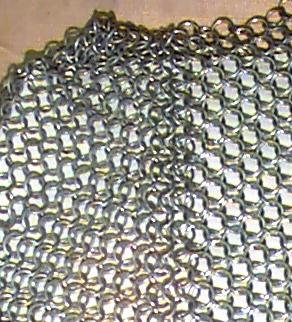
Once you've got the basics of chainmail making down, you're ready to begin a project. For archival value, I've decided to include a link-by-link pattern of a number of pieces that I've actually made, including a chainmail shirt, shown here.
Giving the measurements of a piece of maille is never easy. The same piece of maille will be different lengths on the bodies of different people. The piece shown here will fit anybody whose smallest circumference is 54 inches or smaller. On me (waist 36 inches) , for example, it comes down to about 6 inches above my knees, but on my wife (bust 52 inches), it comes down just to her hips. So far, it has fit everyone who has tried it on, but if you are an exceptionally large (or small) person, I would recommend taking in or letting out these measurements accordingly. All of the measurement shown in this pattern assume that you are using 16 gauge 5/16 inch links in a 4-in-1 style.
The entire hauberk can be broken down into three types of pieces, rectangles, triangles, and combinations of the two. In this pattern I've separated the hauberk into twelve pieces; six rectangles, four triangles, and two combination.
Note: All measurements in the direction of the maille are given in basic units and do not include the link needed to connect the basic units together. For example, the front panel is 38 basic units in the direction of the maille. This corresponds to two single rows 76 links long joined by a row 75 links long.
All measurements perpendicular to the direction of the maille are in rows of basic units and do not include the links required to connect each row together. To refer to the previous example, the front panel is 20 rows long. Since each basic unit is three (offset) links tall, the front panel is (20 x 3 + 19)=79 links tall.
The triangular pieces are simply square pieces that are divided in half at a 45 degree angle. Each row of single links is one link longer than the previous row in a single direction to make a 45 degree cutoff.
Notice that in triangular pieces, basic units are missing a single link on the 45 degree cutoff.
Once the pieces are made they will be ready to be attached together. For rectangular pieces, this step is trivial, but in the four places that have two 45 degree seams joining at different link orientations (e.g. pieces E and F connecting to C) a special method is needed to make the connection look seamless. Once you've made that first connection, however, the joint is simple to visualize and construct.

For ease in manipulation, it is simpler to connect the Yoke pieces (C,D) to the triangular pieces (E,F,G,H). Then use normal joints to connect the two resulting pieces together using the small rectangles (I,J). Try the resulting piece on to make sure it fits easily on your head, and make any necessary adjustments before the larger pieces are attached. Then, center each yoke piece on the front ant back sections. There should be 5 basic units on each side of the front and back pieces that extend beyond the yoke. Once these are connected, the front and back can be joined up the sides. The sleeves will follow the natural flow and direction of the maille, even along the armpits.
The pieces should be joined in the following order. H1 to H1, H2 to H2, H3 to H3 and H4 to H4 all with 45 degree joint. Next L1 to L1, L2 to L2, L3 to L3, and L4 to L4 with normal joints to make the full yoke. Then B to B and F to F with normal joints to make a maille tobard. Then S1 to S1, and S2 to S2 with normal joints to close up the sides. Then V1 and V2 to B through F along the side of the yoke to make short sleeves. The lengths of pieces K and L can be extended to make longer sleeves.
Once the main body of the hauberk is complete, and number of embellishments can be added to enhance the appearance of the shirt. Putting an couple of rows of brass link around the edges gives the hauberk a regal look. Depending on how far the shirt comes down on your body, you may want to add "footman's slits" up the sides to give maneuverability. Simply remove a few rings along each side until you have complete freedom of movement. Depending upon your use of the pattern and the materials you used, the shirt could weigh anywhere from 15 lbs to 25 lbs. If you plan on wearing the shirt for any extended period of time, it might be a good idea to get ahold of some sort of shoulder padding; otherwise you will find that you have sore arms after a few hours of wear.