- Knife = K
Eraser = E
Zoom = Z
Panning Tool = H (for Hand)
Freehand Tool = F
Bezier Tool = W (for the odd angles you can draw with it)
Natural Pen Tool = N
Rectangle Tool = R
Ellipse Tool = C (for Circle)
Polygon Tool = P
Text Tool = A (for the appearance of its icon)
Interactive Fill Tool = G (for Gradient. This is consistent with Photoshop's Gradient tool
Interactive Transparency Tool = T
Interactive Blend Tool = B
Interactive Distortion Tool = D
Interactive Envelope tool = V
Interactive Extrude tool = X
You must click OK at the bottom of the Options window to make your new
settings take effect.
Exercise 2 - The Interactive Fill Tool
Now you are back in your clean, new graphic sheet.- Type R to choose the Rectangle Tool, (taking advantage of the shortcuts you just set) and create a rectangle. Type G to choose the Interactive Fill Tool, and notice which toolbox button is pushed in. (It's the bucket that looks like it is spilling mist, fifth from the bottom.)
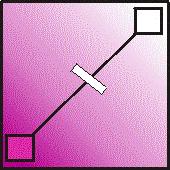
- Click and drag across your rectangle.
- Notice the Property Bar. It tells you, you are using a Fountain Fill. You can choose from four kinds of fountain fills - linear, radial, conical, and square. You can set the first and last colors by clicking the next two icons. Set the angle and midpoint (where the color changes) with the next icons. OR...
- Or set them by dragging the gradient indicator. You can drag colors to the gradient indicator from your color palette. Just drag red over to the diagonal line and drop it there. Drag blue to a different spot on the diagonal line and drop it. Replace any color. The ability to change the gradient by dragging is what makes it interactive.
- You can also set fills by clicking the Fill Tool (the other bucket) at the bottom of the ToolBox.
Experiment with different kinds of fills, both from the Property Bar and from the Fill Tool.

Exercise 3 - Interactive Transparency Tool
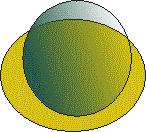
Transparency can be applied to objects in the same way that you applied a fountain, or gradient, fill. Choose the tool that looks like a wineglass. If you set your shortcuts, you only need to type a T to do this. Then drag on the object you want to make transparent. You can adjust settings from the Property Bar, or do it by dragging.
Exercise 4 - the Blend Tool
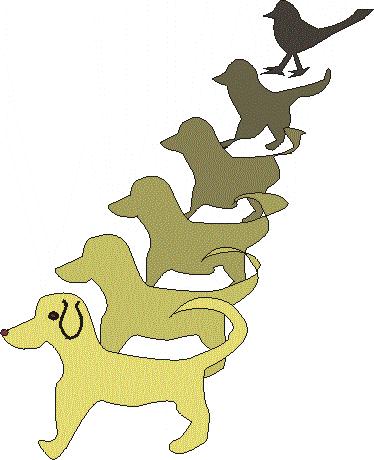
To use the Blend Tool, you must have at least two objects. Choose the tool and drag from one object to another. You can change grey rocks to golden cheese and blackbirds to yellow dogs. Explore the Property Bar!
Exercise 5 - the Distort Tools
Create another object (or choose one of those you have already made) and apply the distortions to it. There are three kinds. The tool is the third from the bottom, and you must click and hold on it to make it expand so you can choose the Distort icon. Or just press D. Remember to explore the Property Bar!Fitting Text to a Path
You must first create artistic text, by selecting the text tool (A) and just clicking, then typing. Next, use the freehand tool to create a path. Select the text and click, on the menu bar, Text - Fit text to path. You'll have a big black arrow; use it to click the path. To make the path invisible, select it and right-click the X-ed out box at the top of your color palette. (You should know where it is by now!)Once you have it on there, remember to examine the Property Bar. Do the exercises in your textbook until you completely understand how this feature works.Homework
Using a new sheet of paper for each of the interactive tools, create a document showing results of your experiments with each of them. You should have from 7 to 10 pages. Print them and bring them to class.The Title -- Use Artistic Text and fit it to a curve.
Experiments -- use the tool to create various effects on shapes.
Just play.
A Paragraph - Explain the results of your experiments in paragraph.
Include questions and steps, if you like.
 sorry - haven't been able to get the image of your homework page up. How about this: I'll use one that you guys turn in, in class this week!