On-Line Study Group
PhotoShop 5.x, 6
Study Guide Number 6
Review of Tools and Skills
Text: PhotoShop Bible
Chapters 1-4
Using the Tools
Review of Shortcut Keys:
B = Brush
C = Crop
D = Default Colors
E = Eraser
F = Full Screen
G = Gradient
H = Hand
W = Wand
Z = Zoom
Exercises:
-
Go to: http://www.nationalgallery.org/ or any other place where you are
likely to find images. Find a nice screen with an image on it.
-
Press your Print Screen key. This places the screen shot on your clipboard.
-
Switch to Photoshop.
-
Open a new canvas: Ctrl-N, File > New, or Ctrl-double-click the photoshop
desktop.
-
Leave the settings for the new canvas as they are. They represent the size
and properties of the data you just copied with Print Screen.
-
When the new canvas appears, Paste. (Ctrl-V, or Edit > Paste)
-
You now see the screen capture in the canvas. Don't get confused. Those
buttons don't work.
-
Choose the Crop tool (C)
-
Drag the marquee around part of the image.
-
Oops - you didn't get the right part. Press Escape.
-
Try again - drag the marquee around part of the image.
-
Oops - you got the wrong part again. Put the mouse pointer over a handle
(small box on the edge of the marquee) and size the marquee to fit the
picture, including the white frame.
-
When you have it right, press enter or double-click inside the marquee.
(Not on the center-mark. That's for rotating.)
-
Press Ctrl-0 (zero) to make the picture as large as it can appear without
being hidden behind any palettes.
(Yes, I know. If you are using an Internet browser that lets you right-click
> Copy an image, you can do that, but for this exercise I wanted you to
get the screen shot and crop.)
You now have a lovely image lifted from the Internet. Remember that
it's copyrighted, even if you don't see anything written on it that says
so. You are only borrowing it for practice purposes.
Troubleshooting: When working in Photoshop, sometimes you find
the tools don't work. You can't paint, even though you have the paintbrush
selected. Here are the things to try:
1. Click on the Image (you weren't where you thought you were.)
2. Press Enter (you were stuck in a dialog box.)
3. Press Ctrl-D (you had a selection active.)
4. Check the Options Palette (you have a strange blending mode or opacity.)
5. Check the Layers Palette (you are on the wrong layer.)
These steps will usually take care of the problem.
Now we're ready to work with our captured image.
-
Press B for Brush. Press F6 to choose a color. Select a lovely brick red.
Press F5 and choose a moderately small brush. Paint a section.
-
Press Z for Zoom. Click on the center of the picture. Click about five
or six times, until the area is comfortably large. Press E for Eraser
and erase the center.
-
Press 5 to change the opacity of the eraser to 50% Erase another area.
Do this without lifting the mouse button, and you will erase 50% of the
color to your background color. If you erase a second time, you will erase
to 25%, and more of your background color will show.
-
Press Tab to hide all the palettes. Press F to change to Full Screen mode.
Press F until your image again appears in a window with the Photoshop desktop
around it.
You now have a red section and an erased area. Let's go on.
-
You should still be zoomed in to about 600%. Press H for Hand. Push the
image around until you can see the red area you painted earlier.
-
Press W for Wand. Click on the red area. You will see marching ants around
the red paint.
-
Press G for Gradient. A gradient is a gradual blending from one color to
another (and maybe to another and another and another.) (Version 5: Press
Shift-G and watch the title of the Gradient palette cycle through the types
of Gradients. Version 6, locate the types of gradients on the Options bar.)
Choose Linear Gradient.
-
Be sure the mode is Normal, the Opacity is 100% (press zero, if it isn't,
or use the window and slider.) Click the drop-down arrow beside the Gradient
window. Choose Foreground to Background.
-
Press D for default colors. The gradient now blends from black to white.
-
Drag a gradient from top to the bottom of your selection.
-
Press Ctrl-D to deselect.
Self-Check:
-
You have caused the red area to be shaded black to white.
-
Find another area of color. Go through the same steps again (W for Wand,
select the area. G for Gradient. D for Default colors. Drag through the
selection) to select and apply a gradient to the color area.
-
Press B for Brush. Choose a brick red. Paint an area. W for Wand, select
the red. G for Gradient. D for Default colors. Drag through the selection.
We've used these shortcuts/tools so far:
B = Brush
C = Crop
D = Default Colors
E = Eraser
F = Full Screen
G = Gradient
H = Hand
W = Wand
Z = Zoom
Locate and select each of these on the toolbox. Click and hold the ones
with small arrows on them, to see the other tool choices. Look at the options
(Options Palette appears when you press Enter) for each tool.
Further practice with these tools:
Using Modes with the Paintbrush.
-
Press B for Brush. Press 3 for 30%. Note the Options Palette, click the
drop-down arrow on the Mode window (it probably says Normal) and change
the Mode to Darken. Choose red (F6 for color palette) and paint.
-
Change to 70% opacity by pressing 7. You may have to press enter. Then
choose green, set the mode to Lighten and paint over some dark parts.
-
Notice that when you are in Lighten mode, you only see paint on areas that
were darker than your paint. When you are in Darken mode, you will only
apply paint to areas that were lighter than your paint. When you are in
Normal mode, you apply paint over everything, in the color and opacity
that you have set.
Using the Crop Tool
Trim away the edges of the image.
-
Press C for Crop.
-
Select the inner area,
-
Press enter or double-click on the image.
Use the Crop tool to add canvas around the image:
-
Enlarge the window around your image by dragging the frame with the double-headed
arrow, until you can see about an inch of blank grey area on all sides.

-
Set your background color to whatever you desire for the added canvas area.
For example, choose blue, and when we "crop larger" the new canvas will
be filled with blue.
-
With the Crop tool, select a rectangular area in the center of the image.
-
Drag the handles outward until you have added about 3/4 inch on all sides
of your image.

Here, I have added area to the right and bottom, but I'm about to crop
off the top and left.
-
Press Enter or double-click in the image.

The result of cropping larger on the right and bottom, with blue for
the background color.
-
Notice that you can drag the handles farther than the frame would seem
to allow!
-
Press Ctrl-0 (zero) to see your image as large as possible.
-
Press F to cycle through the Full Screen views. Cycle back to the image
in a window view.
Using the Wand
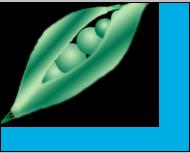
Copy this image into your program.

-
Check the Options, and be sure Contiguous is checked.
-
Press W for Wand.
-
Note the Options palette.
-
Type 10 into the Tolerance window. Press Enter.
-
Click in the dark magenta area.
 Setting a tolerance of 10 means the wand will choose pixels that are not
more than 10 values different from the pixel you click on.
-
Deselect (ctrl-D) and type 50 in the Tolerance window.
-
Click in the same area.

-
Try a setting of 70.
-
Is it possible to select the entire area with one click?
-
Turn off Contiguous, and click again in the magenta area.

Notice the small area top left has also been selected.
With Contiguous turned off, you get all the color areas in the image
that are within the tolerance you have set.
Adding to the Selection
Sometimes you need to add to a selection. The Shift key is used to add
to selections.
-
Deselect (ctrl-D)
-
Set the Tolerance for the Wand to 30.
-
Click in the magenta area.
-
Hold down the Shift key and click in the light blue, bottom right.
-
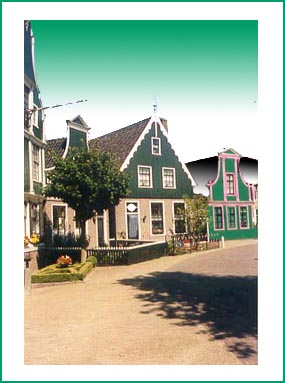
Open a picture with a sky that shades from blue to white and use the above
method to select the entire sky. Then apply a gradient to the sky.
Save a copy of your image:

File > Save a Copy > JPG, Dutch Houses, 6 (medium quality.)
Copyright Christine C. Frey, 2000
