You'll see an opaque gradation, from your foreground color to your background color.
1. How many images (documents) can you open at one time?
a. Only one image can be worked on at a time in PhotoShop.2. How can you display the status bar, and where does it appear?
b. PhotoShop will let you open two documents.
c. PhotoShop will let you open as many documents as you like.
d. The number of open images you can have depends on your computers memory.
3. What can you do with the floating palettes? Why are they called "floating"?
4. What does the status bar tell you? What can you do with it?
5. How do you display the size of your image? What do the two numbers mean?
6. How do you see an outline of the way your image will print on a page?
If you display Efficiency, what number would you want to see?
In Lesson 1 we looked at shortcut keys A, B, C, D, E, F. Now well add
some more.
G = Gradient. In version 6, the Bucket has been grouped with this icon.
H = Hand. Use the Spacebar to toggle to the Hand (pan) tool.
I = Eyedropper. Use the Alt key to toggle to the I-dropper.
J = Airbrush. Like the brush, but use a low setting and the "spray" will build up and darken.
K = Knife, for slicing images to bits. Used to create web pages with
image maps. (We won't cover this tool in this course.)
2. Click and hold on the Gradient Icon on the toolbox. Examine the flyout.
3. What are the available gradient types? Choose the Linear Gradient tool.
4. Examine the Options for the Gradient tool. The features are the same, but the display differs between versions 5 and 6.
5. Set the options to Normal mode, 100% opacity.
6. Choose the Linear gradient. Drag from the upper left corner of your
canvas to the lower right corner.
You'll see an opaque gradation, from your foreground color to your
background color.
7. Still using the Linear gradient, drag from right to left, but this time start well within the canvas frame instead of dragging from edge to edge.
The new gradient completely covers the old gradient because it is 100%
opaque. The gradient starts and ends according to where you click and drag.
Practice with this until you understand how the tool works.
7. Choose the Radial gradient. Change your foreground/background colors. Click and drag in various areas of the canvas.
8. Use the other gradient types, changing colors as you please.
9. Set the gradient opacity to 50% and apply over existing gradients.
10. Change the blending mode to Screen and create a new gradient. Change the mode to Multiply and create another.
Continue to explore the different Gradients, changing colors, opacity
and mode. We will edit the gradients at another time.
The Hand is used when your image is larger than the canvas window. You use the hand to shove the visible area of the image around in the window.
1. Open a large image. Size the frame much smaller, so that you can see only a small area of your image.
2. Click the Hand tool, or press H. Shove the image around.
3. Choose the Brush tool. Toggle to the Hand by holding down the Spacebar. Release the Spacebar to toggle back to your original tool.
4. Press the Home and End keys. Where do you go in the image?
5. Press Page Up and Page Down. Where do you go in the image?
6. Use the scroll bars. Which method do you prefer?
7. Use the zoom window on the status bar to change the zoom factor.
Click in the zoom window on the Status Bar. Type 225 into the window. Type 452. Type 47. (You must press Enter for the command to take effect.)8. Press Ctrl-plus. Repeat several times and notice the zoom.
The spacebar always toggles to the Hand tool, regardless of the tool
you are currently using.
2. Be sure you can see the color palette (press F6 or click Window > Display Colors)
3. Click on different parts of the canvas to pick up different colors.
4. Switch to the Airbrush (J). Click on the Brushes palette tab, or press F5 or Window > Show Brushes. Choose an appropriately sized brush. Paint on the canvas.
5. Hold down the Alt key to toggle to the Eyedropper. Click on red.
6. Hold down the Spacebar to toggle to the Hand. Move the palette.
7. Let go to toggle back to the Airbrush. Continue painting.
The Alt key always toggles to the Eyedropper tool, regardless of the
tool you were currently using.
1. Press J to toggle to the Airbrush, or click the Airbrush
tool on the toolbox.
2. Set the pressure to 30.
You can set pressure/opacity, etc. by typing a single number on your keyboard. 3 will set opacity to 30%. Type 1 for 10%, etc. To set 100%, type zero.3. Choose a large brush.
4. Press Ctrl-0 to display the canvas as large as possible without hiding it behind palettes.
5. Paint evenly across the canvas, back and forth, to evenly cover the area with color.
6. Notice that holding steady on one spot will build up color, while moving more quickly leaves a thinner color.
7. Choose a different color and change the mode and opacity. Practice
again, spraying an even coat across the canvas.
1. Press G (for Gradient) and drag the Spectrum gradient across
the canvas again. (Mode and opacity, your choice.)
2. Switch to the Bucket tool. Examine the options palette to be sure you have the right tool selected.
3. Set the tolerance to 10 (If you type in the little box, you must
press Enter. If you just type a number 1, without first clicking in the
little window, you don't have to press enter.) Click in the middle of an
area of color. Notice the amount of the fill.
The Bucket tool fills contiguous areas of color. If you click on a red bit of your gradient, the Bucket will fill all the red areas that are within the tolerance you have set.Click Edit > Undo (Ctrl-Z). Set the tolerance to 80 (type in the window and press Enter, or just type an 8) and click again in the same place. Notice the area filled.Tolerance means how much difference the tool will allow. If your red fades to purple, a low tolerance will not fill the violet areas. A higher tolerance will fill more. If you set the tolerance to 250, the entire canvas would be filled, because there are 250 degrees of difference among the colors.

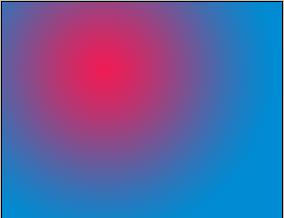
A Radial Gradient, red to blue.

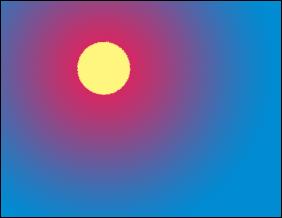
Using the Bucket at 32 tolerance to fill with yellow, clicking in the center.

Using the Bucket at 32 tolerance, clicking on the rim.

Clicking the rim with the Bucket tool at 50 tolerance.
Practice the various ways of moving around in the canvas, changing
the zoom, and setting options on all tools learned so far.
I recommend keeping this area set to display Efficiency. Click the > to the right of the area and choose "efficiency" from the options.
copyright Christine C. Frey