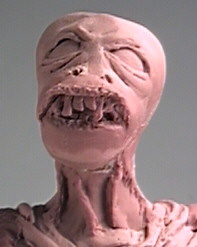
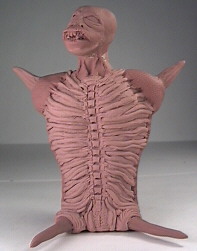
Alien Bust
This is a step by step demo of the construction of a bust. The great thing about sculpting busts is that they take up a small amount of shelf space, they stand up nicely, and you don't have to worry about those annoying hands, legs, feet, etc..
Each image shows the additions I made to the figure after baking it. This model wasn't really planned out. I just improvised and made it up as I went along
I started by playing with a small ball of Sculpey till I had, (what looked to me anyway,) the start of an alien-type creature. The first picture shows the head attached to an armature made from coat-hanger wire. The second picture shows the armature wrapped in aluminum foil to give the Sculpy a surface to adhere to. Pictures #3 and #4 show the fleshed out figure with just a thin layer of Sculpey on which I will build up the body details. In picture #5, I have sculpted a base so that the figure can stand on it's own.

After letting the figure sit around for a few weeks, I decide on a kind of bio-mechanical sort of design. When in doubt, pull out the H.R.Giger books. I also decided to switch to color photos, so the details stand out a little better.


The line of small crests up the figure's back was rendered by laying a snake of Sculpy up the spine and pressing a brass tube into the clay at regular intervals. The line of squares up the center of the figure's front was done by pressing the plastic treads from a Tamayia Bren Gun carrier kit into the soft Sculpy. Try using various items found around the house as shaping tools while working on a model, just to see what happens...

Sculpy is added to the figure's back and tube structures are added...
 Return to Headquarters