Intro to Bézier Curves in Paint Shop ProBézier curves, as implemented in PSP, are curved lines that are defined by four points: two endpoints and two control points. To draw a Bézier curve, activate the Line tool and choose Bézier as the Line Type in the Control Palette (set the Width to whatever pixel width you want for the line, and check Antialias if you want your line to be antialiased). You might also find it helpful to turn on PSP's grid with View | Grid. You first need to draw a straight line that will be warped into a curve. Click in your image canvas at the point where you want your curve to begin, thus defining the first endpoint, and drag to where you want the curve to end. When you release the mouse button, the second endpoint will be defined. You'll then see a thin line. This line will not show up at the width you selected, but your curve will have the proper width later on when you're finished drawing the Bézier curve. 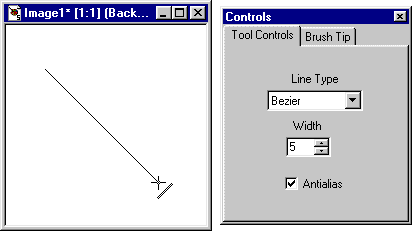 Defining the endpoints of the line Next, you'll set the control points. To set the first control point, click at a point in the direction toward which you'd like the curve to be warped; you can alter this point by dragging the mouse, but as soon as you release the mouse button the point will be fixed. To set your second control point, click again at another point in your image canvas and drag to adjust the warping if you like. 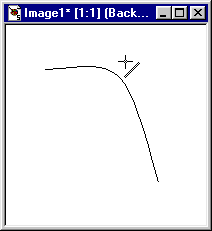 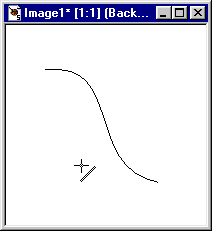 Defining the control points When you release the mouse button, the second control point will be fixed and your line is drawn in the foreground color and at the width you've selected. 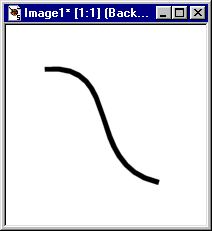 The resulting Bézier curve Below are some example Bézier curves. In these examples, the endpoints and control points are marked with blue dots, with the endpoints labeled A and B and the control points labeled C and C'. The first example we'll look at is a line with a simple rounded bend; notice that to make this curve you put both of your control points in the same spot. 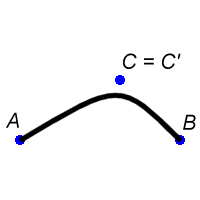
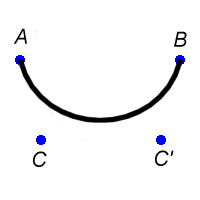
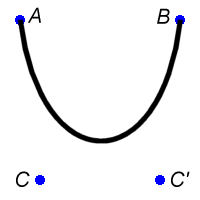
Next we'll look at some symmetric rounded curves. The example on the left is a shallow bowl-like curve, and the example on the right is a deeper parabolic curve.
If you want a line that resembles an S-curve, click away from the line on one side for your first control point, and then on the opposite side for the second control point. 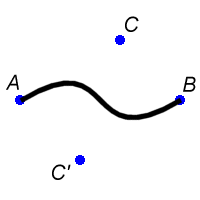
This example is a somewhat skewed S-curve. If you want your S-curve to resemble a sine wave instead, then position your control points so that they define a perpendicular line that runs through the midpoint of the original line segment, with the control points equidistant from the original line segment. The next example is a spiked curve that looks to me like a cartoon nose. 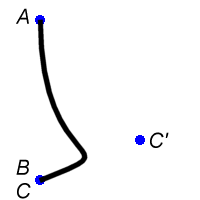
Here, the first control point is made at one of the endpoints, and the second control point is made away from the original line. The last few examples I'll give here are looped curves. 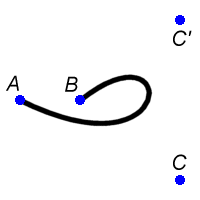
In this open loop example the control points are made at points beyond one of the endpoints of the original line segment. The two control points define a line perpendicular to the original line. The example below is a closed loop. (Looks sort of like an upside down raindrop, doesn't it?) The endpoints of this loop are both in the same spot. Notice that this point and the two control points define an isoceles triangle. 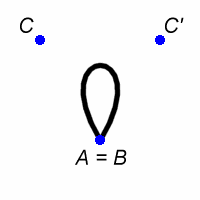
The last example looks something like a lowercase script "L". 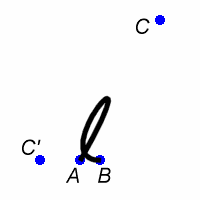
Here the endpoints define a short horizontal line. One of the control points is high above and slightly to the right of this line segment. The second control point is just to the left of the line segment. Have fun experimenting. You can produce rather complex curves, for example, by making one Bézier curve and then beginning another at one of the endpoints of the first line segment, and so on. You can also copy and paste your Bézier curves, flipping and mirroring them, to produce complex shapes. Note: If you're among the mathematically inclined, you might want to take a look at What's a Bézier Curve? And for more information see Nonlinear Design: Bezier Curves at webreference.com. Back Copyright ©2000 Lamander |
