Carved Wooden or Stone Button
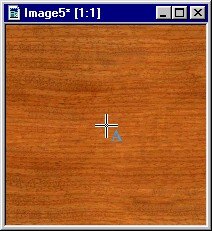
- Open an image that contains the wood, stone, or other texture that you want to use.
Duplicate this image and crop the duplicate to 200 pixels by 200 pixels.
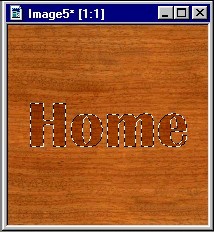
- Select the Text tool and position the cursor in the exact center of the image,
at position 100, 100. Click the primary mouse button, being sure not to move
the mouse from the center position.

- In the Text dialog box, select Antialias and deselect Float. Select the font
and size -- I used Britannic Bold, 48 pt -- and enter the text for the button.
After hitting Enter you'll have a selection in the shape of your text.

- With the text area still selected, choose Colors | Adjust | Brightness/Contrast.
Decrease the % Brightness (-15% was used here), with the % Contrast set at 0.

- With the text area still selected, choose Image | Effects | Cutout. (If Cutout is
grayed out, check the color depth of your image and increase it to 16 million colors
if it the color depth is less than that.)
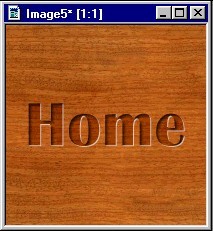
When you apply Cutout here, make sure that Fill with Interior Color is deselected, and select White as the Shadow color. Set Opacity to 75%, set Blur to 0, and set both Horizontal and Vertical to -1.
- With the text area still selected, choose Image | Effects | Cutout once more.
Use 75% for the Opacity again, but set Blur to 5, use Black as the Shadow color,
and set Horizontal and Vertical to 2. You can then deselect the text area by clicking
the secondary mouse button anywhere in your image.

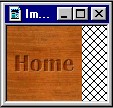
- Crop the button if you want a rectangular rather than a square button,
then choose Image | Resize, with Resize Type set to Smart Size, to resize your button.
In this sample, I resized to 75x75.

- Now make sure that the current foreground color is a dark shade that matches
the color scheme of your button. Choose Image | Effects | Buttonize,
setting Edge Size to 10% and selecting Transparent Edge. Your button is then complete.

Here's another example of a button made using this method:

Note: You'll need to experiment to find the values for Brightness and Opacity that will work best with the particular textures that you use for your own buttons.
(This tutorial is the result of a challenge I accepted from Jerry Haberer to try to infer how he made an image similar to the ones shown here. After I came up with this solution, Jer revealed his own -- very similar -- technique, which you'll find at Creating 3D Text, part III.)
Back
Copyright ©2000 Lamander
All rights reserved