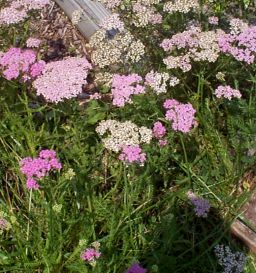
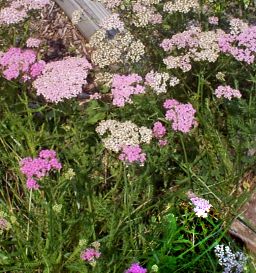
Retouch Tool: Dodge and BurnThe Dodge and Burn modes of the Retouch tool correspond to the dodge and burn techniques used in printing photographs. Dodge lightens overly dark areas, and Burn darkens overly bright or washed-out areas. When you use either one of these tools, it's usually a good idea to isolate the area you want to modify in your image so that other areas are not affected. It's also usually a good idea to set the Opacity of the Retouch tool rather low (maybe 15-30% or even less) and to start out with a large brush and then use a smaller brush as you work down to more and more detail. Take a look at the example below. On the left is the original photo, with the photographer's shadow blocking the area on the lower right of the image. I selected the shadow area with the Magic Wand and Lasso tool. Then I chose the Retouch tool with Dodge as the mode, with the Brush Size first set to 70, Opacity set to 19, and Hardness set to 0. I then repeatedly clicked in the selected area, centering the brush along the edge of the selection at first and then moving into the center. To finish up, I changed the Brush Size to 13, with the Opacity set to 25, and clicked a few more times in a few areas where I wanted a bit more detail. The result is the image on the right.
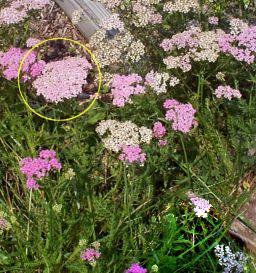
If I'd taken my time more, the results would have been a bit better, but this gives you an idea about how Dodge works. You'd use the same sort of technique with Burn. Suppose we wanted to burn in the head of yarrow that I've circled in yellow:
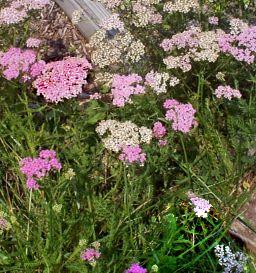
You usually need to set the Opacity very low for Burn. I'll use 4 for the Opacity setting here. I'll also set Hardness to 55 and Density to 76, with the brush shape set to Round and the size set to 19. Here's the result:
Tip: After you've selected the area you want to dodge or burn, hide the selection marquee with Selections | Hide Marquee, so you can see how the area near the marquee is being affected. Just remember to show the marquee again when you're done! Back Copyright ©2000 Lamander |


