Masks: Image as Mask
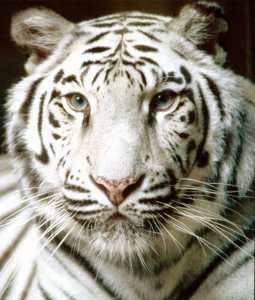
In this, the first introductory tutorial for PSP5 masks, I'll use an image of
a white tiger as a mask:

For your own mask, any high-contrast image with a simple background will do nicely.
- Start by opening the image that you want to use as the basis of your mask.
- Set the background color to whatever you'd like for the background color
of your new image. Then open a new 200x150 pixel image, setting Background Color to
Background color.
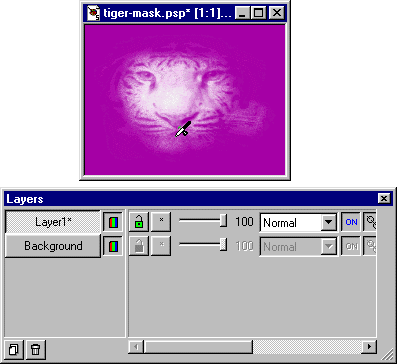
- Create a new layer in the new image by clicking the New Layer
button in the Layers Palette. (If the Layers Palette isn't showing, hit the L key.)

The new layer, named Layer1 by default, will be entirely transparent.
- With Layer1 the active layer, choose Masks | New | From Image.
For 'Source window', choose the image that you want for the basis of your mask
(WHITE-TIGER.JPG here). Be sure that 'Source luminance' is selected under 'Create
mask from'.

When you click OK, your mask is applied to Layer1. You won't see any change in your
image, but you'll notice an asterisk at the end of the label on the Layer1 layer button,
which indicates that this layer has a mask.
If you want to see the mask, choose Masks | View Mask (or just hit Ctrl+Alt+V).
A reddish semi-transparent gel will seem to cover the layer, and the different levels
of luminance in your mask will show up as different shades of this reddish color.
For this tutorial, I suggest you turn mask viewing off during the next step.
- Next set the foreground color to whatever color you'd like to use as your paint.
(I chose white.) Select the Airbrush tool, and set Shape to Round, Opacity to 10,
Density to 30, Size to 40, Hardness to 25, and Step to 1. (You'll want to experiment
to see what works best for your particular image.) Then, with Layer1 the active layer,
spray your foreground color across the masked areas where you want that color.
Try to let the color fade out by spraying only lightly at the edges.
Used this way, a mask is like a stencil or silk screen. Masked areas of the layer
will resist paint and unmasked areas will accept paint.
- You can now merge the mask with the layer by choosing Masks | Delete and then
clicking on Yes when you're asked whether you want to merge the mask with the layer.
(If you click No instead, both the mask and its effects will disappear.)
Then save the file as a GIF or JPEG.

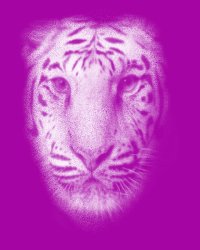
Note that masks stretch to fit any image to which they are applied. Did you notice that in my
example the tiger's head was flattened and stretched horizontally? Here's the result of applying
the same mask to two other images, each with different dimensions from those of my original example:


Back
Copyright ©2000 Lamander
All rights reserved
|
