Vector objects reside on vector layers. Raster layers ("normal" layers) cannot hold vector
objects, and if you try to add a vector object to a raster layer, PSP will immediately create
a new vector layer above the raster layer and will add the vector object to the vector layer.
Notice that in the Layer Palette, vector layers have a different identifying icon than
raster layers:
Deforming an Object
Now let's try moving, resizing, rotating, and deforming the Circle object.
Before beginning, be sure that the Circle object is selected and that you're using one of the
drawing tools or the Vector Selection tool.
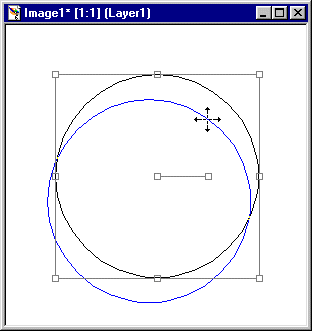
- To reposition the object, position the mouse cursor on the center handle if you're using
one of the drawing tools or anywhere inside the object if you're using the
Vector Selection tool. When the cursor is in the correct position,
the shape of the cursor will change to the double-headed crossed arrows of the Mover tool.
Then drag to move the object. (Until you release the mouse button, you'll see both the
original object in its original position and a blue moving outline of the object.)
- To resize the object, position the mouse cursor on one of the control handles
on the selection border and drag. Dragging with the top or bottom handle
alters the height of the object, while dragging with the side handles alters
the width. To change both the height and width at the same time, drag with
a corner handle. (The shape of the cursor when the mouse is positioned over
a handle will give you a clue about what will happen when you drag with that
particular handle.)
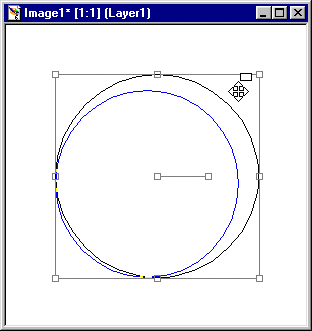
Note: To maintain the aspect ratio while resizing your object,
right-drag on one of the corner handles.
- To rotate the object, position the mouse cursor on the handle at the outer
end of the bar radiating from the center of the object. When the cursor is
in the correct position, the shape of the cursor will change to two arrows
forming a circle.

Since we're using a circle here, you won't be able to see a difference
in the object when you rotate it. Later on, on your own, try rotating a vector square.
There are several ways you can deform an object. You do this the same way
you would with the Deformation tool on a raster layer: Drag on a handle with
either the Shift key, the Ctrl key, or both keys depressed.
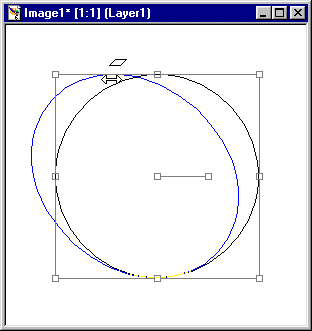
Shift-drag handle
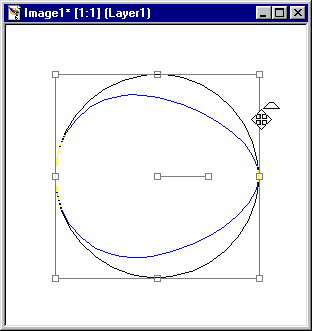
Ctrl-drag handle

Shift+Ctrl-drag handle
When you release the mouse, the object will take on its new shape.
Modifying Properties
There are three ways to access an object's properties:
- Double-click on the object's Layer button on the Layer Palette.
- Right-click on the object's Layer button on the Layer Palette, then
select Properties from the resulting menu.
- Choose the Vector Object Selection Tool, select the object you're interested in
(either by clicking its Layer button or by dragging the tool across the object),
and then right-click anywhere within the object selection borderand select Properties.
The Properties box of our Circle object will look something like this:
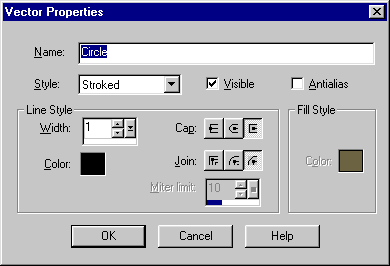
You can modify any of the object's properties.
For example, let's change our black Stroked circle to a blue Filled circle:
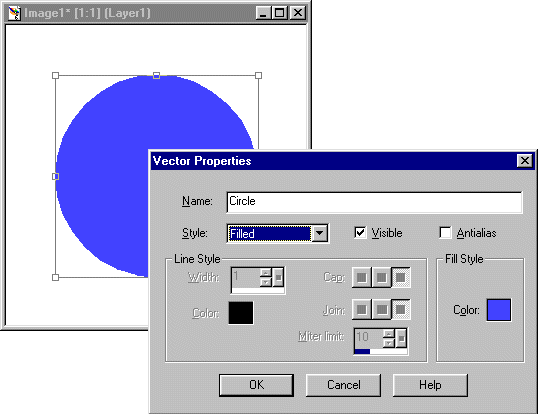
To change the line or fill colors, click on the appropriate color box in the
Vector Properties dialog box and then select the color you want with the Color Picker.
Now let's change to a Stroked & Filled circle, filled with blue and outlined
with black. Let's also increase the width of the outline to 10:

Experiment with changing properties. You'll become an expert in no time!
Note: The Cap and Join properties aren't really relevant for circles.
But do give both of these a try with vector lines.