![]()
![]()
![]()
![]()
![]()
![]()
![]()
![]()
![]()
![]()
![]()
![]()
Hey - do you like jewelry, handbound books, baskets or other neat gifts & plain old fun stuff?
Then take a moment to help feed our fish and check out our items on eBay
Just click on the image below. Thanks!
![]()
Please take a moment
to visit our
sponsors:


What is a paludaruim anyway?
A paludaruim is an aquarium which is set up with half water and half land. Ideally it is a balanced system which houses plants and animals from all levels of the food chain - a balanced ecosystem packaged nicely in a little glass box.
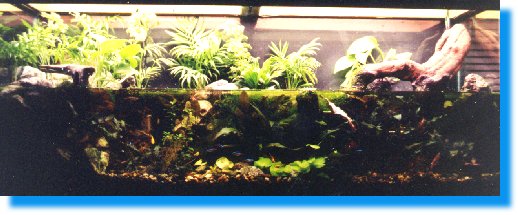
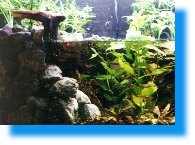
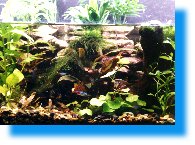
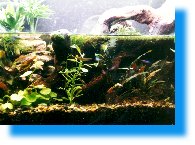
The Photos and images here are of an older paludaruim that we disassembled in the summer of 97. At this time it was just about three years old and was an extremely successful setup. (We disassembled the tank out of a need to move the tank itself to make some repairs to our home, not because we were dissatisfied with the tank - Right now we are setting up a smaller paludaruim in a 29g tank and will post photos of that setup once it is established.)
The paludaruim housed many different critters. The general makeup of the tank was:
- Fish, Amphibians, etc...
- 2 Fire bellied newts
- 4 Freshwater clams
- 4 African pygmy frogs
- 12 Neon tetra
- 4 Kuhli loaches
- 2 Pictus catfish
- 8 Otocinculus
- 5 Cloud mountain minnows
- 6 Guppies plus several dozen fry
- Plants
- Spade Leaf - Gymnocoronis spilanthoides
- Brazilian Pennywort - Hydrocotyle leucocephala
- Crypts - Cryptocoryne Wendtii
- Java Moss - Vesicularia dubyana
- Duckweed - Lemna minor
- Clasping-leafed pondweed - Potamogeton richardsonii
- Parlor palm
- Woody parsley
- Pineapple plant
- Heart leafed philodendron
- a weekly crop of wild mushrooms accidentally introduced with the mosses.

Putting it all together
It's easier than it looks.......
I thought this might be of interest since there have been postings off and on in the aquaria newsgroups concerning paludaruim and home made river tanks. While this isn't a river tank in the sense that there is a continual current in one direction, it is very similar in layout and it does have a very nice, natural look to it that the plastic kits miss by a mile - hopefully it may serve as inspiration to those who are leery about constructing their own ...
Paludaruims are easy to build and maintain. In many ways, they are easier to deal with than most full water set-ups. You don't need a huge tank or a mountain of expensive equipment to produce great results. Unfortunately unlike freshwater aquaria, there is not a lot of information available on paludariums or their inhabitants, and what is available is spread thinly all over the library. However, if you are willing to be patient, experiment and do a bit of research you will be amazed at what you can do with a tank and a few well placed rocks. :)
History.....
Our first paludarium was set up in a ten gallon tank. Like our first aquarium, it was bought on a whim. The mom and pop pet store down the hill had a tank full of newts by the register which we would always stop to flirt with when we went to get supplies. We thought they were just plain cool! After about two months of Monty Python jokes, we broke down and bought a pair of newts, a 10g tank with a screen lid, gravel, a small submersible filter and 2 dozen crickets. Later we added plants, a flock of danios, driftwood and then experimented with building springs, water falls and PVC pipe caves. The newts did not stay in the 10g for long. There were just to many neat things to do and animals to add. Over the next few months we moved them into a 15g and then a 29g tank until finally it became more logical to convert our 55g tank to house the newts than to deal with the algae patch form Hell that had taken over any longer. To say we was frustrated with the 55g tank would be an understatement. Algae! Arrrrgggghhhh!
Our 55g paludaruim went together as follows.....
After taking everything apart and declaring an all out algae scrub-o-thon, we decided on a layout for the tank and then laid the substrate. Instead of starting with new gravel, we mixed the existing substrate from the 55g full water setup with that of the 29g tank the newts were in at the time and covered the whole thing with more gravel. The old substrates were full of detrus, newt poop and blood worms so no fertilizer or special additives were needed. To allow plenty of room for plant roots we keep adding gravel until the substrate was about 4" deep in the front sloping up to 6" in the back. Next we furnished the tank and built the beaches out of layers of 3"to 5" river stones.
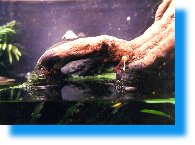
The layout of the tank is rather simple. In the right half of the tank we placed a hollow log which extends from the middle of the tank out of the water into the upper right corner. This provides a nice sheltered area both above and below the water line for the inhabitants. Against the left side of the tank is a rock pile which rises above the water surface to form a large beach. This rock pile makes up most of the land mass and is shored up with a nice piece of moss covered driftwood. Although the river rocks naturally form cracks for plant roots and small animals to hide, we also placed three pieces of black 2" PVC pipe inside the rock wall which open onto the main body of water but are hidden by the rocks and are completely out of view. This gives the newts and fish a nice place to retreat to that is somewhat secluded and protected. All of the fish and amphibians use the caves at one time or another (also to a certain extent it keeps them from burrowing into the rocks and either getting stuck or causing an avalanche). A thin strip of rock beach which hides the sandshark also extends from the main beach along the back wall to the hollow log. Near the center of the tank there is a second, smaller piece of driftwood which rises just to the surface of the water and is covered with java moss. On the right side of the tank a piece of lace rock hides the powerhead from view. The layout of the tank keeps a strong current running from the back right corner to the center of the tank where it is evenly dispersed. The rocks and logs also provide large areas of still water for our little friends.
Setting the land masses up is a lot of fun. We use river rocks that are about 3" in diameter. This size lets you create land masses that are pretty sturdy and also leaves big enough cracks that you get good water circulation throughout them, which is important if you plan to plant live plants on the beach (which is of course half the fun of having a paludaruim). It is also a lot of fun to rearrange the rocks until you find a configuration you like - just be careful, if you find more than one setup you like, it is very tempting to run and and buy another tank rather than compromise.
After furnishing the tank we filled it about half way with a combination of water from the old 55g and 29g set ups and some fresh water. Then we got both the filters going and planted the tank. Finally after about eight hours of this insanity we introduced the newts and all the other in habitants to their new home.
After 16 months the tank is pretty well established. Aside from a few losses due to old age and a slight algae problem everything is going well. We are having broods of guppies almost weekly and the plants are growing inches between water changes. As an added bonus, we recently won an award for best naturally planted aquaria.
I hope this description inspires some of you to give paludariums a try. They are lots of fun and well worth the effort.

Tank specs
- Tank: 55g
- Age: three years
- pH: 7.2
- Temp: 72 degrees
- Depth and volume: 7" to 9" or about 22g
- Amount of water to land: about 70% open water to 30% dry land
- Lighting: Two 48" fluorescents - one cheapy and one plant tube
- Filtering: Believe it or not, no filtration - only a powerhead and small sandshark for current and aeration.
- Substrate: a mix of 3-5mm gravel and local river rocks from pebble size up to 4 or 5 inches in diameter.
- Maintenance: Weekly water changes of 1/3 to 1/2 the water- at which time we vacuum up any solid wastes left on the bottom.

 We love to hear from others in the
hobby. If you have any comments, questions, funny
stories, or just want to say 'hi', just click on the icon
at the left to send us something.
Original content © 1998-99 Amy and Phillip Pittman.
Last updated 25 January, 1999

