|
 Hovercraft. Hovercraft.
Tech-minded roomates build their own hovercraft - an article that the Santa Barbara News Press did on the hovercraft.
 |
 |
| Page 1 |
Page 2 |
Here are pictures of the hovercraft that I built along with Daryl and Rupert. We got the plans from www.hovercraft.com and ended up with this, a 1-2 person hovercraft that travels up to 45mph at eight inches above land or water. Everything was built from scratch from shaping the propellers from blocks of wood to adding fiberglass to the plywood body. I would be more than happy to help anyone out that is interested in building their own hovercraft. So nine months after ordering the blue prints and hundreds of hours of work we completed the hovercraft. We did not even know if it would work when we turned on the lift engine. At first building the craft was a blind process because the blue prints hardly provided a picture of the finished product although in the end everything worked correctly.
It definetly attracts a lot of attention while pulling it on a trailer or using it on a lake or parking it on the street. The DMV had a hard time trying to register the vehicle. In the end it has been registered as a miscellaneous vehicle. At one point it was about to be registed as a car, then a boat, then an amphibious vehicle.
The operation of a hovercraft works like this. Hovercrafts push themselves while resting a cushion of air. There is a propeller for thrust and one for lift. The thrust propeller is mounted on the back of the hovercraft and is used to push the hovercraft. The lift propeller is located on the front of the hovercraft. It feeds air to the bottom of the craft. Most of the air forms a pocket underneat the hovercraft. The rest of the air is fed into a skirt or bag that lines the outer bottom edges. When the lift engine is started the skirt appears to lift the craft. Actually the skirt is filling up with air, almost like a balloon that stretches around the sides. It is at this point that a pocket of air is being trapped underneath the craft. And as the pocket of air seeps out underheath the skirt, lift or a cusion of air is created between the skirt and the ground. The purpose of the skirt is to form a pocket underneath the craft and control the air that seeps out from the bottom. The hovercraft can operate on ice, water, or land. However there are many problems with floating such as breaks, slugish stearing, and inclines.
 |
The very first day. We started with a set of blue prints and a general guide to building hovercrafts. Here we are preparing to buy all the wood from a local lumber yard. |
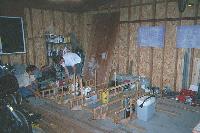 |
Daryl and I are lining up the ribs of the hovercraft. Later stringers will be attached to act as spinal cords for the craft. |
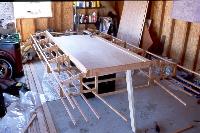 |
The frame is starting to take shape. Here we are laying out plywood to get an idea as to the shape of the bottom of the craft. |
 |
Putting plywood on the bottom of the craft with epoxy. Two part epoxy is a good way to permanently ruin your clothes. |
 |
The bottom has been skinned, epoxied and fiberglassed. The bottom is (hopefully) waterproof by now. |
 |
Daryl is sanding the inside of the craft. The bottom skin has been attached. |
The frame has finally been completed and we are ready to move onto adding skin to the craft. The ribs are being held in place by stringers that travel the length of the craft. Each joint on the ribs consisted of three thin pieces of wood that acted like layers. On the top layer there are pieces of fiberglass. The bottom inside and outside has also been sealed with three coats of epoxy to ensure that the hull is water tight.
 |
Ribs 2, 3, and 4 can be seen here. This is the front of the craft. |
 |
The cockpit is beginning to take shape. |
 |
This will eventually be where people sit while riding in the hovercraft. |
 |
This is the rear of the hovercraft. |
 |
Here the hood has been attached. A hole will be cut here and the thrust duct will be mounted. This is where the lift engine will be mounted. |
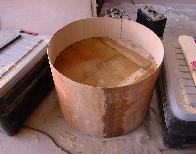 |
This will be the lift duct. It needs to be perfectly round as there will be less than an eigth of an inch of clearance between the inside of this lift duct and the lift propeller tips. |
 |
Here you can see the lift duct drying and the side of the craft. The blueprints can be seen on the back wall. |
We built the propellers from wood. The first step is to take a 1x6 board and epoxy them together. Next the edges are roughly marked on the boards and a rough cut is made. Then a sander is used to profile the blades till they resemble the shape of a wing. The board is then coated with epoxy and three layers of fiberglass to add strength to the edges. The most important part of a propeller is the inch on both outside edges. The edges will get an eigth of an inch of clearence when being used. These blades could hit an object 100-200 times per second! After spending so much time on these propeller we decided to mount the thrust prop to a table in the garage and spent many hours, sometimes at 2am blowing junk across the driveway. The thrust prop creates a 50 foot gust of wind.
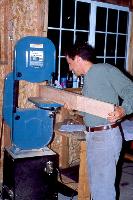 |
Here Daryl is cutting what will be the thrust propeller. Only 40 hours left of shaping this piece of wood till it's complete. |
 |
Finished is the two blad prop for thrust. The four blade prop is the lift propeller before being cut, shaped, sanded, fiberglassed, and epoxied. |
 |
Here is the lift prop after being cut with a hand saw and sanded. Next it will be sanded till the blades look like wings and the entire prop is equally balanced. |
 |
Who needs to dust out the garage if you have one of these. Although other things that accidentally get sucked up are generally destroyed. |
 |
The four blade propeller is the lift propeller. Notice the circular disks that are used to hold the air underneath the craft. |
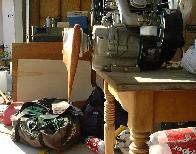 |
Here is a profile of the thrust propeller. The shape is very important for performance. |
 |
 |
The rudders were shaped from foam with a heated electrical wire. Next they were coated with fiberglassed and painted.
|
 |
 |
The lift duct has just been installed. Water jugs have been put in place if the craft takes on water. |
 |
 |
The hover craft on its way to get painted. |
 |
 |
The original hovercraft trailer before being welded down to a flatbed and completely redone with wood, eletrical, and tires. The hovercraft on the new trailer after being painted. |
 |
So we got the lift engine installed and are now wondering what to do next. This was the first time staring it up and it worked, what a surprise. |
 |
Here we are happy that it works after six months of work. We spent some time pushing eachother back and forth across the driveway that afternoon.
|
 |
 |
 |
 |
 |
 |
 |
 |
Daryl out at the lake, what an awsome trailer. Driving the hovercraft can get a little messy but it's well worth it for the ride.
|
 |
The lift engine mounts here on the rear of the craft. The rudders are placed behind the thrust engine.
|
 |
It now has several coats of (very) yellow auto paint. The thrust engine mounts on the flat piece in front of the rudders. |
 |
Here we are being filmed for a news broadcast on Telemundo. It aired in spanish so it sounds like bla bla bla hovercraft bla bla hovercraft. |
There will be more to come...
This project may never come to an end. Now that it is complete we need to look at other things like performance, upgrading engines, refining the props. Some additional ideas have been throw around such as, adding R/C servos to the hovercraft. That would make it possible to control the hovercraft via an remote control radio. However I think some kind of saftey mechanisms are really needed here. But beyond that it would even be possible to add a laptop with wireless etherenet or a cellular modem to act as a server on the hovercraft. Java servlets could be set up on the laptop or even a digital camera. This would allow anyone on the net to see where the craft is going and control the hovercraft and I could use my new steering wheel joystick, ok, that may be way to damn crazy but who knows...
 Hints to those looking to build a hovercraft. Hints to those looking to build a hovercraft.
- Know what you are getting into. The project will take much longer than expected.
- Quality is worth the extra expense. Better tools and higher grade materials will make your life easier.
- Measure twice and cut once. Correcting mistakes is a pain the ass and they will happen. Precision pays off when the next step goes smoothly.
- Buy jump suits and surgical gloves. Two part epoxy makes crazy glue looks like solvent. As time goes on you will get intimately involved with fiberglass and epoxy and the shit never comes off.
- Do not be afraid to deviate from the blueprints, they are not the best method for everyone.
- Never drink while working. Instead test out the propellers at 2 AM and try to blow your friends down - neighbors love this one.
- Communicate with everyone else that is in on the project. Custom modifications are a good way to screw yourself over if they are not known by everyone.
- Look for help on the net when needed. Pictures on the net are a good source for help. There were many times when the blueprints did not provide enough details.
- Take the time to set up your work space before starting the project. Make sure powerstrips and tools are convenient to use.
- Drive with caution at first. There are no breaks however I think hitting a tree is just a right of passage here.
- Know your chemicals and materials. We mistakenly put resin over epoxy to save money. The resin did not hold so we had to remove it with a blow driver and chisel over two weeks.
 Directions on driving the hovercraft. Directions on driving the hovercraft.
- Throttle for the thrust is on the stick.
- Throttle for the lift is the silver lever in the dash. Turn it up for more lift.
- The engine cut off switch for thrust is the red button on the left.
- The engine cut off switch for lift is the red button on the right.
- An engine cut off switch takes 5-10 seconds to stop an engine. Hold down the button. Because the cutoff switch does not work immediately it is _very_ important to use this well in advance.
- Drainage plugs are located in the back, behind the skirt.
- Step on the grey stripes only while walking around the craft.
- Starting for the first time:
- Start each engine by pulling their starting cord.
- Thrust: put choke on full, pull cord gently twice - this will prime the cylinder with gas, then yank the cord, warm up engine for 5 minutes, turn choke off.
- Lift: Set throttle to low by turning the silver handle in the dash down. Push choke button 3 times, yank cord.
- Maneuvering
- The hovercraft operates much like a boat in the sense that there are no brakes and turning is only effective while throttling the thrust engine. The hovercraft moves faster on smooth surfaces. But keep in mind that the faster the craft will accelerate, the longer it takes to stop. Two ways to stop include shutting off the lift engine and skidding to a stop. When using the lift engine cut off, hold down the button and try to keep the hovercraft straight. Skidding at high speeds while moving sideways can cause the craft to tip or the skids may dig into the skirt. Another way to stop is to do a 180 then throttle the thrust to slow down, this is a very slow process. The highest RPM for the lift engine is not alwasy the most effective. Hover enough to provide lift from the surface. Do not provide too much lift as a large gap will be created between the skirt and the surfuce then whatever is on the surface will be blown into the air. Because there is little friction between the ground the craft, drive like you would on ice. If you are moving south and want to move east the turn the craft northeast. The hovercraft will drift down slopes. Hover on a beach and you will find yourself drifting towards the waves. Be safe - those propelles are moving fast so don't get in their way. And above all walk before you run.
 Hovercraft Log Hovercraft Log
| Date |
Location |
Description |
| 03/07/00 |
San Marcos High School |
Very first trial and the thing worked. We were running out of daylight and needed
someplace to test out both engines simulataneously so we set up in the parking lot
of the high school across the street. We did not have a throttle for the thrust yet
so one person steered while the other pulled the bicycle cable that controlled the
thrust engine. We were all shocked to see it hover and accelerate for the first time.
It moved over speed bumps and those cement blocks in front of parking spaces like
they were not even there. We also decided that braking is definetly a very significant
issue so engine cutoff switches will be needed. We kicked up a lot of gravel and dirt.
Dirt gets everywhere, inside the craft your hair, ears, everywhere. The key here is to find
surfaces that do not have as much gravel. |
| 03/28/00 |
Storke Field |
The Santa Barbara Newspress came out to do an article. UCSB was
on spring break so we decided to try out Stork Field by Harder Stadium. The craft
moved slugishly on grass. On grass air may be leaking through the blades of grass. We
all took turns, including Rupert, Daryl, the reporter, cameraman, and myself. The
article can be found here,
Page 1 and
Page 2. |
| 03/30/00 |
Storke Field |
Telemundo Channel 47 contacted us on doing an article for their news
channel. We went out to Storke Field again. The guy on the tractor cutting the
field was nice enough to stand by for a few minutes. The hovercraft moves at
maybe 25mph on this grass. The news segment appeared on TV in spanish, I need to
digitize it or get a translator. The camera man didn't speak english very well but that
was cool because driving the hovercraft is pretty simple when there's nothing to run into.
|
| 04/01/00 |
Lake Cachuma, Storke Field and Goleta Beach |
We arrived at Lake Cachuma on April Fools day of all days and were
not let in the park. That day we were told that the craft "had to be certified by
the Coast Guard to enter the park." So the parks people cried about Lake Cachuma
being safe by not letting people touch the water and bla bla. But the craft does
have a CF number and HIN(kinda like a VIN for
your car) from the DMV. I went through the laws put up by the Coast Guard and confirmed over
many phone calls that our hovercraft does meet all boating regulations. What could be
safer for a lake then something that does not touch the water?
So Lake Cachuma would not let us on the resevoir because the
bass fisherman were jelous that they didn't have such a cool boat. Acutally County
Parks rule 2687c states something like to operate on a lake the craft must be determined
to be of standard design as determined by the director or a deputy for canoes, cayaks,
rafts, and/or inflatables. In a nut shell anybody dressed up in a funny hat can do
whatever they want. We all disagree with this and encourage y'all to flame the
director by writing to:
Attn: Jeff Stone
Cachuma Lake
HC 58
Santa Barbara, Ca 93105
So we took off to Storke Field again. Jeremy, Daryl & I set up up a slalom course - no
problem at low speeds. Then we decided to try it for the first time at the beach. We lauched
at Goleta Beach and everything looked great. But as we got close the salt water, the
engines cut out. Salt water is more conductive than fresh water and we now know that the salt water shorted out the electrical system
in both engines.
|
| 04/02/00 |
Goleta Beach |
We tested the engine by dousing it with water then spraying the engines with salt water. So we went off to the beach with high hopes.
We encountered the same problems with salt water as the day before.
However the problems were less severe as we encapsulated the spark plugs in thicker
rubber boots. It was a bit embarassing to draw a crowd then get it stuck in water
and take 10 minutes yanking cords to restart the engines.
|
| 04/07/00 |
Goleta Beach |
The craft now works fine over salt water. We insulated all electrical
contacts with silicon gel. It was a bit nerve racking to see it hover for the first
time over the ocean but it never cut out. I learned how not to maneuver the craft by
trying to drive through an inlet and running into the cliff. A hole was punctured into
the bottom of the craft. It is now reparied to where that part of the hull is a bit
stronger. We let some random UCSB engeineering student try it out then Daryl took
out a guy with his 9-year old son. He then emailed Daryl to say that his 9-year old
son has been putting lego hovercrafts together ever since that day.
|
| 04/09/00 |
Goleta Beach |
Had a nice day at the beach for a few hours. We gave rides to
a lot of friends in the Henchmyn band. Unfortunately
some student drivers got a little too close to the beach goers and a county parks guy
was there to tell us to take the hovercraft home. That and Daryl scaring several hundred
birds in the air ruined our welcome. It is pretty amazing every time the hovercraft goes
from land to water - almost like watching someone walk on water.
|
| 04/14/00 |
Goleta Beach |
KEYT Channel 3 came out to film us at the beach. We got it
running on a foggy day with low tide. It runs very fast on wet sand. Daryl was driving
pretty fast along the wet sand and thought he could make it between the columns of the
Goleta Pier. Well it was great for the camera up to the point where Daryl decided that
wasn't a good idea and turned around. But the the craft was moving too fast and
did not slow down in time before bumping into the pier. And once again the County
Parks guy was there to advise us to get insurance before returning. The
incident with the pier scratched up the lift prop and the lift engine mount. The lesson
here is to be more careful when on smooth surfaces.
|
|



 Hovercraft.


