


Supplies for Dollmaking
Fabrics to use: Unbleached muslin, flesh-colored polyester knit, white cotton duck, just to name a few.
Stuffing: Polyester Polyfill
Needles: quilting needles, hand-sewing needles, large eye embroidery needle.
Threads: 50/50 blend strong sewing thread for body construction on sewing machine; quilting thread, DMC Embroidery floss.
Paint: acrylic paint
Yarn for Hair: Red Coats Acrylic yarn (works the best)
Trimmings: Eyelet lace, ric-rack trim, pre-gathered trims, just to name a few
Doll Pattern Makers: Simplicity Patterns, Mc Calls, check with a sewing store for other designers.
Notions you might need: pencil, marking pencil, chalk, scissors, tracing paper, yard-stick or ruler or measuring tape, straight pins or ball-head straight pins, thimble, white tissue paper or plain newspaper print paper for making your own patterns, piece of cardboard for wrapping yarn to make hair, painter's masking tape, one Chop stick or small dowel rod (instrument used when stuffing body parts): Patience, Time! :-)
TIPS on Dollmaking
Tracing face onto material: Hold unbleached fabric up to a window pane with doll face pattern underneath, using a pencil (or washable tracing pencil) lightly trace.
Making The Face: Decide whether you are going to paint the face on or embroider.
Embroider the eye Method # 1: Using 2 or 3 strands of DMC floss, backstitch the eye outline in black, and in the iris area use the Blanket Stitch in a blue shade, placing a French Knot in the center in color black or white.
Embroider the eye Method # 2: Using 2 or 3 strands of DMC floss, use Satin Stitch.
Embroider the Nose: Using 2 or 3 strands of DMC floss, use Satin Stitch
Embroider the Mouth: Outline with Back-Stitch or use Satin Stitch.
Embroider the Eyebrows and Eyelasses: Using 2 or 3 strands of DMC floss in color black, use Back-Stitch.
Making the Hair: Decide on style needed.
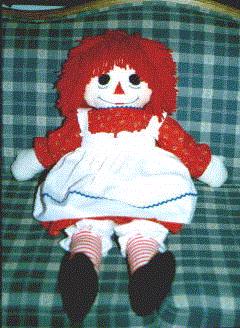
Short like on Raggedy Ann- Get from a fabric shop the cardboard core from the fabric bolt. Using a small piece of painter's masking tape attach the beginning end of yarn, now wrap the yarn around the width of the cardboard the entire length. Keep each strand touching eachother. Secure last strand with small piece of painter's masking tape, cut off from rest of skein. Now figure out approximately where the center of the cardboard is width-wise, place two lengthwise strips of painter's masking tape down this center spacing the two strips about one-half inch apart. Turn the cardboard over and do this again on this side. Next place two strips of painters masking tape at the cardboard edge left side and on the right side- leaving about one-half inch apart.
Next thread your sewing machine the color of your yarn-hair. Now with scissors you will cut Only in-the-space between the painters masking tape you placed on the cardboard left edge, and the cardboard right edge.
Note: The one-half inch space in the center of the cardboard (front & back side) is where you will machine-stitch twice. Set your sewing machine stitch length to Straight-Stitch and stitch-length on 12.
Being careful, remove the entire section of "hair" from both sides of the cardboard. Size should be approximately 8-1/2 by 22 inches. Place one section under the sewing machine pressure foot centering between the two strips of painter's masking tape, now forward & back stitch securing the beginning, and then stitch the entire length, when you get to the end, lift the pressure foot and Turn the piece around and make a 2nd pass of machine-stitching over the one you just completed. Again securing the stitches by a couple of stitches forward & reverse.
Do this on the other 8-1/2 by 22 inch section of "hair" as above.
You may have to repeat the process of making another cardboard core of hair two more times, so as to have enough yarn "hair" for your doll. It takes three (six sections) entire cardboard core winding of yarn for enough "hair" for the 36-inch size Raggedy Ann.
Next carefully remove the painter's masking tape from the center section (near the two rows of machine-stitching down the center) and the masking tape on each edge (two edges- left & right).
Now you are ready to Attach The Hair (sew by hand); using quilting thread or two strands of 50/50 blend thread and a strong needle, place a knot at the end of the thread and begin sewing the "hair" to the dolls head along the placement lines. I use a stretched out back-stitch, following along the machine-stitching on the yarn section I am working with. Several yarn sections will have to be made to cover adequately the dolls head. Only you can be the judge of how thick (number of yarn hair rows attached) you want. Once you have completed sewing the yarn "hair" secure the last stitch by double knotting and even some extra back-stitches in same spot. With scissors cut off remaining extra yarn "hair" section. Next trim the "hair" to your liking.
Making Braided pony tails: To be continued....

