Tricks and Tips


CENTER OF INTEREST or COI:
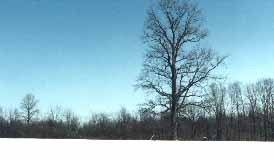
In most cases you would have one main point of interest. The reason for this is because a picture can tell only one story and the picture would look and feel nicer. I'm not saying you can’t have more then one subject but rather one COI. For instance if you were taking a picture of trees, make your center of interest on just one and leaving the others in the background there for you produce a COI (Fig. 1.0). Try not to put your COI in the center of the photo. The reason behind this is because it could make the picture boring and uninteresting. There is a COI rule that you could fallow. The name of this rule is “rule of thirds”, which is as follows. Imagine two vertical lines splitting the scene in equal parts of three, now again imagine two horizontal lines splitting the scene in equal parts of three. These lines intersect in four areas of the picture (Fig. 1.1). The intersections are the best areas suited for your Center of Interest.
Note: This rule is only a guideline and sometimes does not apply for some photos.
| Fig. 1.0 | Fig. 1.1 |
 |
 |
Prgram Mode:
Program mode is good for beginners who are using an SLR (Single-Lens-Reflex) camera because it sets the aperture and shutter speeds for the user.
Aperture settings:
The aperture setting plays a big role in the development of the foreground/background. The larger the f-stop the greater loss of depth-of-field and the smaller the f-stop the more depth-of-field. Let's see, if you were focused at 7 feet to your subject with an f-stop of 11 then you would have a focal point some where near 5 1/2' to 10' meaning anything with in that range would be focused and anything out of that range would be blurred. This goes a step further when using a longer lens. The longer the lens the less depth-of-field to play with.
So for e.g. you wanted to shoot a subject but it had a lot of distracting objects behind it and you didn’t want them in the photo. You would have to set the f-stop to a large number somewhere in the range of f/4 or f/5.6. This would blur the background because your depth-of-field is like .5' or less, making the subject COI.

Snow Time Photos:
Cameras get confused from the bright snowy scenes causing the snow to be gray not white. To prevent this from happening you could set the exposure 1 1/2 stops higher then the meter reading.
The reason why this happens is because of the sun reflecting of the snow and the light meter in the camera thinks it's brighter then it really is. This is also true for large bodies of water there fore this trick can also be used when photographing something over, on, and/or near water.
Back to home
You are visitor#