Welcome to the Creating Hyperspace
Tunnel Texture Maps Webpage
This webpage describes how I create hyperspace tunnel texture maps. A texture map is essentially just a specialized painting. Typically, these paintings are painted or "applied" to 3D polygons which make up objects such as tanks or mountain terrain in computer games. In my application, I'm applying one single very large texture map to a long cylinder, which is 4 inches in diameter and 12 feet long, in order to model a hyperspace tunnel.
I am currently 60 hours into creating and testing a 3D computer graphics program that allows me to create hyperspace tunnel texture maps that I can then feed into the main tunnel rendering program. The texture maps that this program creates are very large, typically 56580x5026 pixels in size at one byte per pixel. That resolution results in a texture map that is 285MB in size. This texture map is then painted or "applied" to the inner surface of the tunnel cylinder. Once the texture map is applied, the image of the tunnel in its current state can then be projected into the virtual camera's viewport and then displayed to the user or saved to a file.
Creating real, non-programmatic, texture maps of this size is a bit difficult and there have been many problems to address. Problems include: determining how large of a texture map must be created, simply working with a 285MB texture map, what and how to painting something on a this texture map, dealing with edge discontinuities and coloring the texture map. But I know that I will ultimately be able to address and overcome all of these problems to create my first real texture map that I can feed into the tunnel rendering program.
Determining the Texture Map Size
The first problem that I had to deal with was determining how large of a texture map should I make? This question was largely answered by knowing how large of a resulting screen image I wanted the hyperspace tunnel to be. I initially wanted my screen image to be 2700x1149 pixels in size. I wanted this image size because this is typically the resolution that I work at when I create high resolution prints of my resulting special effects. The problem with this image size is that the program memory needed to support this resolution would easily surpasses the 4GB program size limit of a 32 bit operating system. So I had to scale down my resulting image size.
I next tried for an output image size of 1500x638 pixels. This required a total of 2.2GB of RAM, and although the program would run on my new Mac, it would do so only very slowly. To add insult onto injury, at this resolution I wasn't even running with motion blurring on. I eventually had to settle for an image output resolution of 800x340 pixels with a 505MB total RAM program requirement. But how did I come up with this image size and how did I determine I wanted a texture map size of 56580x5026 pixels? The answer is that I had to forward and reverse engineer the problem to find the answer.
The 56580x5026 pixel tunnel texture map size was largely determined when I was still working at an output image resolution of 1500x638 pixels. First I figured out what the texture map size would be at the output image resolution of 1500x638 pixels. I then found that the program would take to long to run at this resolution and so I just scaled everything down by approximately 72 percent. The below discussion on the creation of the texture map is therfore based on when my texture map was still targeted for use in a 1500x638 pixel output image size. When I reduced my output image size I just scaled everything down by 72 percent to come up with the final texture map size of 56580x5026 pixels.
The first thing I decided was that I wanted my texture map to be 1GB in size. In order to maximize the number of pixels that I could fit into 1GB worth or RAM, I decided that I would allocate only one byte per pixel. Now, one unsigned byte can only hold an integer number between 0-255. This means that I could have a total of one billion pixels in my texture map alright, but each pixel could only be one of 256 colors, with each color being any of 16.7 million different colors. Now texture maps must be square or rectangular in shape and I already knew that the area of the rectangle must be one billion. So all I really needed to do was determine the length of one of the sides of the rectangle in pixels and the other side of the rectangle would be determined automatically by A=L*W or L=A/W, where A is area, L is length and W is width of the image.
I decided that I would determine the width of the image W and calculate L. Now remember that the long sides of the resulting texture map must be connected together to form a long cylinder. What I had to do was determine the circumference of the circle, in pixels, which forms at the end of the tunnel. The circumference of that circle, in pixels, would be my W in L=A/W. Positioned at one end of the tunnel is the virtual camera which is used to form the resulting image that all us people see of the tunnel. The virtual camera forms a widescreen image of the tunnel in a viewport, which is at the Z=0 plane. The viewport is exactly two inches wide and 0.8510638 inches tall. Now, I already stated my resulting image size was going to be 1500 pixels wide so that means that I to squeeze 1500 pixels into the virtual viewport that is 2 inches wide. See the diagram below.
(Diagram)
I now have determined that two inches equals 1500 pixels. Next I have to place the tunnel cylinder around the viewport so it will look like we are traveling down the tunnel. I had to determine how big of a tunnel to create. I don't want the tunnel's diameter to be to small or I won't have any room to position the tunnel for anything other than looking straight down the tunnel. If I make the tunnel to big though, then to many pixels will have to used to fill out the circumference of the circle and the tunnel's length. After some trial and error, I decided that I would create a cylinder that was physically four inches in diameter. See the diagram below.
(Diagram)
At this point, I have almost determined the W part of L=A/W, at least in inches. But I am really interested in having W in pixels. Well, the circumference of the circle is defined as 2*PI*R where R is the radius of the circle and PI is the mathematical PI. That means that the total distance around the tunnel's circumference is 2.0*3.1415926*2.0 = 12.56637 inches. Now I have already said that the two inch width of the viewport equals 1500 pixels, so from this, the 12.56637 inch circumference would be equal to 9425 pixels by 12.56637 * 750. I now have defined the width of the texture map to be 9425 pixels. I have now defined two of the three variables in L=A/W. Now I can find the length of the texture map. L=1000000000/9425 = 106100 pixels and so my resulting texture map is 106100x9425 pixels. That's how I came up with my texture map dimensions. Then later I determined that everything I had done up to this point was to large so I just reduced the output image size to 800x340 and the texture map size automatically shrank to 56580x5026 pixels.
Determining What and How to Paint on the Texture Map
Now that I had a texture map size defined, I had to deal with what and how to paint something onto it. To do this, I basically had the options of either creating a physical texture map here in the real world or create a synthetic texture map by a programmatic method. Each of these methods has its own advantages and disadvantages.
The first thing that I have to talk about is the problem of edge discontinuities. You will remember that a texture map is actually a flat, rectangular painting that, at least for our purposes, is much taller than it is wide. In order to make a tunnel, the two long sides of the texture map must be connected together to form a cylinder. Now as soon as you connect those two long sides together, you have the potential for the pictures at the two edges to not line up correctly. This would cause a visible seam line to form. This must be avoided at all costs. But the problem is actually worse than this because not only must the two long sides be connected, but the top and bottom edges must be connected as well. Now we have a second seam line problem.
What we need to do is create a completely seamless texture map such that if you were to run off the right side of the texture map, you would instantly find yourself at the left side of the texture map. And if you were to run off the top edge of the texture map, you would instantly find yourself on the bottom edge. It is actually trivial to program this problem away inside the computer. Now lets turn our attention to the texture map itself.
If I wanted to create a physical texture map, then in order to obtain the necessary picture resolution, I would have had to create a texture map that was two feet tall and 22.5 feet long! This would be difficult and very time consuming to say the least. Once painted, I would then have to get the painting into virtual space inside the computer where it could be rendered. I would also have had a lot of problems photographing such a thing. I would have to photograph the texture map in many dozens of separate parts and then composite them back together in the computer to form the resulting texture map.
Another big disadvantage of a physical texture map is dealing with edge discontinuities. It would be extremely difficult to try to paint a texture map such that when you paint a feature that falls off one edge of the texture map, that it continues itself on the other side of the texture map. The one big advantage to a physical texture map though, is that the entire painting can have a very organic and random feel to it.
It was also possible that I could come up with a programmatic way to allow the computer to automatically paint a texture map in the computer by using mathematical functions of one sort or another. The problem with this approach, at least in my opinion, is that a programmatic generation of the texture map won't have the organic, random feel to it that a hand painted texture map would. A programmatic approach has several big advantages though. First is that edge discontinuities won't pose a problem at all. The computer can easily paint off one side of the texture map and instantly just keep painting on the other side. The computer would also be able to paint the entire texture map in a matter of minutes, whereas a hand painted texture map would probably take months of time and effort.
Deciding on how to make the texture map
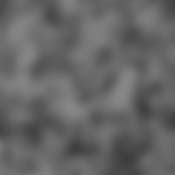
As you can see, one technique's advantage is the other technique's disadvantage and vise versa. What I decided to do was use a hybrid approach. I decided that I would use all the advantages of each approach and just discard each approach's disadvantages. First, I want the organic and random look of a hand painted texture map but I don't want to try to paint this enormous texture map. So what I decided to do instead, was just paint a series of 10, 9"x9", 1300x1300 pixel texture map base components. Each base component was made by drawing grayscale pastel chalk onto a piece of black construction paper and then blending the chalk with a Gaussian blur funtion. Below is a picture of one of the components.

It was pretty easy to paint 10 of these component texture maps. It was also easy to photograph and scan them into the computer as well. I ended up with about 17 MB worth of data or approximately 6 percent of the entire texture map size that I needed. The next thing that I did was to write another program that could take these 10 texture map components and literally plop them down onto the larger texture map at random spots. So essentially, I created the 285MB texture map by piecing it together from 168 smaller parts. This approach also had the advantage that if a component went off one of the edges of the texture map, I could programmatically continue it on the other side of the texture map. This made my resulting texture map completely seamless.
Now of course, I only had 10 texture map components to make the much larger texture map out of. So in order to make the texture map, I would need to plot those 10 components down approximately 17 times. To keep the viewer from noticing any repeating patterns, I had to constantly keep flipping the components horizontally and vertically and keep placing them in random spots in the texture map. This provided enough of a random look to the texture map to prevent any patterns from being seen. Finally, I ran the entire texture map through a Gaussian blur filter to erase the painted look to the texture map.
Adding a second layer to the Texture Map
The previous dicussion was basically just the first of two steps. All of this effort was used to just provide the dark blotchy "base" background colors for the texture map. On top of this base, I had to add all of the bright "sparkles" that you see in the picture. This was done by adding another layer on top of the base texture map. This was done by me making another set of 18 "sparkles" texture map components. I'm actually still working on getting these components to look right. I'm happy with the base texture map.
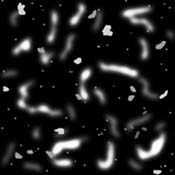
I made these 18 sparkles components as b/w images in Photoshop. Each component was made at a resolution of either 2000x2000 pixels or 1025x2000 pixels. They were made by using the paint brush to paint squiggly lines and shapes onto a black background. I then blurred the component by using a Gaussian blur function. Below is what one of the components looked like.

I then took these 18 b/w "sparkles" components and composited them together using an altered version of my texture map generator program. Now I had a 56580x5026 pixel sparkle map, as well as a 56580x5026 pixel base texture map. I then started up Photoshop and made the canvas to be my base background texture map. I then made a new layer in photoshop and painted it white. I then associated a layer mask with the layer and I then pasted the sparkle map into the layer map. I then merged the layers together. This action combined the sparkles with the base layer. Below is a picture of a small section of what the completed texture map looks like.

Now I had a completed texture map that was ready to be applied to the tunnel. But as you can see, the above picture is in b/w. How did I add color to the texture map? The next section describes how this was done.
Adding Color to the Texture Map
As you will remember, the texture map was created as a one byte per pixel, 256 level grayscale image. Therefore, there is no inherent color in the image. Color for the texture map was obtained by associating a so called Color Look Up Table or CLUT with the grayscale texture map. The CLUT allows me to associate a 24 bit color (8 bits for each of the red, green and blue color channels) with each of the 256 levels of grayscale in the texture map image.
For example, I will just decide that any texture map pixel that has a pixel value of say 45, I will associate the color RED=5, GREEN=250 and BLUE=255 in the CLUT with that grayscale value. Then anytime I want to display a pixel with a pixel value of 45, I just go to the CLUT and I will find that I should draw an aqua colored pixel on the screen. By making this mapping for each of the 255 grayscale values in the texture map image, I can add color to the entire grayscale image. Of course, I'm limited to only 256, 24 bit colors, but that's more than enough colors since hyperspace tunnels are typically only different intensities of a single color anyway.
Last Updated: May 12, 2002
HTML URL: http://geocities.datacellar.net/~special_effect/ht_texture_maps.html
E-Mail: special_effect.geo@yahoo.com or click here
