Creating My Version of the Containment Effect

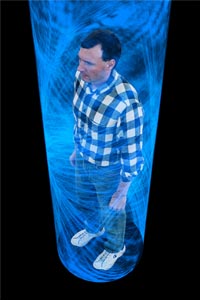
A 3D, CG based transporter containment field effect.
I began the effect by purchasing three medium sized, off the shelf, 5mW diode laser pointing devices from a local video store for a total of about 50 dollars. These lasers produce a small dot of intense red light, but I needed them to produce an interesting swirl of light when projected onto something like a wall. I looked around my house for materials that might be able to perturb these laser beams in some interesting ways. What I found that produced a beautiful swirling pattern was bouncing the laser beams off a piece of Saran wrap and projecting the resulting beams onto a wall.
With the laser swirl problem solved, I next turned my attention to where I wanted to project the laser image. I basically had three options. I could either project the swirl onto the same type of wire and turntable apparatus that ST:TMP had used, or I could project the swirls onto either a flat 2D piece of paper or a series of differently sized 3D tubular pieces of paper. If I projected the laser images onto a flat piece of 2D paper, then I would have to write a 3D, CG program to wrap these flat 2D pieces of artwork onto a 3D virtual cylinder. This is the path that I would ultimately take. But initially at least, I decided it would be easiest for me to just project the laser images onto a series of differently sized paper tubes.
Before I could project the swirl images onto the paper tubes, I first had to determine what size paper I would like to project the images onto. To solve this, I made a b/w frame blowup from ST:TMP that showed Dr. McCoy beaming into the transporter room during the movie. From this I was able to determine the height vs. width ratio of the containment cylinder. I decided that I would make my small paper cylinder to be 11 inches tall. This then constrained the width of the paper to be 9.4375 inches. I then cut out a piece of paper with these dimensions and taped it to a roll of paper towels that was the correct width.
At this point, I placed my camera on its tripod and pointed it directly at the center of the paper tube. I positioned two of the three diode lasers about 18 inches away from the tube and off to either side of the camera about 45 degrees. This caused the axis of the two laser beams to be at about a 45 degree angles to the center of the piece of paper. I then positioned the thrid laser directly below my camera and pointed it at the paper tube. I then focused the camera on the tube and loaded the camera with 200 speed Kodak Gold film. For the 2D flat paper shots, I used my 50mm lens set at f4 and I recorded the subsequent images with a 0.5 second exposure time per frame. Images recorded at f22 required 16 or 30 second exposures. For each subsequent image, I had to move the Saran wrap pieces around so that each frame had some sort of unique image on the white paper. Below are a few of the original frames that resulted from this procedure. This phase of the project was done between January 28th - March 3rd, 2001.

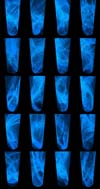
A composite image of 20 of my current containment field effects. (158K)
 __
__
 __
__
 __
__
 __
__

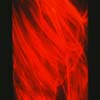
Laser images projected onto 3D cylinders and 2D paper.
Last Updated: October 3, 2002
HTML URL: http://geocities.datacellar.net/~special_effect/sttmp_contain_effect.html
E-Mail: special_effect.geo@yahoo.com or click here!


 __
__
 __
__
 __
__
 __
__
