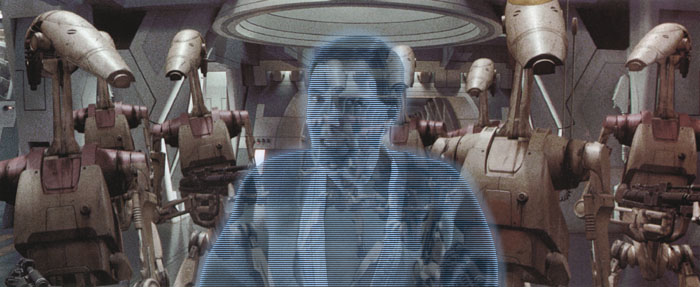
Me in holographic form aboard the Trade Federation Battleship
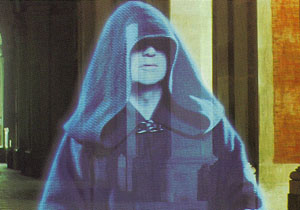
Darth Sidious in holographic form for comparison


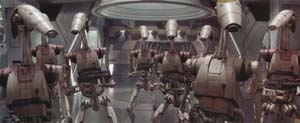
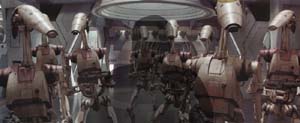
My version of the holo effect started by me first finding a background plate from TPM that I could use to place myself into. Many of the photos that I would have loved to have used already had holo effects added to them, or the photo was to small to be of any use. I ended up finding a nice big photograph of the scene aboard the Trade Federation battleship where the battle droids are waiting outside the reception room to see if Obi-Wan and Qui-Gon have been killed by the poison gas attack. So I scanned and enlarged this picture until I reached my working image size of 2700 x 1106 pixels. I then saved this image off for future use and then reduced this image down to 700 x 287 pixels for display on the net. Below is a smaller representation of the scene that served as my background plate.

With these two base elements in hand, I could now begin the real effects work. The first thing that I had to do was turn the foreground element into a b/w image. This was done by me simply doing a mode change from RGB color to Grayscale. The next thing I needed to do was take this b/w image and change it back into a pseudo RGB color image by adding the bluish tint to it. This color change adds the holographic color quality to the image. To do this I needed a piece of special purpose software. This software essentially takes as input two colors that the user wants to transition between in the resulting output color image. The program then determines what the minimum and maximum pixel intensities are in the b/w input image. Then it looks at the intensity of each pixel in the b/w image and does a linear interpolation between the two user defined colors to determine what each pixel's output color should be. The program then writes the resulting color ouput image out to the disk as a RAW RGB color image. Click here for complete details about how the program works. Below is what the b/w input image looks like after it has been turned into a pseudo color image.

The next step is adding the scanline effect to our hologram. To do this I made another special purpose image processing program that can geneate this type of image. Basically I made a program that reads in an input image, which I feed in the pseudo color image, and this program basically just outputs the same image back out to disk. The difference is that for every other scanline, it reduces the color intensity of these scanlines to just 35% of full. This effectively adds the scanlines to the hologram. The Jedi holo effect element is now ready. Click here for complete program details. Below is what the scanline adder program would produce for a input image that was all white.
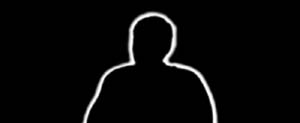
The next thing I needed was a cover matte. To obtain this I basically just loaded up the original foreground element on the background canvas of Photoshop and created myself a new channel. I then made the new channel the active channel and allowed the background canvas to show through. Then I just used a paint brush to very carefully trace out my Jedi costume outline in the channel. After I had traced out my outline, I then filled in the outline so that I had a holdout matte. I actually needed a cover matte so I just inverted my holdout matte. Below is the cover matte that I made.

Next I needed to make the hologram look semi-transparent. If I simply superimposed my hologram onto the background image, then the hologram would look to transparent. To get around this problem what I did was use my cover matte to actually darken the background under where I was eventually going to be standing. By darkening this background prior to superimposing my holo image, this made it look like the hologram was actually blocking out the background in addition to letting some of it through.
To do this, I loaded the background element into Photoshop's canvas layer and I created a new layer. On this new layer I just painted the layer to be pure black. I then associated a layer mask with this new layer and I pasted my newly created cover matte into this mask. I then set the transparency on the layer to 47% and set the layer to standard normal compositing. I then merged the layers and the results are that wherever my Jedi image falls on the background, the background has been darkened by about half. Below is what resulted from this procedure.
The next to last step in the process is to actually composite the modified background element with my holo Jedi element. To do this, I used my light saber compositing software. Click here for complete details about how this program works.
The last step in the process is adding the ethereal glow around my holo image. To do this I just took my cover matte and traced out the glow shape on the cover matte in white. Then I just inverted this matte. I then loaded the nearly complete composite effect onto Photoshop's canvas layer, and I then created a new layer and painted this layer entirely in the color R=150 G=200 B=250. I then associated a layer mask with this new layer and I pasted my newly created cover matte into this mask. I then set the transparency on the layer to 33% and set the layer to standard normal compositing. I then merged the layers and what resulted is an erie glow around my image. Below is the cover matte that I used to create the hologram's ethereal glow.
I found this project to be a fairly difficult short term project. It took me many weeks of on and off again thinking about how I could duplicate the holo effects created for TPM. Many of the problems I had dealt with how to dial in the correct settings for each of the various steps that had to occur along the image processing pipeline. In fact, I still don't know if I have the various settings correct. There probably aren't any "correct" settings. By tweeking the various settings along the way, you could make the hologram different colors and intensities, as well as making the resulting hologram more or less transparent. I do know that I spent a lot of time making adjustments to get where I'm currently at.
I do think the results that I have been able to get are very realistic. I especially like the fact that in dark areas of the hologram, you can see through the hologram to the background, and the background still has an erie bluish tint added to it.