
Pack all Chassis parts, like knobs, bolts, etc. in paper towels, and place in ziploc bags.

Packing of chassis parts. Place bagged parts, inside with chassis, before you double box it.
Packing a Console Radio Yourself
Ever seen how much packing places like mailboxes, or the packing store charge for
packing or crating a large console radio?
Usually upwards of $100.00 or so. Follow the easy steps below, and save yourself
some money. The materials listed below should not cost you more than 10 dollars. The
example is using a large Zenith console. I use Fed-Ex Super saver shipping, because
UPS will not take a box this large. UPS will only take boxes that have a combined girth
and height of 130 inches. Large radio consoles boxed correctly are approx 150-160 total
girth plus height. I did hear of a neat trick that works, but never tried it.
(Thanks CS, I might try this next time.) Call UPS to pick the item up at your
location, but don't tell them the correct dimensions, fudge it a bit. You could possibly
cut the shipping cost in half with UPS! I have done 4 of these via Fed-Ex, with no
damage. It usually takes me 2 hours to do just the cabinet. The Fed-Ex rates vary,
from 45-100 dollars shipping (cabinet only) depending on how far it goes in the 48 states.
Make sure you go to the Fed-Ex location and get a true quote, before trying to estimate
shipping for the buyer!
Materials needed:
Large Washer, Dryer or Refrigerator box, and boxes to put your chassis in.
Sheet foam, 2 inch foam pieces available within the appliance boxes.
Cardboard corner pieces available within the appliance boxes.
Carpet padding, enough to cover front and back of cabinet.
Styrofoam Peanuts, quantity depends on size of box and chassis.
Large roll of bubblewrap.
2 Large rolls packing tape.
Hot Glue Gun.
Sharp utility knife.
Paper towels, ziploc bags for misc parts.
Click on the Thumbnail Images to Enlarge.

Pack all Chassis parts, like knobs, bolts, etc. in paper towels, and place in ziploc bags.

Packing of chassis parts. Place bagged parts, inside with chassis, before you double
box it.

Packing the chassis, you can use foam to secure, or bag it and use peanuts. This box
will be within another, (double boxed) with peanuts.

You may shield tubes with bubblewrap, if double boxing. Not recommended for single
boxing. If single boxing, remove all tubes and pack separate, and make sure you get
a larger box so you can insulate with more peanuts.
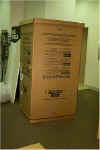
Go to your nearest appliance store and get either a dryer/washer/refrig. box. Also, get
the cardboard reinforcements that go in the corners inside the box, shown later. You
also need the foam inserts about 2 in. thick, and some sheet foam.

Get dimensions of entire cabinet, and add 2-4 inches each way to get the size of the box.
For a large Zenith cabinet with dimensions of 40h X 26w X 19d, we are going to make a box
approx. 48h X 32w X 25d. No need to be exact, just need to make sure you get at
least 2 inches of packing around the entire cabinet.

The easiest way to get started is to compare your box with the cabinet first.
Usually, with a console, the width is ok for one side of the box. We started with a
32 inch square, 60 inch high refrig box. The cabinet is 26 wide, so no modification
is needed to the corners of the box. To adjust the height, just score the sides so
you can bend and make flaps to make the ends. We measured the entire length, and
subtracted 48 inches, and divided that by half, to get our measurements for our flaps to
fold.

To compensate for the depth, cut the box in half, after you have sealed both end flaps.
This will enable you to simply slide the 2 halves together inside one another to
get your depth from front to rear of cabinet.

Hot glue 4 reinforced corners in the box halves, to prevent the corners from denting.

Place a 1 inch thick sheet of foam in bottom of one of the halves.

Place more foam pieces if needed, to make up for room above/below cabinet.
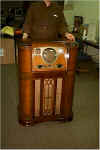
Here is the large console cabinet, almost ready for packing. The bezel with dial
glass will also be removed and shipped separate with the chassis. We were able to leave
the speaker in this model, because it was fairly small and lightweight. However, we
packed bubble wrap around it between it and the wavemagnet boxes to keep them from moving
around. If you have an older console with a very heavy magnet, I recommend you
remove it and box separate.
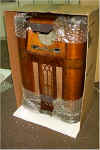
By placing the pieces in the bottom at about 3-4 inches thick, it left us with the same on
the top. Note that we wrapped both the top and bottom of cabinet in big bubble wrap.
We also taped a sheet of carpet foam to the back of the cabinet.
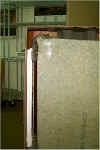
Here is a view of the top and sides. We placed some foam blocks on top, and on the
sides to prevent damage if there is a side impact. The front of the cabinet is then
covered with another piece of carpet padding.
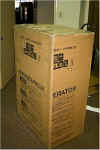
The other half of the box is simply slid over the other. You have to make a few
relief cuts, to get them to fit. After fitting together, tape several layers on all
edges, you are done.
C. Garst
01/16/2000
Copyright 1999,
2000, 2001 C.Garst
Unauthorized use of any
part of this website in its entirety, photos or text, is prohibited.
Times Visited Since 01/16/2000
|
![]()