|
|
|
|
|
This site will no longer be updated, please visit http://pixel-tickler.com instead. |
|
|
|||||||||||||
|
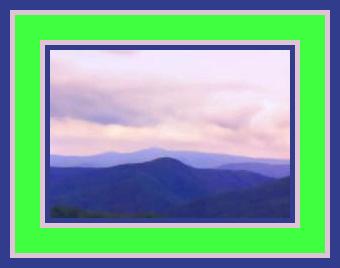
Step 1: First, we are going to add a series of borders to this image. If you are using any image other than the one in the zip file, you need to flatten your image so that is a background, not a layer (layers, merge all). Your image also should be set to 16 million colors (colors, increase color depth, 16 million.) It doesn't matter what format your image started out in, as long as it had these qualities now. |
|||||||||||||
|
Background color to #313D8C |
Foreground color to #EBD0DB |
||||||||||||
|
|||||||||||||
|

|
||||||||||||
|
Step 3: Next, we are going to switch over to using the kaleidoscope effect to this empty section. |
|||||||||||||
|
The screen shots are PSP7 screenshots, so it may look a little different from PSP6, but your results should end up similar. I have had two different results that I likes, all by just changing the rotation angle, so I'm posting them both. You can choose either or do both, but make certain that you copy what you have already done and paste as a new image. |
|||||||||||||
|
PSP6 users: Image/Effects/Kaleidoscope |
PSP7 users: Effects/Reflection Effects/Kaleidoscope | ||||||||||||
|
|||||||||||||
|
|||||||||||||
|
Step 4: Don't deselect yet. Now, add two new layers. We are going to add cut out effects to these new layers. Select layer two and go to your cut out tool. |
|||||||||||||
|
|||||||||||||
|
Settings: Color: Black, Vertical 3, Horizontal 3, Opacity 57, blur 8.8 |
|||||||||||||
| Now select layer 3, then the cut out tool. | |||||||||||||
| Settings: Color: Black, Vertical -3, Horizontal -3, Opacity 57, blur 8.8 | |||||||||||||
| Now go to and merge visible (not all) layers. | |||||||||||||
|
|||||||||||||
| You now have several options, you can save this as a transparent gif | |||||||||||||
| If you are making stationery, you can copy and paste it over a background tile | |||||||||||||
|
If you aren't comfortable with saving as a transparent gif, you can add a new layer and flood fill it with a color or texture that you choose and then move the new layer below the saved image you have just created. |
|||||||||||||
| Here are my two finished images: | |||||||||||||
|
Setting 1 Results |
|||||||||||||
|
|
|||||||||||||
|
Setting 2 Results |
|||||||||||||
|
|
|||||||||||||
|
Download the PDF of this
tutorial here. |
|||||||||||||
 |
|||||||||||||
| Updated 02/06/02 | |||
| Copyright ©
1999-2002 All rights reserved. All graphics on this site are property of Pixel-Tickler and are protected under US and International copyright laws and may NOT be copied, stored or offered for sale without written permission from the owner unless so stated otherwise. PSP tutorial groups may use these tutorials as part of their weekly lessons. If you have any questions regarding the content or images used on this site, drop me a note at news://news.annexcafe.com/annexcafe.psp.tutorials. I browse there regularly. |
|||