|

|
|
|
|
PSP 5, 6, or 7
|
|
|
Grayscale |
Flood fill |
|
|
Color to Target |
Canvas Size |
|
|
Layers |
Convert to seamless |
|
|
Lasso |
Your own photo |
|
|
This is the image I am using
|
|
|
 |
|
|
|
|
|
|
|
|
|
|
Step 1: Always duplicate your image first
and work on the duplicated copy so your original will always remain
intact. Go to colors and convert your image to grayscale, then back to
colors and increase color depth back to 16 million colors.
|
|
| Decide beforehand what parts of
your image you want colorized. For example, some of Mr. Anderson's
photos do not color the skin tones, only the clothing or other
objects.
Step 2: To colorize your image, you will be using
the color to target under the retouch tools option. While using this
tool you will need to vary the size and color depending on what area
of your photo that you want to color. You may have to play with
different colors to achieve the color you want on the photo. You may
start out with one color discover that it is too dark or too light
as you are painting. Start with a small area and the adjust as
needed. |

|
|
|
Step 3: All you have to do is paint the color that you want
on the portions of the image that you want colored. As I stated earlier,
make certain that you know what sections you want colored first because if
you decide later that there is a portion that you don't want colored it's
hard to go back and undo it unless you undo all the steps you have done
afterwards. Make certain that you use the zoom tool to view the smaller
areas. I also used the Window/new feature so that I could see what was
happening to the normal sized image as I worked on the zoomed in
image.
|
|
|
| These are the colors that I used
to color each section: |
| Skin tone: #F9E0C7 |
| Lips: #F8C8D6 |
| Hair (including eyebrows): #CCAC98 |
| Clothes: #AF6399 |
|
|
|
I had originally used a lighter skin tone, but once I
colored her hair, the skin tone color just didn't look right so I switched
to a slightly darker shade and painted her skin again.
|
|
Depending on how dark or light your image is, you may
also have to make some adjustments.
|
|
Step 4: If the teeth look too gray to you, use
the lasso tool set to point to point and no feathering just along the inside
of the lips. Then got to Colors/Brightness. I used these setting: Brightness: 23,
Contrast: 7
|
|
|
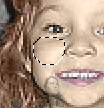
Step 5: If you want to add some color
to the cheeks try this: Add a new layer and on the new layer use the
lasso tool point to point with feathering set to 2 to outline the
area where you want to add a blush. I flood filled with the color #EEB4D2.
This still ended up being a little darker than I wanted so I reduced
the opacity to 52. Deselect this section and move your
"blush" if needed. Add another new layer and repeat this
process to the other cheek. |
 |
|
|
When you are satisfied with your
blushing, merge all or merge visible
|
|
Step 6: Now you can either leave the background alone or you
can soften it as I chose to do. Use the lasso tool again set (point to point
feather 1) around the child/person/object in your image that you have
colored. When you are finished go to selections invert, then blur the
background. I blurred twice.
|
|
|
Step 7: If you want to add a hint of color to your background,
keeping the area selected that you just blurred, add a new layer and flood
fill with the color of your choice. It's best to pick one from the image
that you have just colored. Set this layer to "color" in the drop
down menu of your layers palette and adjust the opacity as needed. Go to
selections, select none and merge all layers.
|
|
|
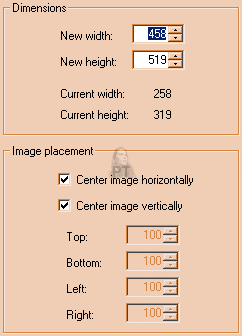
| Step 8: To add a misty effect to your
image, in the color palette change your background color to white. Now
go to canvas size and add about 200 or so pixels both width and height
with your image centered both horizontally and vertically.
Use the magic wand (no feathering, 0 tolerance)
RGB value to select the white border. Go to selections/invert and then
back to selections convert to seamless image. It will open as a new
image.
If you get an error message that "your
image is too close to the edge...," you need to add a wider
border. You can do this simply by using the add borders tool.
If your image is too misty for your taste, then
use the crop tool to cut down some of the white outer border. |
 |
|
|
|
You can now frame your image in any
matter that appeals to you.
|
|
|
|
|
|
|
Here is my finished image |
|

|
|
|
|
Download the PDF of this
tutorial here.
Download Free Acrobat Reader
here.
|
|
|
|
|
|
|
|
|
|
|
|
|
|
|
|
|
|
|
|
|
|
|
|
|
|
|
|
|
|
|
|
|
|
|
|
|
|
|
|
|
|
 |
|
|
|

