GARYS
WORKSHOP

SERVICING
HUBS
1. The first thing to do is to take the wheel off the bike.
Release the brakes first, and then loosen off the quick release
or the bolts. If it is the rear wheel, take the freewheel off
too.
2. Now, get two 17 mm wrenches and put one on both of the bolts,
(now that the quick release or the bolts are off the wheel) and
loosen them off. *Remember the order that you take these thing
off in.
3. Remove any spacers.
4. Now get some 15 mm cone wrenches (really skinny wrenches) and
remove the cones, and hawl the axel out.
5. Be very careful now. Have a doubled over cloth below the
wheel, because the bearings will probably fall out. If they don't
fall out take them out with your fingers or a screwdriver.
6. Clean up the bearings, the axel, the cones, and the inside of
the hub.
7. Now take grease, (I use white lithium grease in a syringe, but
it's up to you) and apply a 2 mm or 3 mm layer of grease inside
the cups of the hub.
8. Place an equal number of bearing in each side. Don't force
them in, but they should either fit perfectly or have a small
extra gap. If your bearings are damaged, get new ones at any bike
store (make sure that they are the right size).
9. Scew one of the cones about a cm on to your axel. Slide the
axel through the hub, screw the other cone on the other side.
They should be equal, or the outer parts should be equal once you
get the the spacers and everything else on.
10. Here's the hard part. Tighten the cones just slightly. Now
spin the axel and then wiggle it. It shouldn't wiggle, but it
should not have ANY resistance.
11. Once you get that done, put the spacers and the outer bolts
on. OH NO! Now you have to get these bolts VERY tight, and still
keep the cones perfect.
12. Use your cone wreches on the cones, and your normal 17 mm
wrenches on the outer bolts and screw around with it for a long
time. The first few times you do this, it will take a long time,
but soon, you'll be able to do a wheel in about 15 - 20
minutes!!!

REDOING
GEARS AND CABLES
1. First off, do not take apart rapid fire gear shifters. You'll
be screwed if you do. Grip Shift can be taken apart, but the
rapid fire shifters will not work again if you do. You can take
them off the hadlebar and remove the cable, but don't push your
luck.
2. Get a chain breaker or a pin extractor or what ever you want
to call it, and remove the chain and clean it in grease remover.
I find that gas works just fine. Do NOT use a hammer and nail to
remove the chain it will damage it too much.
3. To put the chain back on, feed the chain through properly,
(make sure it's on the proper side of the frame), then slacken
off the chain breaker and push the pin back through using it.
This might take time and a lot of patience. Set the pin an equal
distance out from each chain plate. Now wiggle the chain and make
sure it isn't stiff. If it is,oil it and frig with the pin until
it pivots smoothely.
4. Loosen the cable bolts on the two derailers. It might help
with some derailers if you make a mental note of where the cable
goes, it can get confusing.
5. Remove the derailers. You might have to take the wheel off to
do this, but if your gears need frigging with this badly, it's
probably time to do your wheels anyway.
6. Now take a rag to both derailers. This is mainly for looks,
but the less dirt around the pivot points, the better your
derailer will work, and the longer it will last.
7. The front derailer needs very little work. Oil the pivots, and
the grasp it in your hands tightly and try to move it the way it
does on your bike. It should be stiff, but not unmovable.
8. The rear derailer needs a little more work. Again oil all the
pivots. Then spin the two wheels. If they grind or are stiff,
remove the bolts, and clean the wheels well. Greasing is not
necessary, and can attract dirt. Replace the wheels.
9. Now for the cables. They aren't too expensive, so replace them
as you feel necessary. Make sure you get the right ones with the
right heads, and make sure they aren't to thin or thick. When
cutting them, use proper cable cutters, and press hard and fast,
and not until they are already placed and bolted on the bike. You
should leave about an inch and a half of access cable.
10. The cable casings are just as important to replace as the
actual cable. They might look fine, but a lot of water can get in
them and cause rust. Line them up with the old casing and cut
them exactly, or about a cm (half inch) longer if you aren't too
sure. Proper cable cutters are also recomended, and then a file
to smooth the inside of the casing to reduce friction.
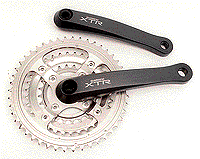
11. The next thing you should do is to take off the cranks. Pop
off the little dust caps then remove the bolts inside. Now you
need a crank extractor. Do NOT use a hammer. An extractor is
about $5-$10 and is worth it. Screw in the big part, then tighten
the other part. (You'll know if you have one). It will be tight
for a second, but will become easy. Now inspect the cogs for
broken teeth and clean it with a rag. When you are ready, tap it
back on with the HANDLE of a hammer, then put the bolt back on
and tighten it as much as you can.
12. To remove the free wheel, just get the proper freewheel tool,
stick it into the freewheel, and turn counter clockwise. To put
it back on, turn clockwise.
13. Now to adjust the gears. When you tighten the cable, make
sure the shifters are at their slackest setting. (Small Wheels).
Then pull the cable very tight and tighten the bolt. Just put it
a little past snug because you don't want to stip it. On every
derailer there are two screws, so go through your gears and make
sure it goes far enough both ways, and not too far. If there is a
problem with the distance, play with the screws a bit, you find
out which one does which. I'm not going to tell you which
direction does what, because if you can't figure it our for
yourself, you can probably just barely ride a bike.
14. That was just for the distance. Now if the chain isn't
hitting the cogs exactly, frig with the little screws on the
shifters where the cable protrudes. You should be on the bike
when you do this, because weight does make some difference to it.

SERVICING
BOTTOM BRACKETS
1. The first thing you need to do is get the chain off the
cranks. You don't need to remove it from the bike, but if you
simply lift it off the front cogs and lay it on the bottom
bracket tube, it will save you a lot of trouble.
2. The next thing to do is remove the cranks. Pop off the little
dust caps then remove the bolts inside. Now you need a crank
extractor. Do NOT use a hammer. An extractor is about $5-$10 and
is worth it. Screw in the big part, then tighten the other part.
(You'll know if you have one). It will be tight for a second, but
will become easy. Now inspect the cogs for broken teeth and clean
it with a rag. When you are ready, tap it back on with the HANDLE
of a hammer, then put the bolt back on and tighten it as much as
you can.
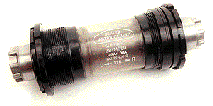
3. Now, you have to figure out if you have a conventional bottom
bracket, or a closed cell bottom bracket. A closed cell has
several small grooves on the inside of the circle on both sides,
and a normal one is much flatter and doesn't cave in or any thing
like that.
4. Both types of bottom brackets are extracted in the same
fashion, but you need different tools to remove them. A closed
cell can not be worked on and if it breaks, it has to be
replaced, but a normal bottom bracket can be fixed. It may not
sound right, but a closed cell is much better, it will last much
longer, and water can't get into it.
5. To remove the bottom bracket, turn it CLOCKWISE on the CHAIN
side, and COUNTERCLOCKWISE on the (?) NON-CHAIN side. To replace
it, just do the opposite.
6. With a closed cell, just wipe it off, clean out the bottom
bracket tube, put anti-seize compound on the threads, and screw
it back in.
7. A normal bottom bracket has to wiped off and the bearings
cleaned up. (If the bearings are in cages, get some new ones from
a bike shop and put them in loosely. They should not be wedged
in, but there should not be too much space. You might have to get
more bearings than were in the cage.) Now grease everything up
with preferably white lithium grease and replace the axel. (Long
part on chain side.) Then tighten the two cups until the axel no
longer wiggles, but there is no friction. (This might take a
minute.) Now screw on the lock ring until it is very tight. Test
the axel for tightness again, and if it has changed, you will
have to frig (I love that word) with it until you get it right.
It isn't as difficult as your hubs but it HAS to be perfect or
else you will waste a lot of power.

SERVICING HEADSETS AND
FORKS
1. You don't have to do this, but if you want to remove the
handlebars, you will have to disonnect all the cables, take
everything off the handlebar, loosen the stem bolt, and carefully
pull the handlebar through. I would suggest you only do this when
you are replacing your handlebar, or something on it, because it
is a pain in the butt.
2. To remove the stem, there is a bolt either on the top of the
stem (closest to the seat), or it is down inside. Get an allen
key (probably 5mm) and loosen it as much as you can. Now, put the
front wheel between your legs, grab the handlebar, (if it is
still on) and twist it. Once it moves, you should be able to haul
the stem right out of the steer tube.
3. Now that that is done, get a 32mm headset wrench and take off
the first bolt that is holding the fork in. Now remove everything
else with your hands and lay it down in an order that you can
remember. Oh yeah, hold on to the fork, because once you remove
all the bolts, it will come crashing down. There should be a
bearing race in the top cup and the bottom cup. Clean the
bearings (or get new ones), grease them up and put everything
back how you found it.
4. Tighten the cup just like you do your hubs. Tighten so there
is no play, but make sure it still turns loosly. Now clamp down
the other bolt and wiggle it again. This might take a little bit
of work to get it right.
5. Slide the stem back in, line it up with the wheel, and tighten
the bolt inside and BOOM. Your done....