AnTec Laboratory - Bob & Lynn Wellenstein
Selecting The Parents
The first step in our flower to flower tale is selecting the parents that, together, will create the progeny that meets the hybridizer's goal of a good flower. Selection of the capsule parent is, by necessity, limited to those plants in flower. To be used as a successful capsule parent the plant should meet some minimum requirements. It should be sufficiently strong, usually not a first bloom plant unless it has multiple growths, and it should be in good health with somewhat stiff leaves, and with an excellent root system. If there is doubt about the roots, it is permissible to shake off some of the potting mix from the top of the pot, which should allow you to judge the health and quantity of the root system. The flower must be fresh enough to last until the pollen tubes grow into the ovary (although on occasion we have had excellent successes with fairly "old" flowers) and it is preferable that the plant has not been subjected to conditions that might cause a drying out of the stigmatic surface, such as being in an orchid show for five days. It is also a good idea not to use the same plant flowering after flowering as a capsule parent, as seed production is demanding on a plant, and it is possible to breed a plant to death, particularly with the brachypetalum section and its hybrids. If in doubt, let the plant rest over another flowering period, and choose a different parent.
|
|
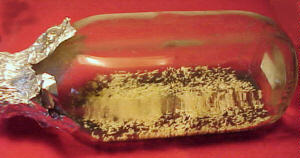
Paphiopedilum Mother Flask
| |
Selection of the pollen parent is a little less restricted in that we maintain a pollinia bank in a refrigerator of thousands of pollinia. We have found that most Paph pollinia, if properly refrigerated (not frozen),packaged and stored, will give good results even after three years. We have tried many different types of storage containers over the years varying from microcentifuge tubes to gel capsules, but have settled on the simpler method of wrapping it in a square of waxed paper, folded, and held closed with scotch tape as the best method. This method is easy to label clearly, takes up less space (a serious consideration when you build up to several thousand), and can be easily "filed" in zip lock bags by type for easier retrieval. Waxed paper also overcomes one of the major problems with the larger containers, and that is the occasional pollinia that molds.
|
|
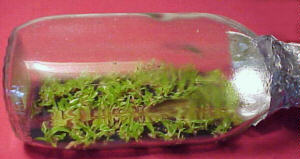
Paphiopedilum Spread Replate
| |
There are many reasons for making a particular cross. It may be a part of a long term breeding goal, an intermediate step in the process of getting to a desired flower, or an end unto itself. Good hybridizers usually have many such plans in their heads, and have plotted out the course of hybrids they think will take them to their goals. It may also be an end unto itself, for instance a remake of a known hybrid with parents you believe will yield a better or different result. Or it may be a speculative cross that is new. Regardless of the goal, the hybridizer will always have a mental image of what they expect from the cross in advance before the cross is attempted. This is one of the things that distinguishes a hybridizer with a breeding program from someone simply making crosses with whatever flowers happen to be open at the time.
|
|
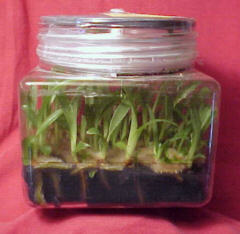
Paphiopedilum Final Replate
| |
The individual parents selected must also be thoughtfully matched. A good hybridizer not only studies and files away the general breeding behavior of particular species or hybrid being used, but is capable of critically and honestly evaluating both the strengths and the faults of a particular plant being considered as a parent. This ability to be brutally honest about your plants is not always easy, but is necessary when matching the qualities of two plants being considered for making a hybrid. We maintain a database of thousands of plant measurements and digital photos and slides to help in the selection process; this is particularly necessary in selected the pollen parent as you may not have seen it in bloom for a year or more.
Making The Cross
|
|
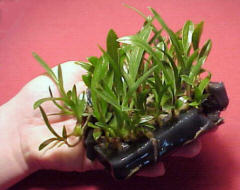
Paphiopedilum Flasklings
| |
Once the parents are selected, the pollen from the pollen parent is examined with a 10X loupe to determine if there is any mold growing on the surface, especially if the pollen is from an older flower, or if the pollen has been stored for any length of time. The cross is made by placing the pollinia on the stigmatic surface of the capsule parent. Sometimes the pouch of the capsule parent will have to be removed to facilitate pollination. We have abandoned the time honored toothpick for this job and instead use a scalpel with a #11 blade, the tip of which has been cut off. The blade is wiped clean and flame sterilized after each cross. The cross is labeled with a paper tag that has been laminated with scotch tape to preserve it in the humidity of the greenhouse. The tag has all the cross information as well as the cross number, and this information is entered in the cross notebook as well. This information is also kept in a searchable database. The plant is returned to its place and the greenhouse. If your cross is successful, the flower on the capsule parent will start to slowly fade or turn brown after a week (or in some cases, several weeks)has passed, although the ovary will remain vital and firm after the flower falls off.
Capsule maturation times for Paphs range from as little as 4 months for some multiflorals up to about 12 months for some others such as Paph. hirsutissimum or Paph. tigrinum. The maturation time is also affected by cultural conditions, especially light and temperature.
Into The Lab
|
|
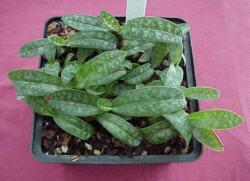
Paphiopedilum 5x5 inch Compot
| |
The capsule is removed based either on physical characteristics or length of time on the plant. Physical characteristics that signal removal would be yellowing or browning, particularly at the flower end, or any signs of dehiscence. Alternately, capsules are removed based on time, which is based on experience and growing conditions. A sure sign that you need to be alert is when a Paph carrying a capsule initiates a new flower inflorescence. Capsules are harvested by snapping off and brought to the lab. If the capsule is in danger of immediate dehiscence, it is placed in a paper envelope.
In the lab the capsule is sterilized and placed in a sterile petri dish. At this point it may be either immediately sown on a mother flask or stored in the refrigerator until time permits sowing. The mother flasks are maintained in reduced light until germination and initial seedling development, at which point they are "spread" onto the first replate flask. The seedlings are left on this first replate until they have developed to a size suitable for final replate. At this stage any poorly growing or deformed plants are discarded. After final replate they are moved to the flask room to grow up to final flask size. The lab process usually takes from 12 to 20 months to complete.
|
|
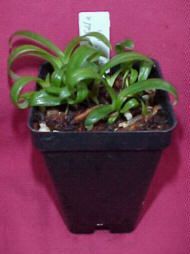
Paphiopedilum 2.5 inch Clumped Compot
| |
Not infrequently, one will cut open what appears to be a mature capsule, only to find that there is no seed contained therein. This may have occurred because the plant was too immature to successfully carry the capsule, or because the pollen was too old, or was moldy, or because the plant was exhausted from previous, successfully matured capsules. Alternatively, it could be because there was a misalignment of genetic material and the parents were not compatible. If the latter is suspected, it might be suggested to try different clones of either, or both, parent, with the hope that combination of different genes will prove fruitful. Remember Winston Churchill's admonition to "Never give up"!
Deflasking
|
|
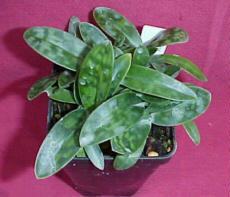
Paphiopedilum 2.5 inch Compot After 6 Months
| |
Deflasking and compotting are covered in detail elsewhere. In a nutshell, the seedlings are removed from the flask in as gentle a manner as possible. This may mean breaking the flask in the case of glass flasks. If you do this, please follow the method referred to above using a drift punch instead of the usually suggested method of breaking with a hammer, as the drift punch method is much safer. The agar is carefully washed from the flaskling roots using a forceful stream of warm water, and they may or may not, depending on preference, be briefly bathed in a weak nutrient and/or fungicidal solution. If you choose this step, be aware that the use of a contact type sterilant with no residual effect is probably nearly worthless as the plants are essentially sterile at this point anyway. It is more useful to apply the contact sterilant a few days later to the compot, or use a systemic with residual protection. If you do use some sort of disinfectant or nutrient soak (and if you have a method that works for you, stick with it), remember that you are dealing with very tender flasklings and keep it dilute to avoid burning them. As always, if you choose to use chemicals, do so wisely and take standard precautions, and do so in a well ventilated area.
|
|
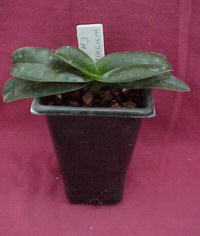
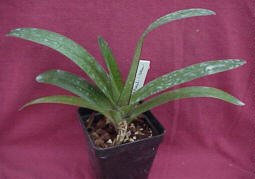
Paphiopedilum Seedling in 2.25 inch Pot
| |
Compotting
The seedlings are then planted into compots (short for 'community pots'). Resist the temptation to pot them individually at this stage, regardless of how large they are. In fact, very large flasklings may have a more difficult time adapting to out of flask culture than more modestly sized flasklings, so give them the microclimate benefits a compot provides. Small or severely damaged flasklings are discarded at this stage. We compot Paphs into a seedling mix of fine fir bark, perlite and chopped New Zealand Sphagnum moss. Use whatever is appropriate for your conditions. The requirements are that the mix hold the flasklings anchored securely, not be excessively salt retentive, and should start to approach drying out in the selected pot size within 3-4 days of watering. We compot in two ways: the majority of our seedlings get clumped (making 3-4 compots per flask) into the center of a 2.5 inch rose (deep) pot; brachys and some parvis with fatter and more brittle roots get spaced out into a 5x5 inch mesh bottom compot (1 per flask usually). If we could maintain warmer conditions for the compots, which we are working on, then all would probably get spaced out in the 5x5 inch compots or even flatted in 1020 flats, but under our current conditions these tend to stay wet too long with resultant fungus problems and loss of roots.
|
|
Paphiopedilum Seedling Moved Up to 2.5 inch Pot
| |
It is very important to keep the compots as warm as reasonably possible, ideally around 75 - 78F, and in very reduced light initially (so that your hand held directly over the compots throws a barely noticeable shadow). Remember that this is how most flasks are grown, in low light levels, and if you start out with too much light you will burn or at least initially stunt the flasklings. They may be gradually introduced to more light over the next several weeks. Growing compots under fluorescent lights works very well, and the fluorescents have the added advantage of providing the seedlings with additional heat.
If the flasklings were in a clumped compot, they will probably have to be spaced out into other compots within 6 months. Otherwise, the compots can usually be left alone for 9 to 12 months. It is wise to check on compots regularly, removing dead leaves and seedlings as you find them. No doubt your growing area will have its own microclimates, and this will allow you to fine tune your seedlings mix if necessary, or move certain compots to a more airy situation, etc.
|
|
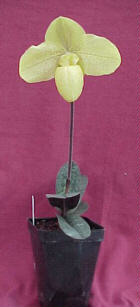
Paphiopedilum Fumi's Gold Flowering in a 2.5 inch Pot
| |
If ideal conditions cannot be maintained during this period, especially with regard to warmth and air movement, then it may be necessary to occasionally apply a broad spectrum fungicide. It is particularly important to select a fungicide that can control Pythium and Phytophthora species.
Moving On
When the seedlings in compot reach 5 to 8 cms leaf span they are ready to be moved on. We use a 2.25 inch 'rose' pot for the first step from compot. Again, any seedlings showing poor growth or deformities should be discarded at this point.
When root growth is sufficient, i.e. filling the 2.25 inch pot, the seedlings can be moved on to a 2.5 inch pot. Many Paph seedlings should be able to bloom in this size pot. Some of the larger types or multiflorals may require moving to a 3 or 3.5 inch pot, however. Most Paph hybrids will bloom by the time they have one growth and a start that is maybe 1/4 to 1/3 the size of the first growth. You do occasionally encounter plants that are reluctant to bloom at this size, and some plants impart a "clumping" trait also to their hybrids.
|
|
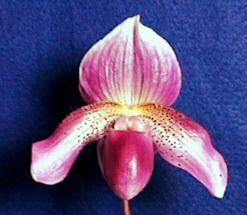
Paph. Mad Wine (Madela x JoAnne's Wine)
| |
|
|
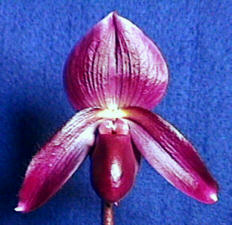
Paph. Mad Wine (Madela x JoAnne's Wine)
| |
Flowering
The final, and hopefully most rewarding stage is flowering out your new hybrid or species cross. This is where you find out how good your projections were. You also get to see the range of variation these parents produced, which is very important in evaluating their use in the future. The best is when you are able to flower out plants that you feel are definite improvements to select for future breeding endeavors. There is always a lot to learn for those who care to be observant!


