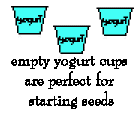
 Seeds can be planted in any flat container, as long as you can put holes
in the bottom for drainage. Fill the container to just below the rim with
moist potting soil. Scatter the seeds over the top of the soil and tamp
down lightly with a flat object like a piece of wood or the bottom of a
glass.
************************************************************
The container must be covered to prevent moisture from evaporating and drying out the soil. The humidity created by a cover also helps to speed germination of the seeds. I use plastic wrap and I cover the top, sealing the edges. Do not let the wrap come in contact with the soil. If it lays on the soil, help to lift it up by putting a few pieces of popsicle sticks into the soil so that they hold the wrap up above the surface of the container.
************************************************************
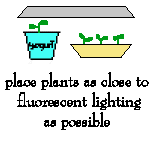
Read the seed packet to get specific requirements for the seed you are planting. If it says to put the seeds in light, you can place them in a sunny window, or put fluorescent lights above the container. Check the seeds daily to make sure they do not dry out. If you need to rewater them, do it by placing the container in a saucer of water to draw up the water from the bottom.
************************************************************
 As soon as the seeds start sprouting, take the cover off of the container
and put it in a sunny location. They should receive plenty of light at
this time so they do not start stretching out to find light. Water only
from the bottom, as before, and not very often. If the surface of the potting
soil stays constantly moist, the seedlings could get "damping off" disease.
This would cause them to fall over and die.
************************************************************
The leaves that a seedling has when it emerges from the soil are not true leaves. When the seedlings grow a set of true leaves, they are ready for transplanting to a single pot per plant. A good size for the pot is about 2 1/2 or 3 inches. Fill the pot with potting soil and push your finger into the soil leaving a hole for the seedlings. Tease the seedlings apart by pushing a fork into the soil and lifting the seedling gently, keeping as much soil on its roots as possible. Holding the seedling by its leaves, lower the seedling into the hole prepared for it and push the soil around it. Do not bury the stem too deeply, only enough to give it stability.
************************************************************
Water the seedlings immediately, as they can dry out just in the time it takes to transplant them. Place them in a sunny place again, turning the plants every day so that they don't lean.
************************************************************
 When the plants have grown an additional set of leaves, you can start
hardening them off for the outside. To do this, simply place the
pots outside in a sunny, but sheltered location. You do not want the wind
to knock them over. Their stems are still very fragile, and a good wind
can kill them all. Keep them outside for a couple of hours, or until they
look like they are getting stressed. Every day, you can leave them outside
for a little longer until they are used to the sun and a little wind doesn't
knock them over. This will probably take a couple of weeks.
************************************************************
Now, you can plant them in your garden. On any particularly windy or hot day, you might want to protect them by shading them or sheltering them.