
A PIL (Pirch Interpreted Language) is a set of commands that allow you
to manipulate text, protect yourself from flooding, do a channel count or
whatever the writer defines. They are very easy to use and can be alot of fun
too. You can find some great PIL's at The Pil Page but
for now let's learn how to add and use them.


- How To Add A PIL
- First you need to download some :)
-
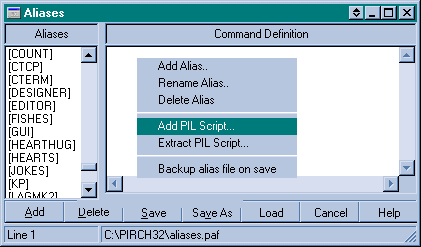
- Open the Aliases Window.
- Right click in the left side; where the Aliases names are.
- From the drop down menu choose ADD Pil Script.
- Find the PIL that you downloaded.
- Click on it.
- Click Open.
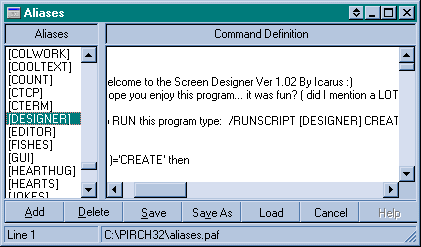
It is now added, you will find it at the bottom of the list
in the Aliases. It will be enclosed in [brackets], like so. When you click on
the PIL name the actual script will appear on the right in the Command
Definition side of the window. For my example I am going to use Screen
Designer by Icarus. Most PIL's have instructions at the beginning. As you can
see below the instructions say you need to type /runscript [designer] create to
run the script. Truthfully, I think that is way too much to have to type just to
run a script, not to mention trying to remember it all! Here is where Aliases
come in.

- Making an Aliases to run a PIL
- A time, finger and memory saver.
- Click Add.
- Type in a shorter name for the PIL (example: des).
- Click Ok.
- The cursor will be in the Command Definition portion of the Aliases
window.
- Here you type /runscript [designer] create.
- Click Save.
Now, when you want to use this PIL you just have to type
/des and it will open up. Much easier, huh? Some PIL's have lines you need to
add to your Events to make them work properly. In this case, set up the PIL as
we did above. Then, working between the Aliases and Events windows copy
and paste the lines in. Don't forget to click save before you close the
Events window or all of your hard work will be for nothing.


 Get your free
homepage today!


