Simple Gold Ring with Caustics Tutorial v1.2.0
2005-03-12
For basic to intermediate Blender users. It will help if you already know the
common Blender keyboard shortcuts and where the common buttons are. (For
example: [F12] to render)
Made with Windows XP (but other OS'es are OK), Blender 2.36, YafRay 0.0.7.
Start Blender.
Delete the default cube.
Make a large ground mesh:
- Add a plane.
- Scale the plane up to about 11 or until it about fills the screen.
- [S], move mouse, LMB when done (repeat this step if necessary)

Make the cross section of the ring mesh:
- Switch to object mode.
- Switch to the side view.
- Make sure NumLock is on (and leave it on for the tutorial).
- Press [3] on the numeric keypad.
- Add a circle mesh.
- Add > Mesh > Circle
- Click OK for 32 vertices.

- Scale the circle smaller in the Y direction so it looks tall and thin.
- [S] for scale, then [Y] to constrain the scaling to the Y axis, move
the mouse, LMC when done
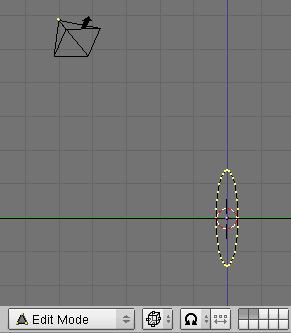
Prepare to spin the cross section:
- Switch to object mode.
- Move the squashed circle away from the center in the direction of the Y
axis.
- [G] for go
- [Y] to constrain movement to the Y axis
- Move the mouse
- The distance you move the circle away from the center will be the
radius of the ring.
- LMC when done

- The 3D cursor should still be in the center. If it is not, then snap it
there.
- LMC in the center of the global grid.
- Switch to top view.
- LMC in the center.
- [Shift]-[S], pick "Cursor -> Grid"
Spin the ring cross section:
- Go to top view.
- Go to edit mode.
- Go to editing buttons.
- [F9] or click the Editing button.

- Look under Mesh Tools,
- Put 360 in Degr.
- [Shift]-LMC on Degr to get a cursor in the Degr box
- Put 32 in Steps.
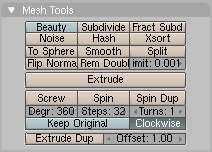
- Click "Spin"
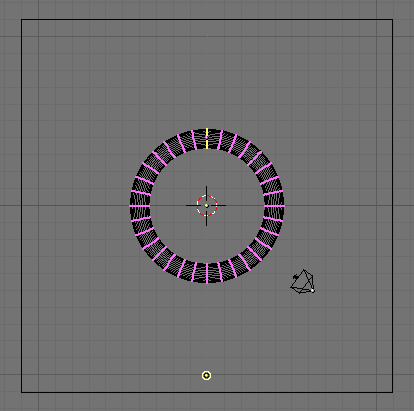
Clean up the ring mesh:
- Remove doubles
- Select all vertices
- Tap [A] until all vertices are yellow
- Click Rem Doubles under Mesh Tools
- Blender says "Removed 32"
- LMC the message to accept
- Reset the center of the ring mesh
- Switch to object mode
- With the ring mesh still selected
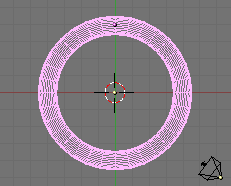
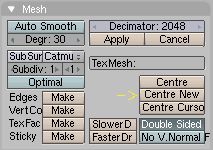
- In Editing buttons under Mesh
- Click "Center New"
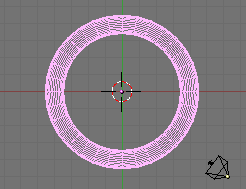
- Feel free to scale the ring mesh to make it look more realistic.
Adjust the ring position so it sits on the ground plane:
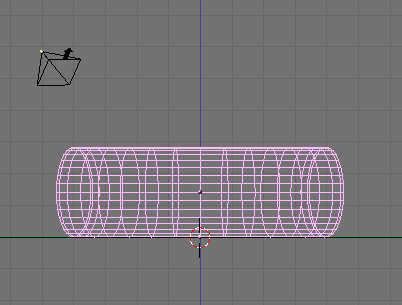
- Go to side view.
- Double-check that you are still in object mode.
- Move the ring up so it just touches the ground plane.
- Double-check that you are still in Ortho mode.
- If not, [5] on numeric keypad
(The grid lines will no longer get closer together as they go off
into the distance.)
- Constrain movement to the Z axis by pressing [G] then [Z]
OR
You may also hold down [Ctrl]-[Shift] as you move the mouse to move in
small steps.
Set up a photon lamp:
- Switch the render engine to YafRay.
- Go to Render buttons on the Scene panel
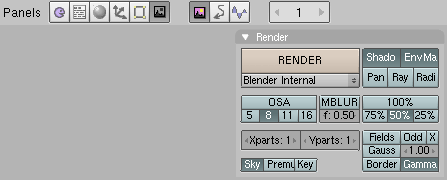
- Click the drop down menu under the big Render button.
- Change it from "Blender Internal" to "YafRay".

- A YafRay tab appears.
- Click on the YafRay tab.
- For now turn off AutoAA and XML
(Auto AA is like OSA: with it off, render time is decreased.
With XML off, the rendering is displayed as it is calculated)

- Make sure you are still in object mode.
- Snap the 3D cursor to the lamp position:
- Select the lamp.
- Press [Shift]-[S]
- Pick "Cursor -> Selection"
- Add a photon lamp
- Add –> Lamp –> Photon lamp
- Point the photon lamp directly at the ring.
- Switch to top view
- Rotate the photon lamp's light cone so it points directly at
the ring.
- Switch to side view
- Rotate the photon lamp's light cone so it points directly at the ring.
- Decrease the photon lamp's angle so it just fits the ring
(this conserves photons)
- Go to Shading Panel then Lamp buttons, Yafray: Shadow and
Photons
- Adjust the Angle setting
- Check top, side, and front views for fit
Tweak the plain lamp:
- Select the plain lamp (not the photon lamp)
- Turn on Ray Shadow for the plain lamp
- Shading Panel, Lamp buttons, Yafray: Shadow and Photons, click
"Ray Shad"
- Increase the plain lamp's energy to about 2.5 or until the scene is bright
enough for you when you render it.
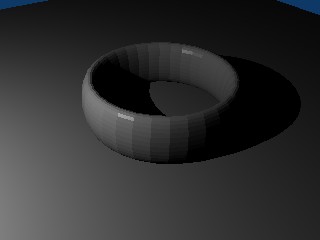
- Play with the Samples and Radius settings for Ray Shadow. They will
soften the shadow edge.
This example is with Samples = 8, Radius = .8
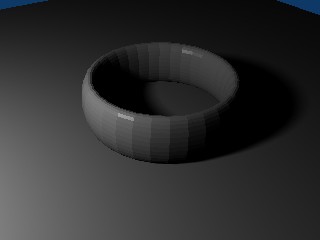
- Feel free to scale the ring mesh so it looks more realistic.
Smooth out the ring mesh:
- In object mode,
- Select the ring mesh
- Go to the Editing panel under Links and Materials.

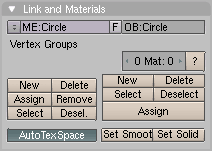
- Click "Set Smooth"
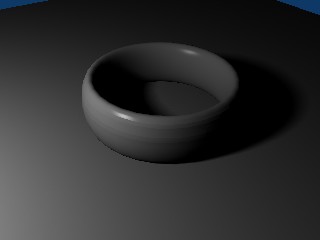
- If you look closely, you can see horizontal banding in the ring.
This is because not all of the surface normals are pointing outside.
To fix this:
- Go to edit mode
- [CTRL]-N
Or
In the menu bar under the 3-D view click Mesh -> Normals ->
Recalculate Outside
- Click on "Recalculate Normals Outside"
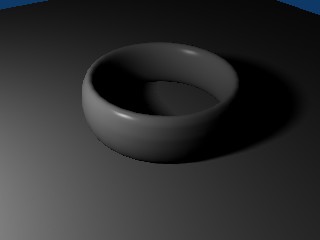
- In the Editing panel under Mesh click "SubSur" to enable
SubSurfacing.

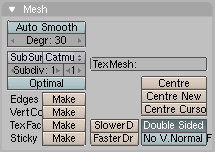

Give the ring mesh appropriate material settings:
- In object mode,
- Select the ring mesh.
- Go to the materials buttons
in Panels -> Shading -> Materials
or
Press [F5]

- Under Material click "Add New"
- Set the diffuse color, "Col", to a very light yellow.
- Set the specular color, "Spe", to a light yellow.
- Set the mirror color, "Mir", to light orange yellow that's more
saturated than the specular color
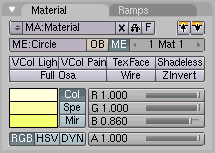
- Feel free to experiment with the colors.
- Go to the Mirror Transparency tab
- Turn on Ray Mirror.
- Slide RayMirror up to about .90.
- Slide IOR to 3.
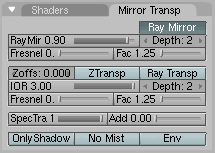
You should now see some caustics in the renders, but they will just be
specks at this point.

- Go to the Shaders Tab
- Change the Specularity, "Spec", to about 1.0
- Change the Hardness, "Hard", to about 500

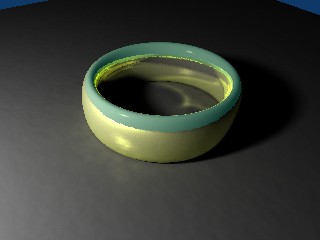
Yes, the top of the ring is green for now. That is because it is
reflecting the blue sky.
Give the ground a material, so we can give it a texture:
- In object mode,
- Select the floor mesh.
- Go to the material buttons.
- Click "Add new"
Make the ground texture:
- Still under the material buttons, under Texture, click "Add new"
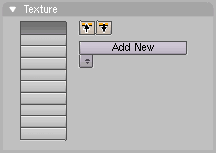
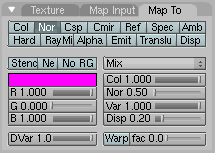
- Click the "Map to" tab that appears.
- Unselect "Col" (for color)
- Select "Nor" (for Normals)
- Keep the Nor slider at .5
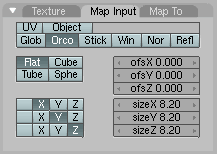
- Click the "Map Input" tab
- Change the SizeX SizeY and SizeZ sliders to about 8.2
- Go to the texture buttons.

- Under texture type pick "Clouds".

- Feel free to play around with the texture settings, but note that Yafray
does not currently support all of the Blender procedural textures.
Add a texture to the ring mesh:
- In object mode,
- Select the ring mesh.
- In material buttons, under Texture, click "Add new"
- Continue as you did for the floor, but set the "Nor" value to
about .1 and the SizeX, Y, and Z to about 15.
Tweak the photon lamp settings:
- In object mode,
- Select the photon lamp.
- Keep right clicking the lamps until you see the light cone of the
photon lamp
- Increase photons to 100,000 for clearer caustics.
- Set the blur to about .25 so the individual photons blur together.
- Set the Photon lamp energy to about 3.
- (Your Angle setting may be different than below)

Add walls and a ceiling by extruding from the ground plane:
- In object mode,
- Select the ground plane.
- Switch to edit mode.
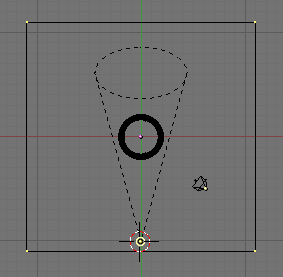
- Switch to top view.
- If the plane does not extend past the lamps and camera, scale it up so it
extends past all other objects
- Switch to side view.
- Extrude the plane up for better reflections.
- Press [E]
- Choose "Region"
- Move the extruded plane up over the lamps.
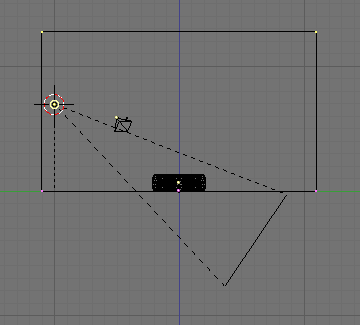
- The ceiling normal will be pointing out, but that does not matter for this
tutorial, only if caustics would fall on the ceiling.
Tweak YafRay settings:
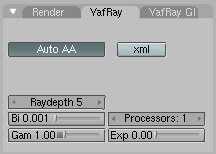
- Go to the Scene panel, Render buttons.

- Go to the YafRay tab.
- Turn AutoAA back on.
- Go to the Render tab.
- Turn on OSA.
- Set OSA to 5 (or more if your computer is fast, or if you are patient).


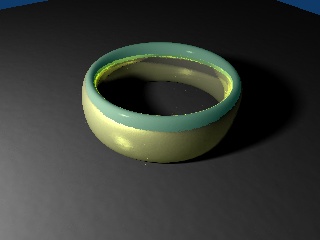
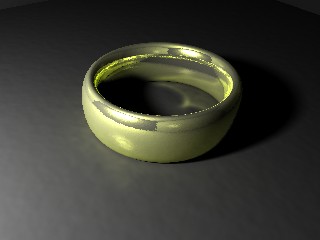
Now fix it up so it looks good to you. Maybe like this?

Share your work on Elysiun.com or Yafray.org
or the Blender forum on
CGTalk.com
If you have any comments, you may post them in the Elysiun
forum thread.


