Main Page
Starting Off
Text and Linking
Images/Pictures
Advanced
Back to Main Site
What's New
Contact Me
Feedback Form
Help Forum


|
The advanced portion will deal with the toolbar:

This will probably be the biggest section on this site, as there are tons of add-ons to go over. To get to the add-ons pop up box, click on that button on the toolbar. (Note: There are shortcuts to these add-ons by selecting Insert on the menu, and navigating the menus.)
The first section on the pop-up box will be "Basics":
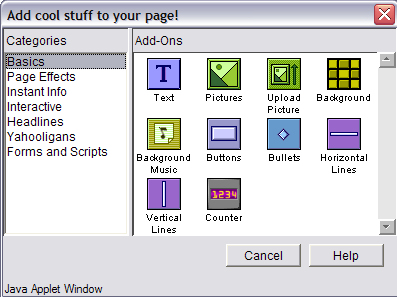
If you notice, this offers a third way do do some things such as pictures/images, uploading pictures, background, and text. You can also do the following:
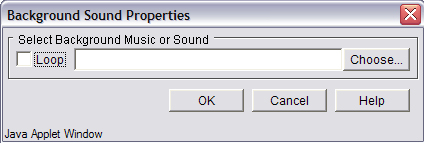
- Background music - This lets you place a midi or wav sound file to play on your page. The following box will pop up:
Click the "Choose" button to select a file on your computer. You can check the "Loop" box to make the music play over, and over, and over... Click the OK button when you're done.
- Buttons - This lets you place a button on your page. The following box pops up:
This works exactly like the pictures feature. You can learn how to do this here.
- Bullets - Lets you have decorative bullets to use before headings and text. Again, this works exactly like the pictures feature.
- Horizontal Lines - Again, works exactly like the pictures tool.
- Vertical Lines - Yet again, check out the pictures tool.
- Counter - Lets you add a counter to keep track of how many people are looking at your page. When you select this, the counter is automatically placed on the page. To modify it, double-click on the counter object, and the following box will pop up:
Use the radio buttons along the left side of the window to select which style of counter you like. You are also able to edit the number color, background color, and size of the counter. You can also specify how many digits will be visible.
The next section of add-ons is "Page Effects". For all of these, you cannot see the effect while editing, you would have to load it into a browser to preview. Here's the box:
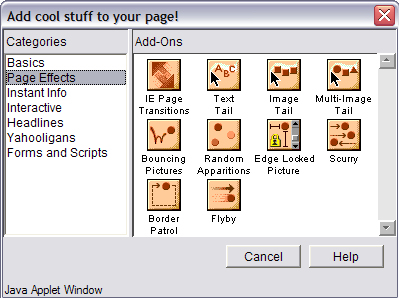
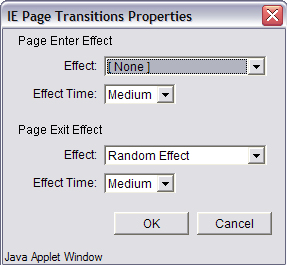
- IE Page Transitions - This lets you have effects when you load and leave the page. This box will come up to let you modify:
These effects will only happen for visitors to your site who have Internet Explorer. These are the effects: Random Effect, Blend, Box In, Box Out, Circle In, Circle Out, Wipe Up, Wipe Down, Wipe Left, Wipe Right, Vertical Blinds, Horizontal Blinds, Checkerboard Across, Checkerboard Down, Random Dissolve, Split Vertical In, Split Vertical Out, Split Horizotal In, Split Horizontal Out, Strips Left Up, Strips Left Down, Strips Right Up, Strips Right Down, Random Bars Horizontal, and Random Bars Vertical. There are a lot here, so I will not go over them. Just go in there and try out the different effects! You can choose one for when the page loads, and a different for when the visitor leaves your page. Click OK when you're done.
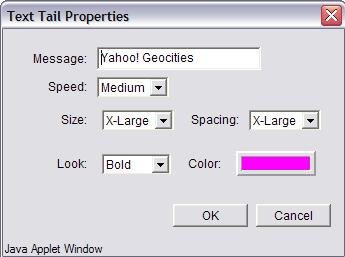
- Text Tail - This effect involves a line of text that follows the "mouse". Here's the box to modify:
You can change the words that are "following", and other various characteristics of the text.
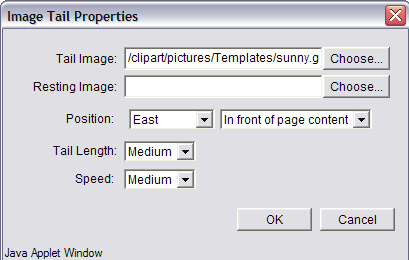
- Image Tail - This effect involves an image that follows the "mouse". Here's the box to modify:
This will let you select the image, plus other characteristics.
- Multi-Image Tail - This effect is exactly like the regular image tail, but instead you can have a bunch of images. Some people like to have a bunch of mini images, all the same, like a bunch of hearts or flowers. So you would place the same image in multiple times.
- Bouncing Pictures - Same set-up as the image tail, except the the image bounces around.
The rest of these I'll let you find out for yourself! Enjoy.
The next section of add-ons is "Instant Info". Here's the box:
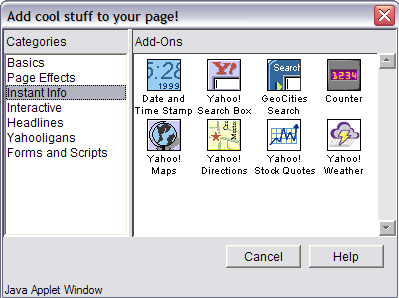
These tools let you do various things like add a Yahoo! search box on your site, or the counter from the other section, and other various Yahoo! related utilities. Some can be customized, some cannot.
The next section of add-ons is "Interactive". Here's the box:
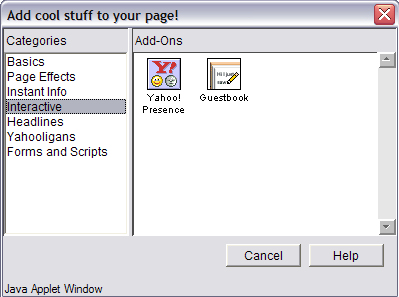
- Yahoo! Presence - This places an indicator on your page that lets visitors know when you are online so they can instant message you. You can modify the size for this.
- Guestbook - This gives you a guestbook for visitors to sign. Selecting this automatically places "read" and "sign" buttons on your page. Then it guides you through the guestbook wizard. I will not go over that in here, it's pretty easy to follow. But, this will end up creating two more page files in your folder for the actual guestbook sign page and entry page.
The next section of add-ons is "Headlines". Here's the box:
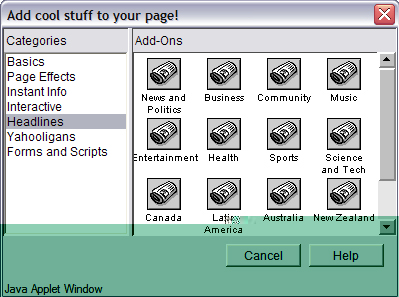
These buttons include many different news feeds you can place on your page. They are live feeds, and will update automatically based on whatever the current news is. You can choose ones that relate to your site (i.e. if you have a celebrity site, you might want the "entertainment" feed on your page.
The next section of add-ons is "Yahooligans". Here's the box:
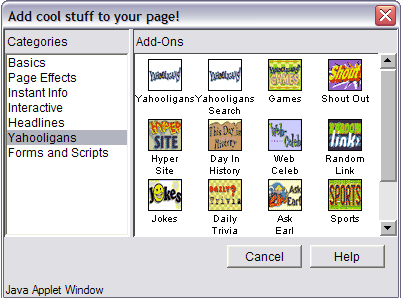
These buttons are geared towards kids, and are mostly link buttons to sections on the Yahooligans site. There are also a few utilities.
The next section of add-ons is "Forms and Scripts". Here's the box:
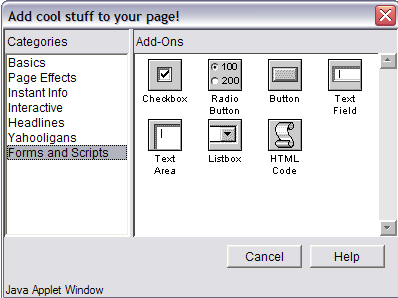
Most of this section is helpful if you want to place a fill-out form on your site. (i.e. for feedback, or to contact you.) These fill out forms would set up to email you directly with the results. These buttons are shortcuts to the form tools.
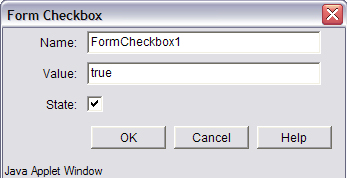
- Check Box - Checkboxes are a way on a form for a visitor to state multiple choice. You can put a checkbox next to text boxes. Like you can ask "Which flavors of ice cream do you like?". Here's the box to modify:
In the "name" field, type in something discriptive for you. This will not show on the form, but will show in the email sent to you so you know what they chose. For my example above, the name for all checkboxes under this subject might be "icecream". The value field will be what the specific flavor is (i.e. chocolate, vanilla, moose tracks, etc.) If you check the box next to "state", this will precheck some for you.
- Radio Buttons - These are simlar to checkboxes, but a visitor can only select one. The box is done the same way, with the "name" being discriptive of the overall question, and the "value" being the choice. And, again, you can check the box next to "state", this will pre-select one for you.
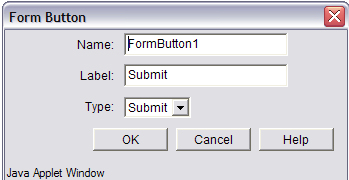
- Form Button - You should be using one button to send the form, and one so the visitor can clear it if they make a mistake.
The "name" can be whatever you want, but to make it easier you should type "submit" for the send button, and "reset" for the clear button. The "label" is what's going to actually display on the button. The "type" lets you select whether it's a "submit" or "reset" button.
- Text Field - This is when you want a visitor to be able to type in text (i.e. their name, or email address.) In the pop-up box, you can type pre-filled in text if you'd like. If you check the box that says "password" it will encrypt (star out -> *****) the text when the visitor types it in. You can also limit how much text someone can type in. The "name" lets you specify something that will display when it's emailed so that you know what they typed.
- Text Area - This provided a larger space, such as for comments, that a visitor can type in. Similar to the text field, you can pre-fill in text.
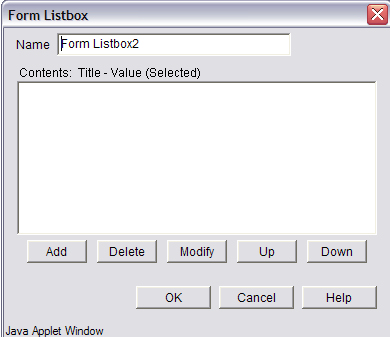
- List Box - This lets you place a dropdown box on your page. Here's the pop-up box:
When you click the "add" button, it brings up a box similar to the one for radio buttons and checkboxes. The "name" will be related to the question, and the "value" will be what will display on the drop down box. Once you add a few, you can delete and modify them, as well as change the order they will appear.
The last one not related to forms is the HTML script button. If you were given code by someone to place on your page, this is the button to use to freely type in HTML code.
|


