.
.
Back to aircraft tutorial
.
Before you start on the textures, you need to design the model mesh so that the textures won't stretch and warp when they are applied. Notice on the Spitfire below, that the top front of the fuselage has been made as a separate piece. If we didn't do this, the side texture would be stretched across the nose of the plane.

When the mesh is done, I render each piece against a black background. Paint each piece pure white with the Ambient setting at 100% so that there aren't any shadows. In the image below, the rudder was made as a separate piece, so I gave it a different color. It is easier to make the rudder texture along with the fuselage texture. When the texture is done, we will Crop the image into two separate textures; one for the fuselage and one for the rudder.
Load the image into your paint program and Crop it so that the piece fills the image. I usually make the textures for the fuselage and the wing about 2000 pixels wide.
 Pic. A
Then I take the 3-view line drawing and Crop it and Resize it so that it is the same size as the above image. I use this image as a reference for drawing all of the panel lines and rivets.
 Pic. B
If I can find a color side-view in a book, I scan it and resize it like the others. I only use this as a reference, not as the actual texture.
 Pic. C
You'll need a good paint program that uses Layers. I use Corel PhotoPaint, but you can also use Paint Shop Pro or Adobe Photoshop. Start a new image 2000 pixels wide, then add the 3 images above as separate layers. Be sure that they are all aligned properly with each other.
When I create the textures, I put each color on a separate layer. Each of the insignia and letters goes on a separate layer. Some of my textures may have 20 or more layers. You will need a lot of RAM to handle this many layers. I've got 128MB right now, but I plan to increase it to 256 soon.
To create the dirt, grime, and chipped paint, use the Brush Texture feature in your paint program. I put each of them on a separate layer. For the dark grimy layer, I usually use the Merge: Multiply mode.

You can create your own brush textures. You can use photos of scratched and rusty things. Convert them to grayscale and adjust the Contrast and Brightness settings so that they look like the pictures below.


You can download these 2 images and use them yourself.
Once you are done, delete the 3 reference layers (pics A,B, and C) and then combine the remaining layers. Be sure to save a copy of the original Photopaint (or Photoshop) file with all of the different layers in it.
To create the top (nose) of the fuselage, I first create the left and right side textures. I apply them to the model and then render a top view. I use this as a reference so that I can see where the camoflage pattern needs to be on the top.

This is what the top texture looks like.

To create the Bump maps, delete all of the layers except the one you made with the panel lines. Fill the background with gray and then combine the layers.

In order to apply the textures to your model, you will need to set the UV mapping coordinates for each piece of the mesh. I don't know which 3D program you are using, but it should have some way of doing this. I use the Planar method of applying textures for the wings, fuselage, and the horizontal tail.
If the object is shaped like a cylinder, I will use the Cylindrical method. Creating a cylindrical texture is different than the method I described above.

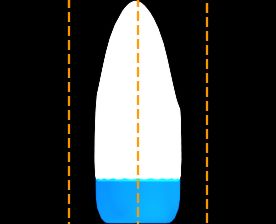
Render a top view of the part the same way you did with the fuselage.

After you have Cropped it, resize the image by multiplying the width by 3.14 (pi). I add dotted reference lines at the 1/4, 1/2, and 3/4 points.

It is more difficult determining where everything goes on a cylindrical texture. The dotted reference lines should help you. In the image below, notice how the green anti-glare panel extends from the 1/2 to 3/4 lines.

Back to aircraft tutorial

 Pic. A
 Pic. B
 Pic. C


