 Once
you have downloaded the program, simply create a new folder for it somewhere
in your PSP folder, or any other folder for that matter. Name the folder
DICER. Unzip the program into that folder. Once you have done
this, double click on Dicer.exe. The image to your left will appear.
 Hit
File --> Open Image. Open the image named men1.jpg from the folder
that you unzipped the menu files to. Here, my files were stored in
F:\Aolpress\Navigar\
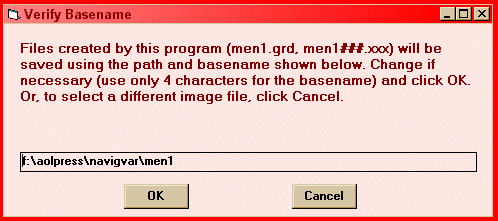
After you open your image, the screen to your left will appear. This is how your images will be named once you cut them up. They will begin with the first four (4) letters of the image name followed by 000.jpg, 001.jg, 002.jpg, etc. Hit OK.
 STEP
2: Using your mouse, a right click makes a horizontal line (----------)
a left click makes a vertical line ( | ). In this exercise, we want
to make horizontal lines, so we will be RIGHT CLICKING on our mouse. Click
as I have here. If you mess up your click and place it too far into the image,
simply put your mouse over the blue triangle at the end of the messed up
line. A no symbol will appear (the circle with the slash through it).
Click your mouse on the Triangle, the line disappears and you can redo
it. Keep in mind when creating your image that you will need room between
the clickable parts, otherwise, you will need to open the menu images generated
by this program in your graphics editor and piece them together. Once
you have finished your "dicing", hit File --> Process Image.
 Ok,
now for our second image. Repeat STEP 1 above as
far as loading the image. Except, load men2.jpg. This is our
second, or rollover image. Make sure the Verify Basename says (men2.grd,
men2###.xxx) Hit OK.
 Here,
since we already diced up our first image, and we want these ones to fit
in perfectly, we select File --> Load Grid, and select men1.grd from the
popup menu that appears. It will look like this one to your left.
Hit OK.
 Now,
this grid of the first image will appear on your second. This is the
easy part. Just hit File --> Process image. Now, you are done!
You will have PERFECT Rollover menus and images with no pain and
frustration of trying to cut everything exact and piecing it together.