 Among
the many new features added in PowerBuilder 6, the Datawindow buttons are probably
the ones least talked about. However, the Datawindow buttons coupled with the
power and flexibility of the Datawindow form a potent combination which can
introduce a whole new user interface paradigm.
Datawindow buttons are the latest addition
to the objects that can be placed on a datawindow. To place a button on a datawindow,
in the datawindow painter choose from the drop down toolbar. The properties of a datawindow button are similar
to those of other datawindow objects including support for conditional attributes.
Datawindow buttons can also display pictures.
PowerBuilder 6 provides two types of datawindow buttons-
- Buttons with predefined actions like Insert, Delete, Save, Save As etc.
- Buttons with user defined actions
The predefined buttons do make things extremely easy and simple, however I
doubt if they will be used widely. This is because most PowerBuilder development
today uses class libraries and frameworks like the PFC. Most of these frameworks
incorporate 'hooks' in their code for developers to code validations and other
application specific code. Ex. a reinsert event or a presave event. Such coding
practices also enforce a standard style of coding. Since the predefined datawindow
buttons will bypass the framework code, it is unlikely that a development team
would want to use it at the cost of sacrificing the benefits of a framework.
Datawindow buttons with user defined action allow the developer to handle
the action to be performed. For this the developer must code the 'buttonclicked'
event of the datawindow. The arguments to the buttonclicked event provide the
information about which button was clicked.
The user defined buttons present a lot of possibilities. Here are nine COOL
ways to use the new datawindow buttons.....
Download:
The prototype application. Click here.
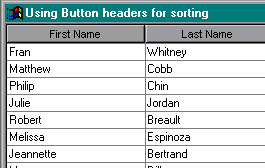 1.
Header Sorting
Clicking on the column sorts the datawindow by that column,
similar to a listview.
 2.
Open File Dialog
Clicking on the button open the windows Open
file dialog for selecting a file and associating it with the record.
3.
Edit File
Clicking on the button opens the file in the associated application
for editing.
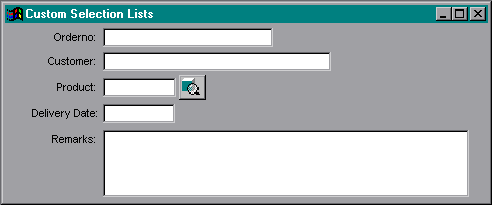 4.
Custom Selection List
Clicking on the button opens a response window from which the user can choose
a record for the field.
 5.
More Info
Clicking on the button displays a drop down with more info about the current
row.
6.
Row operations
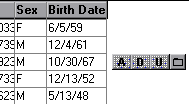
Buttons with options for operating on the current row. The buttons are visible
only for the current row. This is achieved by using the conditional attributes.
7.
Drop Down Menu
Clicking on the button displays a menu with more options.
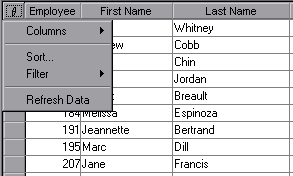 8.
Corner Menu
The button is placed in the top left hand corner. Clicking on the button displays
a menu with options which can be applied to the entire datawindow.
 9.
Extended Entry
Clicking on the button open a response which allows the user to input additional
optional data.
Download:
The prototype application. Click here.
Jiggy,
07 June 1998
 Among
the many new features added in PowerBuilder 6, the Datawindow buttons are probably
the ones least talked about. However, the Datawindow buttons coupled with the
power and flexibility of the Datawindow form a potent combination which can
introduce a whole new user interface paradigm.
  1.
Header Sorting
 2.
Open File Dialog
 4.
Custom Selection List
 5.
More Info
 8.
Corner Menu
 9.
Extended Entry