|
Tip supplied
by Rick Nelson
(Spamola)
 Open a new RGB image. Type your text in black on a new layer. Open a new RGB image. Type your text in black on a new layer.

 In the
channels palette, drag one of the channels to the "new channel"
icon. In the
channels palette, drag one of the channels to the "new channel"
icon.
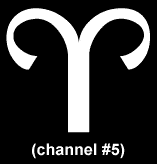
 This will create channel 4. Duplicate channel four to make channel
5. Invert channel 5 (ctrl/cmd+i) so it appears as white text on a black
background.
 Make
channel 5 active. Now load channel 5 as a new selection. To do this, Make
channel 5 active. Now load channel 5 as a new selection. To do this,
 you can
either hit select/new selection and choose channel 5 from the pull
down menu or you can save some hassle and hold the ctrl/cmd key and click
on channel 5. you can
either hit select/new selection and choose channel 5 from the pull
down menu or you can save some hassle and hold the ctrl/cmd key and click
on channel 5.

 Now
you have something that looks like the above image with a selection border Now
you have something that looks like the above image with a selection border
 (marching ants) around your text. Invert the selection (ctrl/cmd+shift+i)
so that it borders the whole image as well as your selection. I can't get
the selection border with my screen capture, so you'll have to use your
imagination.
 Tip
for new users: Tip
for new users:

 Now
you need to get a nice fade on your text that starts with white Now
you need to get a nice fade on your text that starts with white
 on the inside and
fades to a dark gray. There's several ways to do this with photoshops
native tools as well as third party plugin filters (KPT gradient designer
set to circular shapeburst). To keep things simple, first make sure
your background color is black (keystroke d, then x). Feather the selection
(select/feather) by five pixels and hit delete.

(Still a little too light around the edges...hit delete once more.)

(Perfect!)
 We're done playing
with the channels. Go back to the layers palette and We're done playing
with the channels. Go back to the layers palette and
 select a new layer. Hit ctrl/cmd+d to make sure nothing is selected. Fill it
with something...anything! You can use a pattern, solid fill, gradient, image
or whatever you want.
 You'll
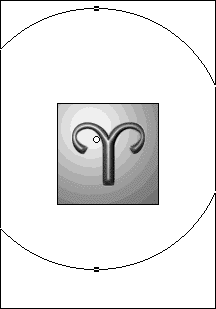
be using the "lighting effects" filter to create the beveled
look. If you You'll
be using the "lighting effects" filter to create the beveled
look. If you
 haven't
worked much with lighting effects, don't get frustrated
and give up. Once you learn how to use it, you'll find it is one of the
most useful filters for all kinds of text effects. haven't
worked much with lighting effects, don't get frustrated
and give up. Once you learn how to use it, you'll find it is one of the
most useful filters for all kinds of text effects.
 Tip
for new users: Tip
for new users:
 . .
 After
filling a new layer, open the "lighting effects" menu After
filling a new layer, open the "lighting effects" menu
 (filter/render/lighting effects).
If I remember correctly, "lighting effects" is the
only thing in Photoshop that uses floating point math to create true 3D
effects. It uses a grayscale texture channel to determine what is "high"
or "low" depending on the brightness of each pixel.
 We'll use a single white
light coming from the upper left side. For the light We'll use a single white
light coming from the upper left side. For the light
 type and
properties, I used the following settings: type and
properties, I used the following settings:
Light
type: Omni
Intensity: 20
Gloss: 0
Material: 0
Exposure: 0
Ambience: 0
Texture Channel: #5
White is high

 You'll
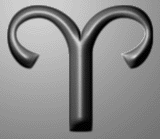
probably have some horrible banding. I got rid of it (much to my surprize) You'll
probably have some horrible banding. I got rid of it (much to my surprize)
 by converting the image to a 64 color indexed mode with difusion dithering.

 Remember
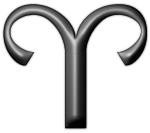
channel 4? You can load that as a new selection, feather it by Remember
channel 4? You can load that as a new selection, feather it by
 one pixel,
and hit delete to remove the background. one pixel,
and hit delete to remove the background.

Good
luck!
|


