
 |
Thanks to Jeffrey Shultz the author of this article.
|
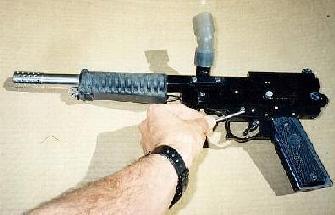
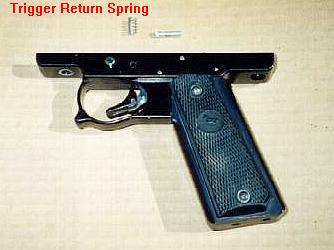
First, remove the trigger frame assembly from the rest of the gun. Next, locate the silver pin that the trigger rotates around. This should be the pin directly to the rear of the safety. |
|
Using a small nail or allen wrench, carefully tap the pin out one side of the gun. This will allow the trigger to move around freely. There is no need to take the trigger out completely, just move it out of the way. I have received quite a few messages from people saying that the pin is very tight and will not come out, even with a lot of pounding. This seems to be prevalent in the newer Spyders. The pin has grooves on one side to hold it in tightly. You must push the grooved side out first, or you may damage the frame. The groves are usually on the right side of the pin (looking down from the top of the frame), so push the right side out first. If you don't see the groves, stop and push the pin the other way! |
|
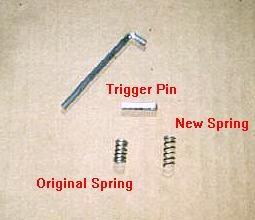
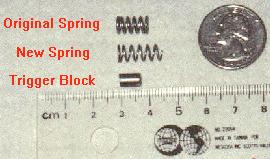
The objective by removing the trigger pin is to get at the trigger return spring. This spring controls the tension on the trigger. By replacing this spring with a slightly softer one, the trigger pull can be lightened considerably. Just be careful not to go too light, or the trigger will feel soft and mushy. Most hardware stores will have a selection of small springs. Take the original one with you to help get the right size. An alternative way to make the spring lighter is to carefully cut sections off the spring. Start with 1/4 loop sections and work slowly. You do not want to cut too much off the spring or you will ruin it. Note: Because cutting the original spring is a permanent modification, I recommend replacing it with a lighter spring. |
|
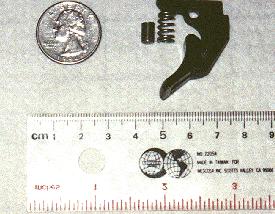
The second part is to put a trigger block in place so that the trigger can only move just far enough to fire the gun. In the stock setup, the trigger can be pulled farther than is necessary to fire. For example, when you pull the trigger slowly, you will notice that at the point the gun fires, the trigger is not all the way back. In fact, you can still pull the trigger another 1/8 inch or so before it finally stops. With the trigger block in place, now the trigger will only go just far enough to fire. All that extra travel wastes time, and slows down your rate of fire. |
|
The way
to stop this is to put a short piece of music wire down inside the middle
of the spring. You can find music wire at any good craft or hobby store.
It comes in various diameters, and usually in 2-3 ft lengths. Music wire
is very hard, so to cut it you really need a strong pair of wire cutters,
or better yet a Dremel Tool. If you can't find music wire, a wood dowel
or a regular metal nail of the same size can be used instead.
This wire needs to have an outside diameter of about 4-5mm (small enough so that the spring can easily slide around the wire). The idea is to cut the music wire a bit long, typically around 10mm to start with, then slowly trim the length down to the point that when the trigger is pulled far enough to fire the gun, the trigger is resting on top of the music wire, leaving very little excess travel. Once the trigger block is in place and the softer spring installed, you will find your Spyder is capable of firing a whole lot faster due to the decreased trigger movement. This also helps to eliminate short stroking. |
One final note: Removing the trigger pin has been a problem for quite a few people, especially on the new Spyders. If you are pounding on the pin and it is not coming out, then I don't know what else to tell you. The pin will come out, but you don't want to break the frame in the process. Most of the Spyders need the pin pushed out to the right (push on the side with the printing), but some newer Spyders need to be pushed out the other way. All I can tell you is to take it slow and don't break anything in the process.
Good luck and remember I am not responsible for any problems that occur.
Last Updated: August 16, 2001