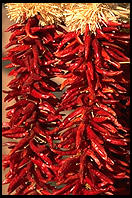
HOW TO MAKE A CHILI PEPPER RISTRA

I took a class in making a chili ristra during this summer's Chili Cheese Festival in Roswell. It was a fun class and when I was done, I had a beautiful ristra to hang outside my house. The class was about 2 hours long and then it took me another 2 hours to complete my ristra. Your time will depend on how big you want your ristra to be.
The course was given by the New Mexico State University Chaves County Extension Home Economist, Charlette Collins. It was easy to do - even for an amateur like me!
MATERIALS NEEDED:
3/4 to 1 bushel of fresh red chili peppers
light-weight cotton string cut in 5 foot lengths
1 coat hanger (untwisted) or bailing wire or twine
DIRECTIONS:
- Begin by tying clusters of three chilis on the lightweight string. To tie the clusters, hold three chilis by their stems and wrap the string around the stems twice. Bring the string upward between two of the chilis and pull tight cutting into the stems slightly. Loop the string around your hand and turn it so that you place the loop over the ends of the chili stems and the free end is beneath the string attached to the cluster (half-hitch). Pull tightly.
- Continue making clusters about every three inches on the string. Several 5 foot lengths of string will be easier to work with than one long piece. Continue until all the chili peppers have been used. Note: Do not use any peppers with bad spots.
- Suspend the wire or coat hanger from a nail in a rafter or a door knob or some other convenient place. Make a loop in the free end of the wire to prevent the clusters from slipping off. Some people use a wooden dowell at the end to keep the chilis in place.
- Starting with the first three chilis on the end of one string, braid the chilis around the wire. Place the cluster so that the chilis are on one side of the wire and the string holding the stems together is on the other, and twist two of the chilis in a braid. The process is similar to braiding a child's hair - the wire serves as one strand and two of the chili stems in the cluster serve as the other two.
- As the chili clusters are braided onto the wire, push them down in the center to ensure a tight wrap. Position the chilis in different directions on the wire for a balanced look. If this is not done, empty spaces may develop along one side of the ristra. Continue braiding until all the chilis have been used. Any excess string between the clusters will be hidden inside the ristra.
- You may add a finishing touch with corn husks or ribbon.
- Now that you have your ristra, hang it outside in full sun on a clothesline or an outdoor rafter to dry. If you do not do this, the chilis will turn moldy and rot. They will lose most of their weight during the drying process.
Your new ristra can now be hung indoors or outdoors as a decoration. The dried chili peppers can be broken off and used in cooking. Do not spray the chilis with lacquer or any similar spray that will give it a shiny, unnatural sheen. This will make it look artificial and make it unfit for use as a food. Dry chili peppers have a natural luster without any from of spray.
Now you have a beautiful chili ristra to use in

Recipes of New Mexico!


![]()

![]()