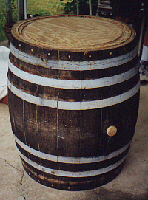
 The original ends of the barrel are smaller than a usual drumhead,
so cut the ends off at a point where the diameter is wider.
Inject glue between the barrel staves and allow to dry.
To reinforce the structure and ensure that the drum stays round,
nail 3/4 inch-thick plywood inserts into both ends.
 |
Use a power router to make a surface on the insert that slopes down toward what will be
the drum hole. One person moves the router, another vacuums
up the sawdust, and a third holds the router pin in the center.
This requires many passes, so everybody has a chance to get
some power tool experience.
Dan, who you last met on my
January Junket to Japan, moves the router,
assisted by two members of PT's youth group, Tanuki Taiko.
The tanuki ("raccoon dog") is a trickster character from
Japanese folk tales.
|
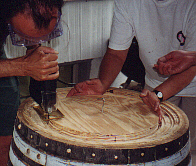 Use a jigsaw to cut out a central drumhole. To demonstrate how precise
the measurements were, June retrieved the cutout she had saved from
the last oh-daiko that was built. It was exactly the same size!
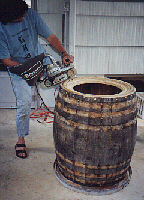 Metal bands wrap around the staves of the barrel. Knock them off with a hammer.
Using a power sander and coarse grit sandpaper, round the ends,
so that the skins don't tear when stretched over the edges.
To get a nice shape, you need to move the sander in a wide, even arc.
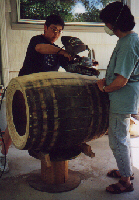 Sand away the weathered wood and make smooth the sides of the barrel.
Do about 1/8 of the circumference at a time, then rotate the barrel.
The barrel finally starts to look like a taiko!
Again, use big, wide movements.
Don't spend too long on one spot, or you will end up with an
asymmetrical taiko!
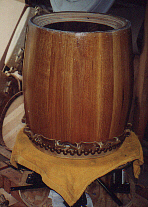 After a second sanding with fine grit sandpaper, varnish the outer surface.
|
 The original ends of the barrel are smaller than a usual drumhead,
so cut the ends off at a point where the diameter is wider.
Inject glue between the barrel staves and allow to dry.
To reinforce the structure and ensure that the drum stays round,
nail 3/4 inch-thick plywood inserts into both ends.

 Use a jigsaw to cut out a central drumhole. To demonstrate how precise
the measurements were, June retrieved the cutout she had saved from
the last oh-daiko that was built. It was exactly the same size!
 Metal bands wrap around the staves of the barrel. Knock them off with a hammer.
Using a power sander and coarse grit sandpaper, round the ends,
so that the skins don't tear when stretched over the edges.
To get a nice shape, you need to move the sander in a wide, even arc.
 Sand away the weathered wood and make smooth the sides of the barrel.
Do about 1/8 of the circumference at a time, then rotate the barrel.
The barrel finally starts to look like a taiko!
Again, use big, wide movements.
Don't spend too long on one spot, or you will end up with an
asymmetrical taiko!
 After a second sanding with fine grit sandpaper, varnish the outer surface.