Where can I get a chastity belt suitable for a male to wear for an extended interval?
Some years ago, I saw a review for a design similar to this.
Shortly after this, it was suggested that I should make one.
This design had a couple features that made it intriguing --
Lack of need for metal working skills, no sharp edges, and inexpensive and readily available components. Another benefit not initially discerned was that as there is little metal (the buckle and eyelets, along with a small padlock), it can be worn while travelling, even through airport security checkpoints.
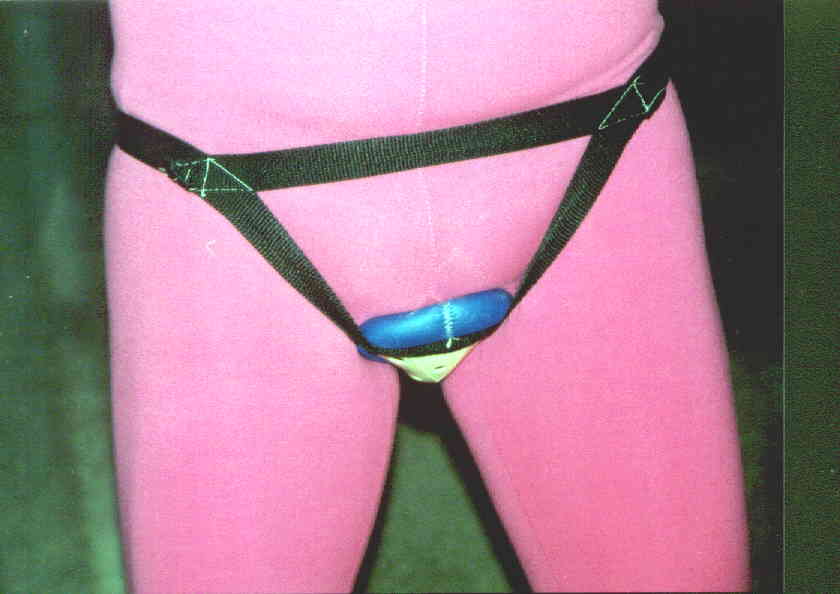
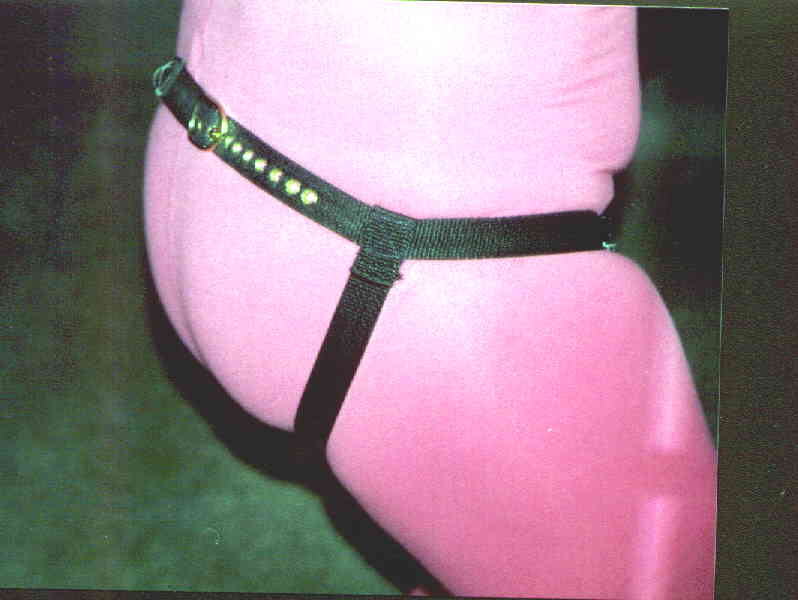
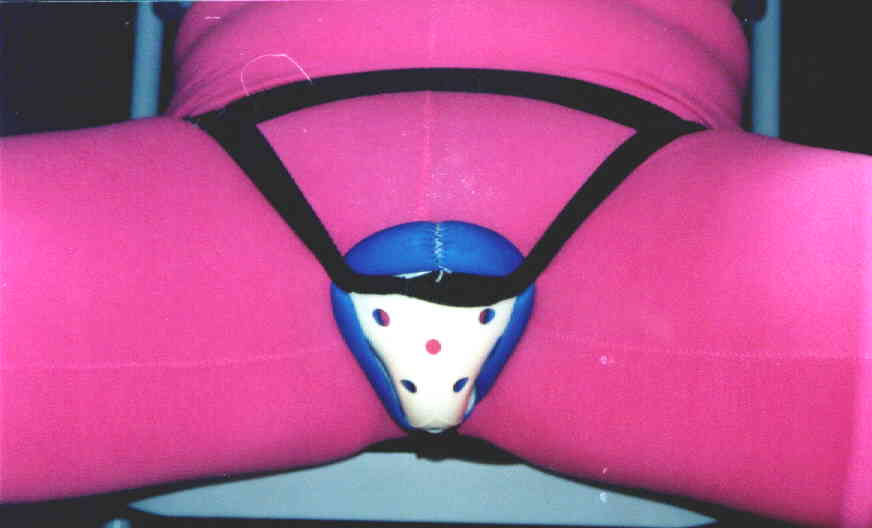
Pictures are said to be worth a thousand words. I don't know how to describe this chastity belt other than show you some pictures. I've avoided offending your sensibilities (and those of the Wal-Mart One Hour Photofinishers) by wearing the belt for these pictures over a pair of exercise leggings. There are four pictures in this section... they display
in a large format, but they are only about 30 Kbytes each, so
download time shouldn't be too bad. This way you can also print them if you
want to use them as guides in duplicating the design.

Here's what you need to make one yourself:
- Fiberglass or nylon plastic athletic supporter protective cup
(referred to hereafter as simply the cup)
- About 3 yards of 1-inch wide nylon strapping
- Buckle to fit this strap
- Eyelet kit (a sewing item used to put metal eyelets into the nylon strap. These may not be needed depending on the strap material and how you punch holes into it.
See the description below.
- Needle and thread suitable for sewing the nylon webbing
- This sketch of the whole project:

I found all these items at my local Wal-Mart, for a total cost of less than US$ 15.00.
Construction steps:
- Carefully remove the urethane plastic padding ring from around the edge of the cup. You'll want to be able to replace this later.
- Drill several small holes (the size of holes in a button)
at the center of each of the curved corners of the cup. I drilled two rows of four holes each in each of the three locations, about 3/16 inch (or 4 mm) apart. Note that the end of the two rows of holes nearest the edge of the cup must be far enough from the cup edge so that the foam pad can be replaced.
- For the waistband, cut a piece of the strapping 16 inches (or 40 cm) longer than needed to reach around the waist of the intended wearer.
- For the cheekstraps, cut a second piece of strapping 4 inches (or 10 cm) longer than the length needed to go from the waist on the left side of the wearer, under the buttocks, and up to the waist on the right side. The extra length will allow folding over the waistband
(li)For the front strap, you will have to find the best length
empirically. You have enough strap left over to do this later.
- Punch a hole at one end of the waist strap for the buckle tang, about 1-1/2 inches (or 3-4 cm) from the end. Attach the buckle and sew the strap back to itself to retain the buckle.
- At the other end of the waist strap, you will eventually need to punch holes and press eyelets into those holes at an appropriate point, which will also need to be determined empirically. A hot nail would be an ideal tool for making these holes. It might be that the fusing effect of the hot nail would eliminate the need for eyelets.
- Measure from just above the intended wearer's penis upward to his waist and then around to the back --

-- to find the point for attaching the waist strap to the wider end of the cup. Ideally, the buckle will end up in the small of the wearer's back. We can always trim excess from the other end if necessary.
- Using heavy nylon or dacron thread (like button thread) sew the waist strap to the wider side of the cup at the two corners of the wider side of the cup, where we drilled holes. Ensure this stitching is strong and secure, in the way you'd sew a button, for example.
- Find the center of the cheekstrap, and sew it similarly to the center of the narrow end of the cup.
- Find a suitable place for one of the waistband eyelets, which will have to be 2 or 3 inches (5-7 cm) looser than a normal belt. Install the eyelet.
- Fasten the waistband around the waist of the intended wearer, and fit the cup so that it will cover the area from just above his penis back towards his anus.

- You can fit the cheekstraps at this time as well.
The previous two pictures should give you an idea of how this should be done.
- After the cheekstraps have been fitted snugly, you will want to fit and attach the front strap to keep the waist straps from being able to be pulled over the intended wearer's hips.
As you can see from the pictures, the cup will be held very
snugly into the wearer's crotch. His testicles will need to be at least partly pressed up into the inguinal canals, and the flaccid penis is pressed back and up. This can be seen in
the immediately preceeding picture, which
gives you a view of this fit. In this position, the belt can be worn for long periods -- I've worn this belt for periods of several days. Normal urination will not harm the cup, but to avoid a mess, the wearer needs to be seated. Careful blotting is helpful as well.
In addition, as you can see  the belt can be worn under normal clothing of either gender presentation. I recommend panties with a "panty liner" over the belt's cup for extra absorbtion.
For security, a small stainless steel or brass padlock can be locked through the eyelet nearest to the buckle. While the wearer could remove the belt by cutting one or more of the straps, such tampering would be quite obvious.


