|
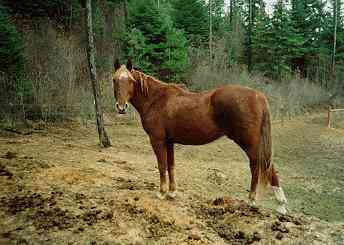
- Willy gave us a gif of his horse Walker, and what I like more that
a horse is more of them.
- We were instructed to learn to use the cloning tool, and he suggested
that we look it up in the Help Menu. -- hehe
- That is one of the things over the years I have never learned to
do on my own. Thanks willy, I did it first this time, and boy what
a difference, I started having results right away.
|
|
|
- First I just played around with the tools, till I started to get
a sense of how they worked.
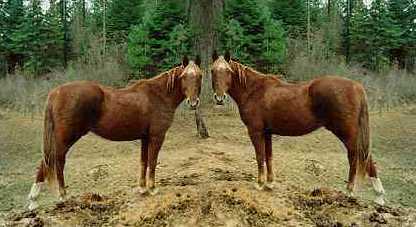
- I decided I wanted to put two horses in the gif so I duplicated
Walker1.gif, and mirrored it so that I would have his clone facing
the opposite direction.
- I tried re sizing the canvas to allow for the extra space needed,
but eventually found it easier to just create a new blank image the
size I wanted, and cut and paste walker1.gif into the larger canvas.
- That wasn't too much of a problem, just had to play a bit with the
different settings to see how they worked, and eventually I selected
the aligned setting, with a large square or round cloning brush, and
duplicated the image on the left.
- It went pretty smooth, except I needed to clean up the seam between
the two images. For this I chose a small round brush, and just blended
in the immediate areas around the seam.
|
|
|

- That was too simple, so I started playing with trying to offset
the two images, placing one below the other to make it look more natural.
Hmmmmmmmmmm started getting a little complex. hehe, and very messy.
The foliage keep bleeding into the horse. Pretty funny looking horse
with evergreens for horse hair.
- After opening and closing multiple copies, messing them up, and
getting frustrated, I went back to Willy's first suggestion -- READ
THE HELP FILE --, and I found something very basic and interesting.
- If you want to restrict the painting of an area, you select it with
a marque. (the selection tool) I used the a combination of the lasso
and the rectangle. The lasso allowed me to get in close to the outline
of the first horse, and prevent bleeding.
- Hey it works. But in using this technique, you get only partial
areas of the original. About 50% of the background was missing above
the second horse, leaving a large rectangular area barren.
- Once again going to various sizes of cloning brushes, and shapes
I copied sections of the background into the barren areas. It is amazing
what you can get away with, with this kind of background. I just moved
it over, and blended bits and pieces here and there, sometimes zooming
in so I could work on small restricted areas.
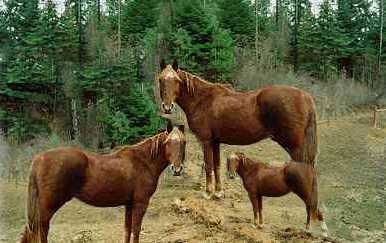
- Hmmmmmmmmm -- not enough. There is nothing quite as beautiful on
a hot summer day out in the country than watching a young colt following
the adults around.
- Another copy -- reduced its size by 30% or so, and proceeded with
much of the same techniques I used for the step above. Played around
with the cleaning up, and here it is.
- Obviously not professional, but it was a great exercise.
- I wasn't planning on posting it as a tutorial, hence I didn't record
the steps I took, and when I wrote it up it is kind of sketchy, and
iffy --
- But the general process is there, and my sense is that every time
I would do it, it would be different anyway.
- I doubt if any one attempt could be duplicated.
- I would love to put him by a pond, and create a reflection in the
water. If you have any ideas for creating water as if in a pond etc.
please let me know
- Thank you Willy, I really enjoyed this one.
|
|


