Color Correction with Layers
If you're unfamiliar with layers, you should probably first take a look at
Layers: Creating a Semi-transparent Tile and
Layers: CoLamanderzing with Blend Modes.
Photographs sometimes come out with either a magenta or a bluish cast. You can use
any of PSP's Color functions -- including, for example, Hue/Saturation/Lightness and Hue Map --
to help correct this. But often you can do your color corrections more easily simply by using
a colored layer.
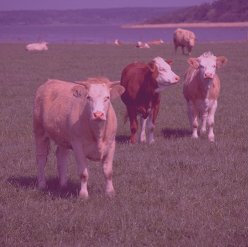
Let's first try correcting this magenta-tinted image:

- Start by adding a new layer to this image. What we're going to do is fill this new
layer with green, which is the complement (or opposite) of magenta on the color wheel.
Hit the "L" key on the keyboard if the Layers palette is not open, and then click the
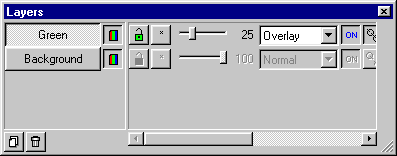
New Layer button on the Layers palette. If you like, you can give the layer a meaningful
name. (I called mine "Green", but "Color Correction" would also be appropriate.)
- Double click the foreground color on the Color palette and then select green on
the Color Picker wheel:

Now choose the Flood Fill tool, with the Fill Style set to Solid Color.
With the new layer the active layer, fill the image with green. At this point
all you'll see is solid green.
- On the Layers palette, adjust the Blend Mode and Opacity of the green layer.
Blend Modes that are good to try here are Overlay, Hard Light, and Soft Light.
If your photo is also overexposed, you might try Multiply or Burn.
If the photo is underexposed, you might try Screen or Dodge.
As for Opacity, you'll probably want to set that fairly low.
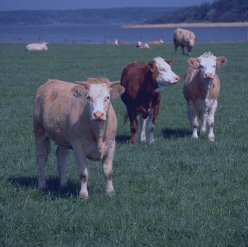
Here's my color corrected version, with Overlay as the Blend Mode and Opacity set to 25:


- And here's an example of a blue-tinted photo:

This time I'll use a goldish yellow (the complement of blue) on the color correction layer:

The Blend Mode here is Overlay, and Opacity is set to 30.
Experiment with the different Blend Modes to see what works best for your particular image.
If you want to save a web-ready copy, use Save Copy As to save the image as a JPEG.
Remember that JPEG compression is lossy, though, so if you want to save the image and then
do more corrections or other image editing on it later on, save the image in PSP format, which
uses lossless compression.
You can also use this method on a selected area of your image instead of the entire image.
This might be useful for correcting red-eye, for example.
Back
Copyright ©2000 Lamander
All rights reserved
|
