Making Tubes
In this tutorial we'll make a tube with three tube elements.
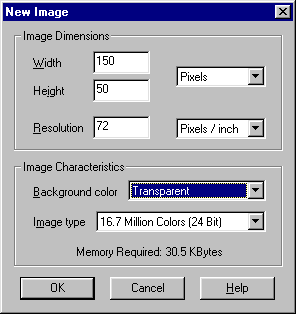
- Open a new 16-million color image with a transparent background. Make this
image just large enough to accommodate your tube elements. In this example,
I have three tube elements that are each just under 50x50 pixels, so I've
opened a 150x50 pixel image.

- To help you place your tube elements correctly, display grid lines by choosing
View | Grid (or just press Ctrl+Alt+G).

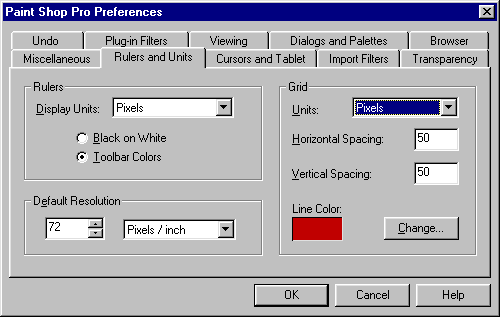
It's probably easiest if you set the grid so that the grid cells are the
same size as your tube cells. Since the tube cells here will be 50x50 pixels,
I've set the grid's horizontal spacing to 50 and the vertical spacing to 50.
If you need to modify your grid spacing, choose File | Preferences | General Program
Preferences and then select the Rulers and Units tab. In the Grid pane, set Units to
Pixels and set the Horizontal and Vertical spacing as appropriate.

- Open the first image that you want to include in your tube. Select the part of
the image that you want in the tube -- remember that you'll want a figure with
transparent areas surrounding it. Then copy the selection to the clipboard by
choosing Edit | Copy (or press Ctrl+C).
- Make the new image active by clicking on its title bar. Then
choose Edit | Paste as New Selection (or press CTRL+E). Drag the selection until
it is positioned in the center of the first cell, then click to anchor the selection
and right-click or choose Selections | None to deselect it.

- Open the next image that you want to add to your tube, and follow the cut and
paste steps above, this time positioning the selection in the second cell
of the tube. Continue in this way until all your tube elements are in place.

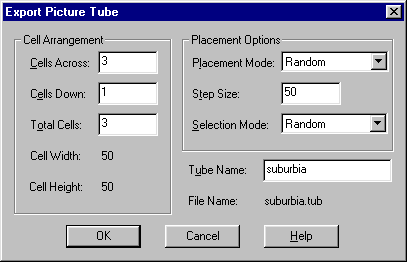
- You're now ready to export your image as a tube. Choose File | Export | Picture Tube.
You'll then see the Export Picture Tube dialog box.

- The first thing to do is to specify the number of Cells Across and the number of Cells Down.
In this example, there's 3 cells across and 1 down. As soon as you finish entering
these numbers, PSP will automatically calculate Total Cells.
- You can leave the default entries for the Placement Options
or modify them as you like. (You can always reset these options later when you
actually use the tube.) The only thing that you must do is enter a name for your tube.
Once you enter a name, click OK and PSP will create your tube and add its name to
the list of available tubes in the Control Palette of the Tubes tool. You don't need
your image file anymore, so you should close it without saving it.
For more information on making and using tubes, see
Hoods' pages on tubes.
She's got lots of information in a great presentation, and some wonderful tubes for download!
Back
Copyright ©2000 Lamander
All rights reserved
|