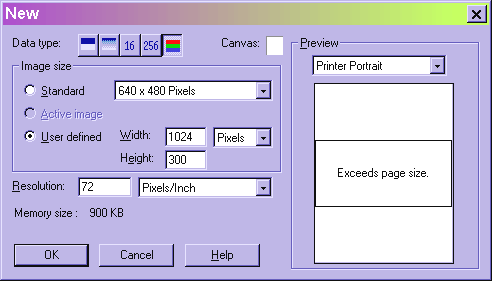
One of the handiest tools is the fill tool. Actually there are two fill tools, down at the bottom of the left hand tool bar is the fill tool. With it you can do a bucket fill, which is a one color fill. However, there is a better way to do one color fills and we'll look at that in part two. First we are going to look at gradient fills. I have selected the linear gradient fill and the Fill method selected at the top is Two-Color. However, I have to put this somewhere so first I have gone to File, New and opened a new canvas. Because I usually make stationery I have started with a 1024 x 300 pixel canvas.
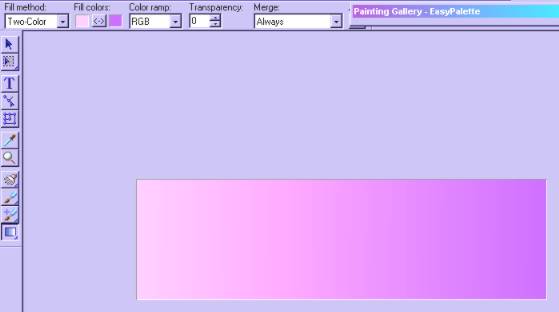
Now with the color picker I am going to select two colors for my gradient. If I were going to paste an image onto this canvas I might use colors out of that image for my gradient. I am picking pink and purple just because I like them. Once you have picked your colors you can switch which is left and right by clicking in between them. To fill the canvas, click and hold down at the left edge of the canvas, continue to hold down while dragging the pointer across to the right edge of the canvas. Let up and there is your gradient.
If you want more of one color than the other you can start or stop at a place other than the edge. If you start to the right of the left edge, your left hand color will fill over to the left hand edge. You can also drag from top to bottom or diagonally, but if you do you will have to do some fiddling to get your panel to tile seamlessly. More about this much later. The pull out bar on this tool will also let you select a rectangular or circular gradient. For these you must start in the middle of where you want the effect to be. To help you do this you can use the ruler which you can select by clicking on the little ruler symbol in the right bottom corner of the screen and selecting Ruler.

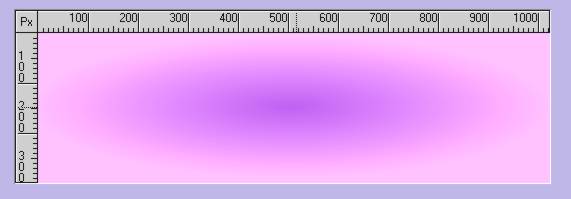
Here is a circular gradient where I started in the center of the canvas. If you look close you can see the little lines at approximately 512 and 150 that follow your pointer to help you line things up.
When saved with compression, gradients tend to separate somewhat into bands instead of being as smooth as they originally appeared. It helps to add about 5% or less of noise under Effects before saving. More about Effects later.
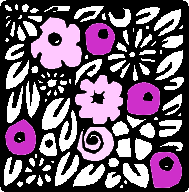
The fill command is on the Edit menu, but it is one of the commands that is used so often that it is easier to use the keyboard Ctrl F command. When filling a lot of small areas with the same color this works very well as you Ctrl F with the left hand, and hit enter or click the mouse with your right hand. Below is an example of where you might use this technique to color black and white clipart. I have used the Magic Wand selection tool on a few of the flowers already and have filled them with a couple of colors.
When you hit Ctrl F the screen below comes up. There are a lot of choices there. The top row contains a number of blocks for which colors can be selecting with the right click menu. You can select a different block when you change colors, then the previous colors are preserved for you to go back to without having to select them again. The block which has a black edge around it is the one that is selected. You can also choose pure white or black. Textures are another option. The Magic Texture and Natural Texture libraries come with PhotoImpact. Click on these and browse through the selections, there are a lot of them and as you will see later, you can change the color of any of them after you apply them. This is the Fill Menu in PI 4.
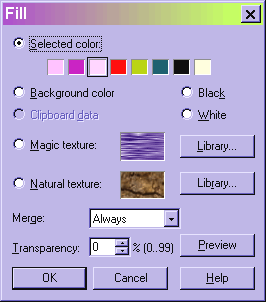
Clipboard data is greyed out here because there is no image on the clipboard, but you can select anything you want to fill with, the Copy command will put it on the clipboard and then you can fill with it. You can select a portion of a picture and use it as is or make it into a tile with a filter, or use a separate texture that you have gotten somewhere. Below is a nice textured tile that makes a lovely background to paste a picture onto. You can right click on this and save it for your use. There are a lot of textures available on the web and some of them are found in perhaps unexpected places. I found a lot of wonderful wood textures at a flooring site.
Another feature of the fill tool is the transparency adjustment. If I were to fill the tile above with the pale yellow on the right end of the colors at 0% transparency, I would just have a flat yellow square. But if I fill it at 60% transparency look what happens. The texture is retained but I have a different colored tile.
You can also fade out an image to use as a background this way. Here is a rose in its original format and then with a white fill at 30% transparency.


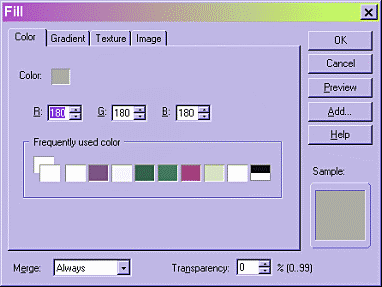
This is the Fill Dialogue box in PI 5. As you can see the Gradient, Texture and Image fills are on separate tabs.
