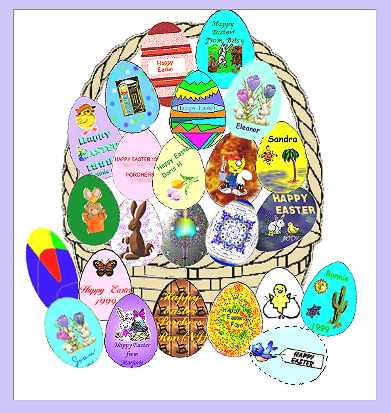
In Selection Tools Part 2 the flower which we selected and then copied and pasted to another canvas became an object. You can also create an object just by right clicking on a selection and choosing Convert to object. Objects are very useful as they can be moved around, resized, flipped, angled, their colors changed, all independent of the rest of the picture. They are pretty much equivalent to the layers in PSP if you are familiar with that program. Here is an example of a very handy use of objects. For one of my favorite newsgroups I put together this Easter basket with eggs that various people made. Each egg is a separate object and as the basket got fuller I could move them around to make them all fit. In order to do this you must save the whole thing as a UFO, Ulead File for Objects. When you reopen a UFO all the objects maintain their separate character and will show the dotted line that means they are selected when you click on them. Here the bluebird egg at the bottom is selected.
Some object are so nice that you may want to use them again and again. You may particularly want to save them if you put a lot of work into cutting them out nicely. You can save them in your Material Gallery's Object Library. To access this, if the Easy Palette bar shown here is not showing, click on the folder icon marked in red.

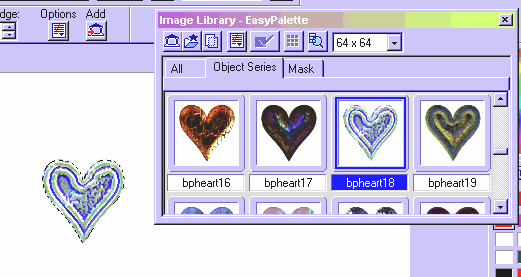
Double click on this bar and the Easy Palette will open up. To Access the Object Library click on the second icon from the left that looks like an open folder with a star coming out, then on the menu select Image Library. There are some stock objects there that come with PI. To use an object, double click on it, hold and drag it onto your canvas. Click once to place it. You can now move it around to where you want it.
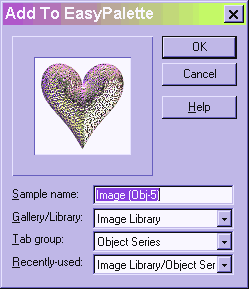
To add your objects to the library in PI 4, right click on a selected object and choose Copy Object to Object Library. Name it in the highlighted area and hit OK. To add an object in PI 5 you must click on the object and drag and drop it on the Easy Palette. The same dialogue box will come up allowing you to choose where to store your image.
Now when you open the object library your object will be there ready to drag and use.
In PI 5 the Easy Palette has a little different layout, the individual libraries are listed on the left and there are more categories. I now have my images in My Library.

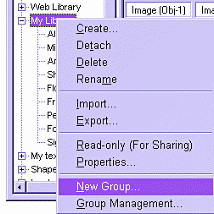
You can easily add categories in your library by right clicking on the library title and selecting New Group. When you collect a lot of objects, it makes it easier to find what you want when you have them categorized.
You may notice that some of the objects that come in the object library contain shadows. I would not recommend saving objects with shadows because they will not look right if placed on a background that is a different color from the one they were made on. You can always add a shadow to an object when you are using it and the shadow will blend in with whatever background you are using.
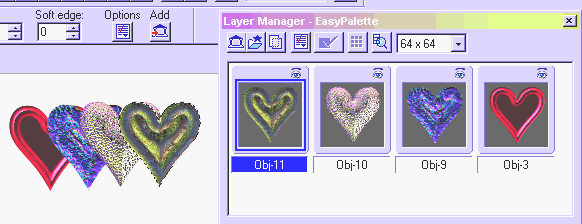
If you click on the third icon from the left on the Easy Palette you will get the Layer Manager. Here I have dragged four hearts from my object library and you can see in the Layer Manager, the latest is on the left and on the canvas it is on top. You can click on and drag the objects in the Layer Manager to change their order. A quick way to bring an object to the top layer is to right click on it, choose duplicate, then delete the original object. The new duplicate will now be on the top layer.
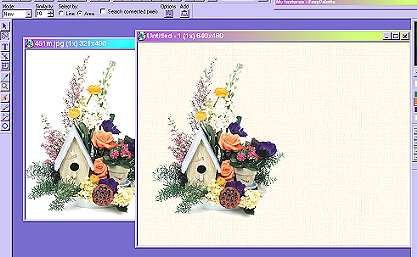
You can also drag an object from one image window to another. Here I have opened a picture of a bouquet and a new blank canvas. If they open in the middle of the window, click the little rectangle in the upper right corner to get them to be separate windows within the PI window.
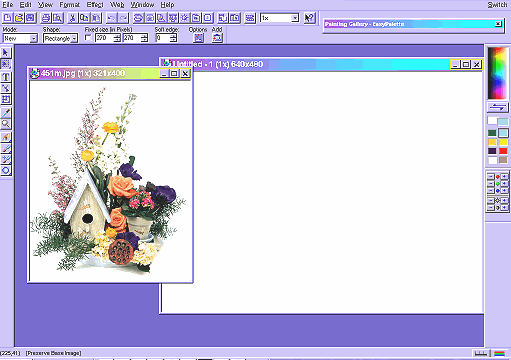
Now I have flood filled the new canvas with a texture, selected the white background on the bouquet with the magic wand, inverted and converted it to an object. I then dragged it from the left window to the right window and dropped it.
