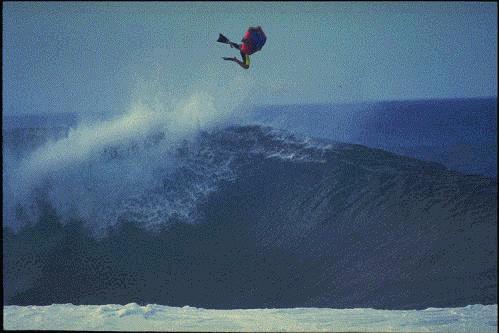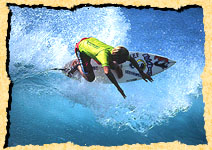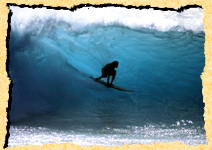

If the surfing learning curve seams a bit too hard in the beginning, riding boogie boards is a great alternative. Tom Morey, a Southern California inventor, came up with the Morey Boogie Board which opened up wave riding to the masses. You just slip on a pair of fins and lay on this two foot Styrofoam board for some serious wave riding thrills without the long learning curve of surfing.
The costs are a bit more reasonable than a surfboard as well. You can be riding and understanding waves in an afternoon.
A good boogie board and set of fins will cost you about £90 to £150 for a new setup, but you can of course have great fun on a £20 board. Used boogie boards can be found for considerably less at some of the local surf shops. The paddle out on a boogie board will also be a lot easier compared to paddling a surfboard, and you will be able to catch a lot more rides faster than if you were learning on a surfboard.
For these reasons, it's no wonder why the sport has grown so fast. This is a great sport that lets anyone experience the thrill of riding waves right away. Even if you are an accomplished surfer, it's great to boogie board at a shore break surf spot or at a break you never surfed before. At these new surf spots, you might be nervous at first to use your surfboard right away because you aren't familiar with the break. The boogie board will be a lot safer and a whole lot of fun in that situation.
Boards
Just what are the various factors that effect the performance of your bodyboard? Listed here are the main features of design with descriptions of the effect they have on the performance of the board. It is worth knowing about and looking at a number of these factors when purchasing a new board.
1. Nose Width
The width of the nose plays a role in water displacement, speed and manoeuvrability. A narrow nose creates more down the line speed whilst a wider nose creates better manoeuvrability and a larger pivot area for spinning. Generally a wider nose board is more suited for prone riding, allowing you to get further up on the board for trimming while a narrower nose is better for dropkneeing when your weight is further back.
2. Nose To Wide Point/Wide Point
Getting these measurements right is essential for rail to rail manoeuvring. Ideally, the wide point should sit just behind your elbows so that water is dispersed behind your initial manoeuvring points; elbows, forearms, hands and head. Having your wide point in front of your elbows will encourage nose diving and spray, hindering your vision.
3. Tail Width
The right tail width is important for ensuring board stability. A wide tail provides more speed and projection whilst a narrower tail provides more manoeuvrability and better tube riding.
4. Length
The taller the rider, the longer the board should be. Ideally the board, when standing upright, should come up to your belly button. If you tend to ride smaller waves then the board can be a little longer while if you ride bigger waves the board can afford to be shorter. Longer boards with more buoyancy tend to suit heavier riders though they can not manoeuvre as tightly.
5. Nose Kick
The nose kick of the board is the rise in angle of the bottom of the board starting about a third of the way down from the nose. The nose kick on a board influences the manoeuvrability and speed of a board. A low kick allows the board to move across the water with the least resistance giving greater speed over the water. A high kick creates more resistance but provides more responsive turns and clears a greater area of the board for spinning.
6. Tail Kick
The greater the tail lift, the slower the board will be. Tail lift stops the flow of water along the rails and over the bottom of the board creating drag on the board. Greater tail lift does however aid in releasing your edge for quicker spins.
7. Rail Configuration
The numbers in the rail configuration refer to the percentage of bottom rail/the percentage of top rail. A 60/40 rail therefore has 60% of the rail on the bottom and 40% on the top while a 50/50 rail has equal amounts of rail on the top and bottom. A 60/40 rail gives better edge control for directional changes while 50/50 rails make movement from rail to rail easier for more responsive turns.
8. Bottom Designs
The bottom design of the board can have a crucial effect on the performance of the board. Different designs effect the wave-holding ability of the board, the speed and the manoeuvrability of the board.
Fins
Fins are one of the most important pieces of equipment in a bodyboarder's arsenal. A good pair of fins can make the difference between an enjoyable session or an irritating painful session.
If a pair of fins is too loose then they will give less power, cause sore feet due to the excessive movement and can come off easily if hit by a wave. If fins are too tight then they will rub causing blisters and can also cause cramps. Remember that fins with larger, stiffer blades will be harder to kick with but give you more propulsion. With these things in mind, it is very important to purchase the right size fin. Do not feel that you are locked into purchasing one brand of fin if there is not a size in that brand that properly fits your foot. Some brands only have a small range of sizes (S, M, L, XL) and it is possible to have a foot size that falls in between the sizes offered by that brand. In that case try some other brands. Of course if your feet are still growing then it would make sense to buy fins which are a little larger than you currently need. You can then use fin socks or just normal socks to make your feet the right size.
Another, but less important issue, is the shape of the fin. Bodyboarding fins are either made with a novel, different shape or in a very similar shape to a fin already on the market. It seems that the actual design has very little to do with the performance of the fin and is more in an effort to distinguish one brand from another.
Your style of surfing, either prone or dropknee or both, can dictate the shape of fins that you should be wearing. Prone surfers can be less concerned about the shape of the fin and more about the propulsion it provides. Dropknee surfers, on the other hand should look closely at the shape and length of a fin. Ideally a dropknee fin should have shorter wider blade that makes it easier to get ones foot up to the front of the board without catching on the wave face while still giving enough power to be on the wave well and truly before it breaks to give more time to get up and set an edge. Some riders trim off the corners of the fins for dropknee riding to stop them catching on the wave.
Fin Socks
Fin socks are an option to help stop rubbing, keep your feet warm or bring the size of your feet up to fit your fin better. There are two main varieties of fin socks; neoprene and lycra.
The lycra socks can keep sand away from your foot to help stop rubbing and are thin so they don't make your foot too large to fit into the fin comfortably. They don't however do as good a job at protecting your feet from blisters and chaffing.
Neoprene socks can stop rubbing from sand and bad fin or foot shape. They do a good job at keeping your feet warm in winter and can also be used to make your foot effectively larger if your fins happen to be a little bit too big.
Fin Savers/Fin Tethers
Having spent £40 on a pair of fins it is worth investing in a pair of fin savers. These fin savers generally wrap around the back of the fin and then velcro around your ankle stopping the fin from leaving you if it is ripped off by a wave. These are a small investment to save you buying a new pair of fins and definitely worth having. Before you buy some, take a good look at how thick the material is that wraps around the back of the fin. If this material is too thin, it can sometimes rip straight through the rubber at the back of your fin not only causing the possible loss of fin, but rendering the fin useless even if you do retrieve it.
Webs
Webs are for those times when you need that little extra bit of propulsion. Webs are especially useful when you are standup bodyboarding or if you are learning to dropknee and find it easier to ditch one or both or your fins. They are also handy for those long sessions in large swell when your legs are beginning to cramp and you need your arms to do a bit more of the work.
Leashes
There are a number of different types of leashes that can be used with bodyboarding. There are coiled wrist leashes, coiled (upper) arm leashes and straight leg leashes. Both coiled leashes are generally used for surfing prone while straight leg leashes are generally better for surfing dropknee. It is worth making sure you get a leash with at least one swivel to save you the hassle of unwinding your leash.
Installing a leash is a simple operation that can be carried out in the store when you buy the board or at home. To attach the plug at home you need a screwdriver (preferably a phillip's head) or a similar thin, sharp object. Choose the position that you want to install the plug, making sure it is not too close to the rail, and push the instrument through the board starting from the slick side. Ideally the hole should be perpendicular to the surface of the board and not be too large. You can now screw (using a coin) the two-sided plug into position until both sides are flush with the surface of the board. Make sure that female side is on the deck so that you can attach your leash.
Plugs
There are a few different spots on a board that you can put a plug. For surfing prone, the plug will usually be on either the front left or right side though some people like to have the plug in the middle of the front of the board. If you like to paddle with your right hand then you would probably have the leash on your left hand and the plug also on your left hand. If you prefer to paddle with your left hand then you would use the reverse setup.
If you dropknee a lot then you might want to consider using a straight leash with a plug on either the back left or right. If you dropknee natural (left foot at the front, right knee at the back) then you would probably want to have the plug at the back right, if you dropknee goofy then you would do the opposite. If you like, you can have two plugs and two leashes and swap them over as you desire.
Board Bags
Board bags are used to protect your board from other people and the elements and can be especially useful when travelling. There are a number of different types of cover coming at different cost and catering for different needs.
Stretch Covers
These are the cheapest form of bags and are usually made out of a stretchy towelling material. They don't have any handles but are good for protecting boards against scratches. They don't have any pockets so all gear has to be stored in the bag itself.
Back Pack Covers
Back pack covers are a good all purpose bag. The straps make the bag easy to carry making it a good bag for transporting all your gear if you are walking or riding. Most of these bags have at least one front pocket where you can store all your accessories. When you are buying these bags it is important to make sure that the bag can easily fit your bag as not all bags on the market are big enough to fit all boards. It is also possible to find back pack board covers that accommodate two boards if you desire to carry two boards.
Travel Covers
These covers are for those people that want to do some serious travelling with their boards. They are well padded and can hold a number of boards. Their silver reflective nylon surface gives some protection against the heat whilst the strong padded inner layer protects against sharp objects and excessive weight.

 Back to Surf Home