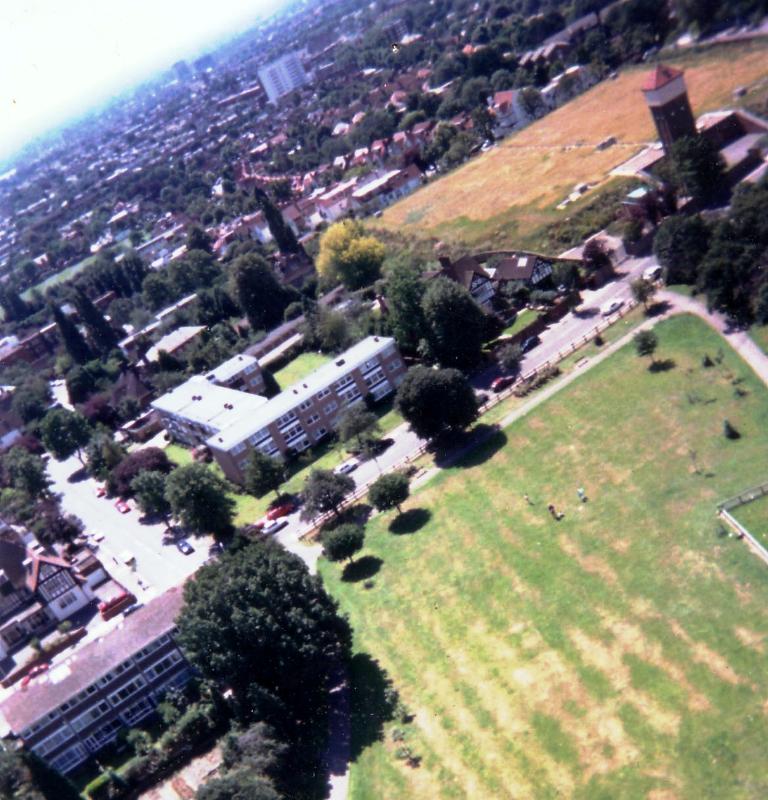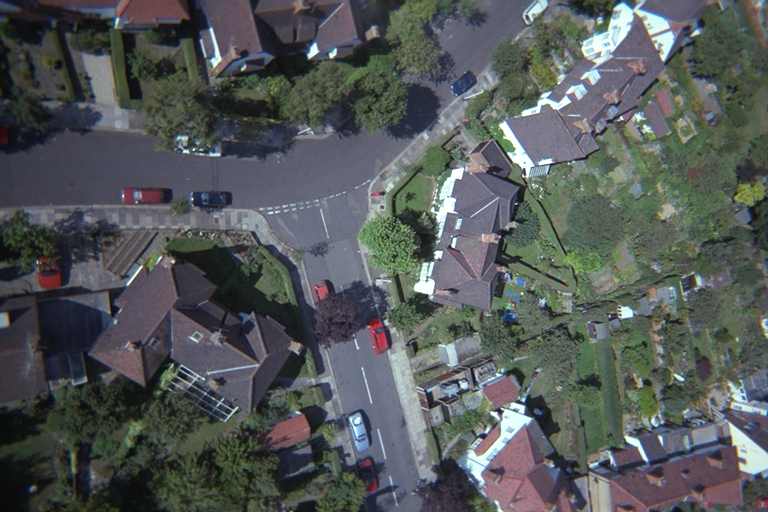
link to kite photo gallery
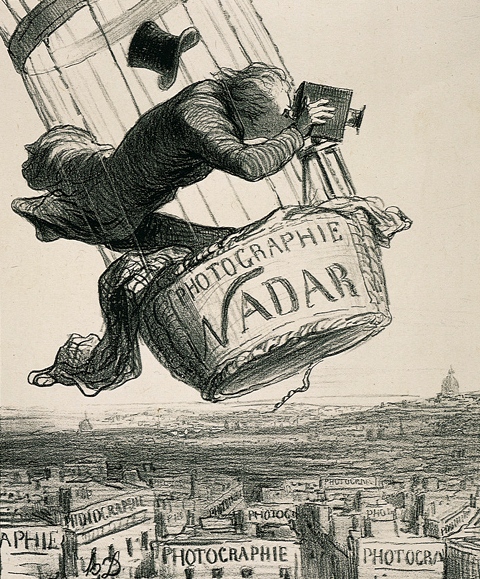
Although people have been taking photographs from kites almost since the
invention of the camera, the advent of the Fuji APS throwaway has made this an idea whose time
has finally come perhaps it has finally gone again with the arrival of google earth but then again perhaps not.
Experience has taught me that the best weather conditions for kite photography
are bright sunlight and low wind speed. Anything more than a gentle breeze causes the camera to
rock too much for good results, and this means using either a huge kite or a very light camera.
The Fuji APS, weighing only 30 grams, with the addition of a simple timer is ideally suited.
In some ways the Fuji 800 ASA throwaway is better even though it is a bit heavier because of the very fast film. It will give better results than matchbox-sized digital cameras which have quite long exposure times.
One of the most important principles in stabilising the camera is not to allow the string to become taught. If too large a kite is used the slack goes out of the string and the camera will start wobbleing however ingeneous the camera mounting.
As well as being light the camera is also very inexpensive,
and this takes a lot of the anxiety out of the exercise. The first thing you notice about kite
flying is the crashes, and minimising the potential losses encourages one to keep trying.
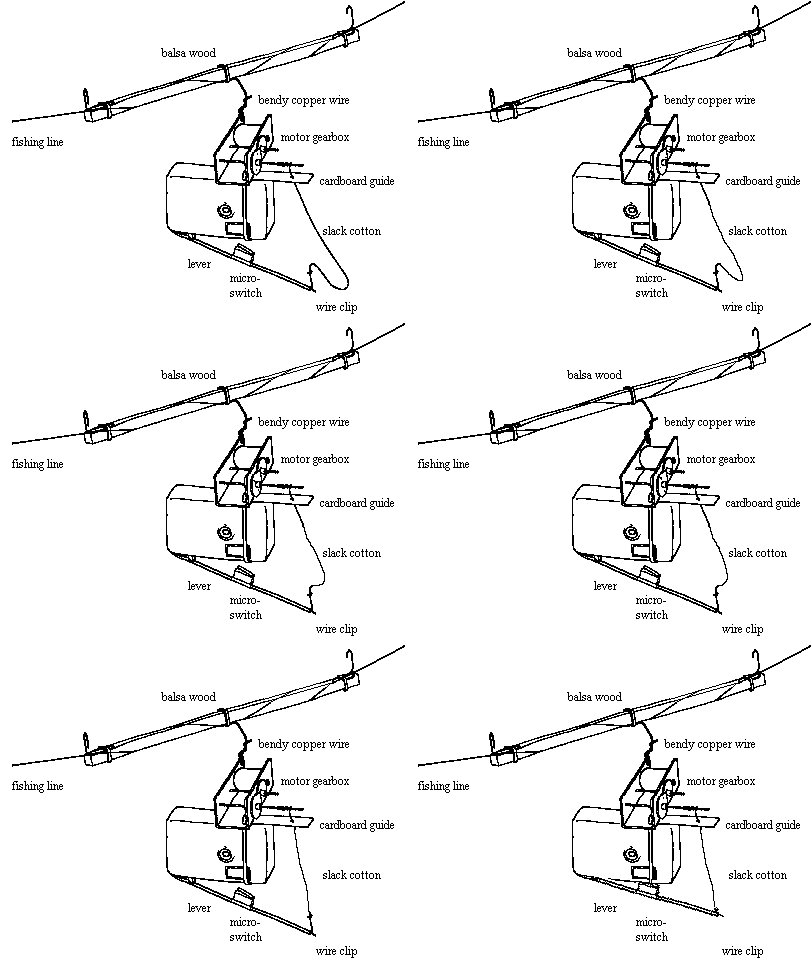
The camera is attached to the string rather than to the kite itself, this is
for two reasons: the most difficult aspect of flying a kite is launching it, especially in a
restricted space, and any additional weight increases the difficulty. Secondly, the mass of the
camera tends to destabilise the kite and a completely steady flight is essential.
Typically the camera will be 100ft below the kite but in very light winds it
may be necessary to send the kite up a very long way before there is enough pull to lift the
camera and timer. Wind speed usually increases as you go higher.
I use a short length of balsa wood as a cleat to attach the camera to the
string, with a short length of bendy copper wire to allow it to be aimed before sending it up.
It has to be wound down between each exposure to wind the film on and reset the timer.
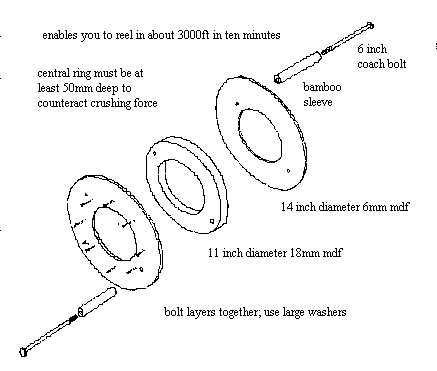
A large reel, as illustrated, makes this the work of minutes; the second thing you notice about
kite flying is how much more difficult coming down is than going up! Fifteen pound fishing line
makes an ideal kite string however it is a bit dangerous in the event of it coming down across a road. 5 pound line gives good results and is cheaper.
Knotting a line roughly halves its breaking strain: if I want to join a length of line I tie
a small loop in the end and then double a piece of duct tape over it. Never use wire to fly
a kite for two reasons: power lines and lightning.
Atmospheric electricity
is present even in good weather.
I make my own kites, when I first started I lost them by the dozen but the
one I have at present has survived to a ripe old age. I find mylar is the best material to use (space blanket or shiny
wrapping paper): it weighs about the same as tissue paper but is very much stronger. It won't
rip if you cut it with very sharp scissors. I hem mine with parcel tape. I also use parcel tape
to attach the sticks, for which I use 2mm carbon fibre if available. Failing this I use very thin dowel or 8mm square
balsa wood. Using the right materials the kite should weigh little more than the camera does
and cost about £5 to make. Once again this approach minimises the inevitable heartbreak which
follows a crash. It should easily fly to 2000 ft. The weight of a kite effects its stability: a 3ft kite should weigh
no more than 40 grams or it becomes unstable.
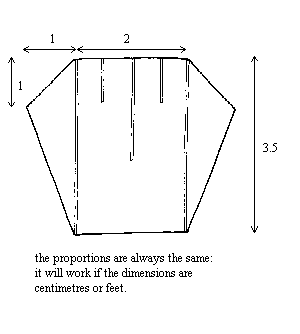
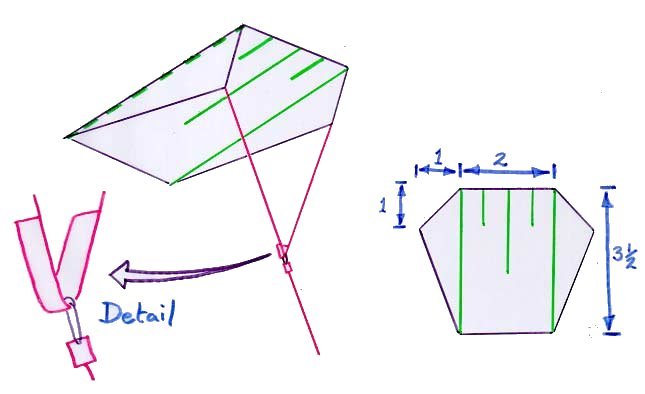
I find that a new kite inevitably tends to fly either to right or left and I
adjust them by moving the attachment point of the bridle: leftwards if the kite goes to the
left and rightwards if it goes to the right. The arrangement of using a nappy pin through a
piece of doubled-over duct tape works well. Once a kite has been balanced it requires no
further adjustment.
This was invented by M.Picavet, it is a very clever method of keeping a camera level and damping twisting oscillations.
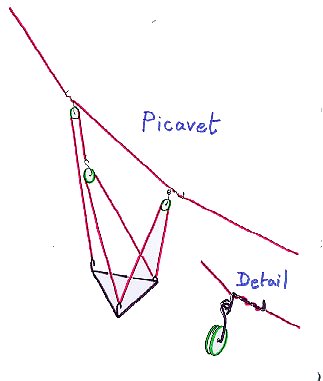
Although it works very well it is very tricky to attach to the kite string in a hurry, it also tends to come off the pullies when you are re-setting the timer. Make sure the pullies have wide flanges and use an extra piece of cotton attached to the kite string in case something falls off.
This is a new kite design, it uses strips of styrofoam as longitudinal stiffeners.
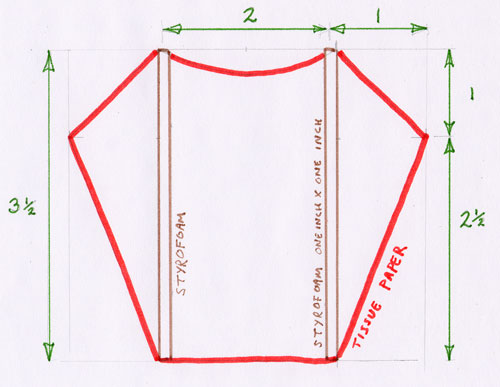
This seems to work really well and has various advantages: styrofoam is free and fairly easy to get hold of, you can cut it into one inch square section strips with a hacksaw blade if you hold the blade quite flat. This is rather messy but otherwise easy and fun. Because the strips are comparitively large they are much less demanding to stick onto the tissue paper with an acceptable degree of precision. You can do this with pritt stick which is the most expensive item needed to make the kite. I haven't used this kite to take photos, but it seems to fly really well.
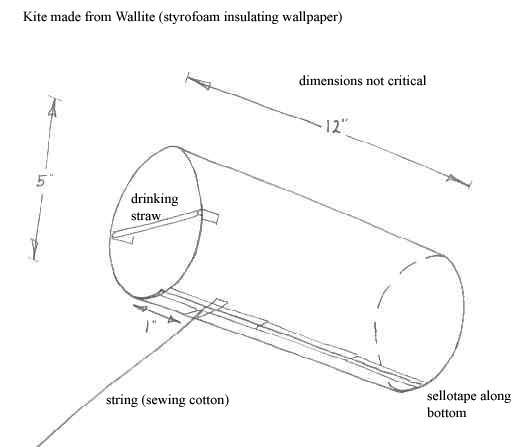
This is a kite which can be made by children; this is almost a contradiction in terms because kites are so difficult to make, however this one has very few steps and requires little or no precision. It is also very cheap, about 40 can be made from a single roll of wallite. It will fly in quite a range of weather conditions on a very short string (as little as 10 ft)
It works best if you only overlap it at one end.
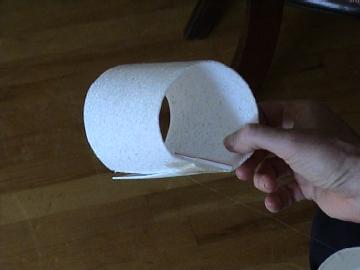
Pinch it between thumb and forefinger and sellotape. This makes it very slightly conical. Doing this makes the construction much easier and it flies better. Because you don't need a table, you can make it where and when you fly it. This is one being flown on a motorised split-bamboo frame hung from a lampshade
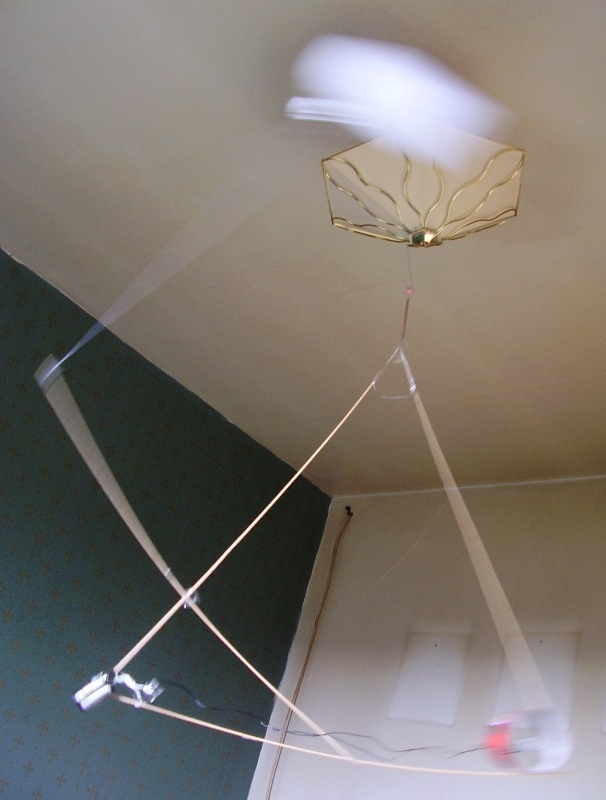
link to movie
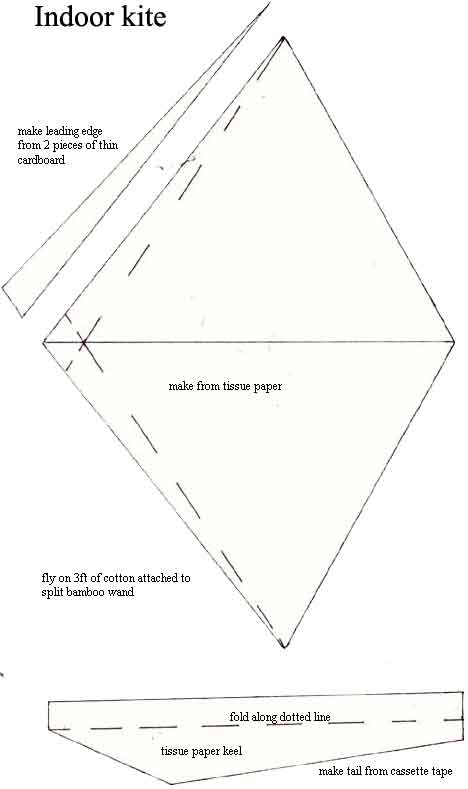
This is another kite which can be made by children but it is quite difficult, it has to be made precisely and only works indoors. Printing the image will give a pattern with the right dimensions.
It can be used with a kite-flying robot
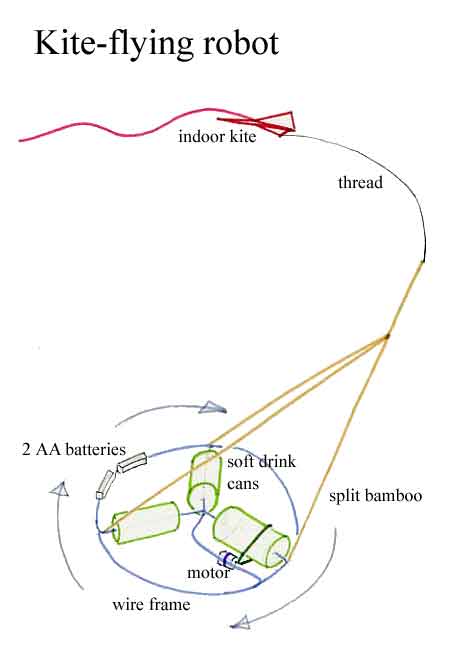
a lot of fun but tricky getting the equilibrium right.
link to movie
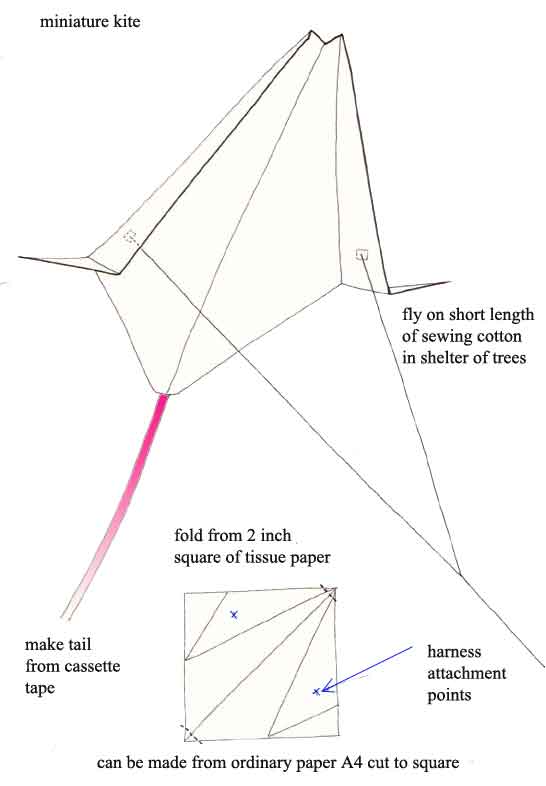
This is a kite which can be made from a 2 inch square of tissue paper, or even smaller. The main difficulty lies in attaching the harness. Very economical.
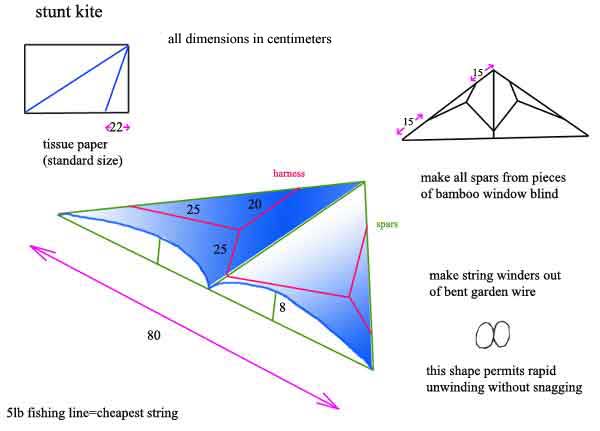
This is a stunt kite made from tissue paper and bits of bamboo window blind; can be made by 11 year olds in 40 minutes; works very well because it's very light and flexes in gusts to fold its wings. Takes about 30 minutes of 1:1 tuition to learn to fly it unless pupil has related skills.
This is a plan for a tissue paper boxkite
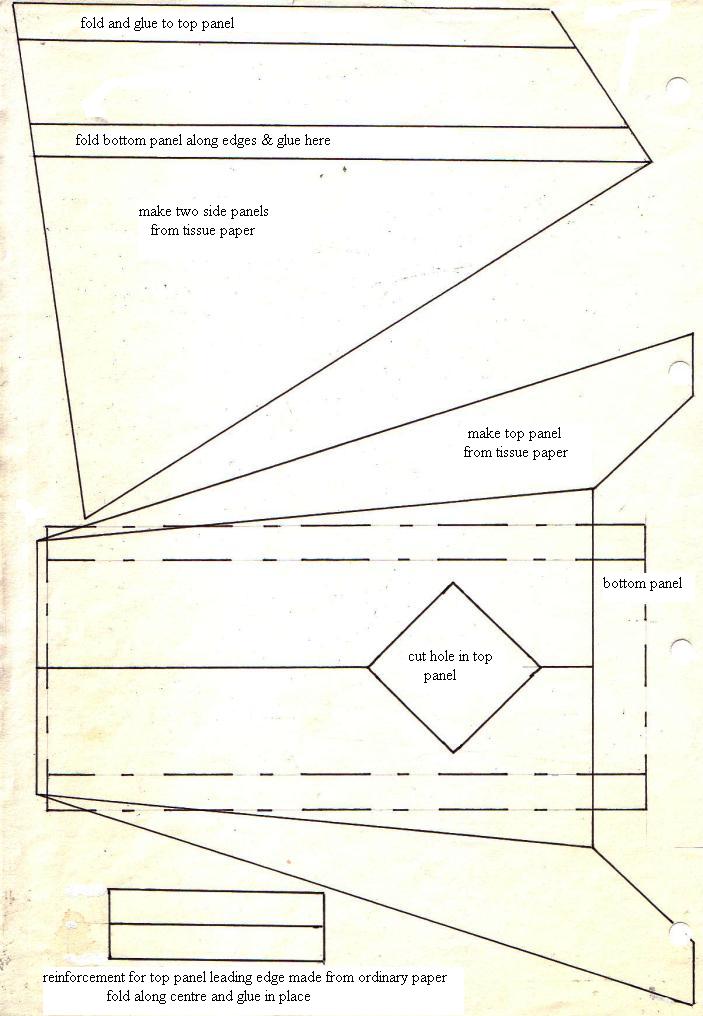
It can be made from about 8cm long to about 20cm long and flies quite well in a range of windspeeds. It is quite difficult to make but looks very beautiful, especially if tissue paper streamers are added to the top plane fins.
link to rotodynes
link to electric aeroplanes
link to flicking cardboard rings
learn french with Henri Mignet
hang gliding
extreme base jumping in wingsuits
flying wind farms
more about flying wind farms
propelling ships
wikipedia
interesting overview
space elevator
link to kite web site
another kite web site
and another
back to main site
my email is davidvwilliamson@hotmail.com
