MUSIC CONTROLS
CASTLE BUILDING 101 PAGE 45
SOME OF THE 1,256,410 ROCKS INVOLVED
MATERIALS LIST
long handled shovel
hoe
large heavy duty trowel
small heavy duty trowel
heavy duty wheelbarrow
wire brush{paint scraping brush}
auto parts cleaning brush
old rags
old blankets{or burlap}
at least five, five gallon pails
old metal knife and spoon
clean washed sand
portland cement
motar
large rocks{larger the better}
thousands of small rocks{half dollar size}
a lot of water
small level
large or long level
strong string
HOW TO BEGIN
FINDING THE RIGHT SITE
A good water source?
Good drainage?
Clear a large enough area to sort rocks by size. Make sure to leave enough trees for your enjoyment.
Excavate area until you reach hard earth or better yet bed rock.
Make a footing two feet deep and three feet wide.Use only portland cement{three parts sand,one part cement. Mix thoroughly. Wash a lot of small rocks and throw in with cement in footing area.Keep covered and wet for 10 days, longer if possible as the longer you keep it wet the stronger the cement becomes.Tramp down fresh cement to get air out and make level with a 2by4 with level on top.
BE YOUR OWN ARCHETECT, DRAW A PICTURE
Most building takes commom sense. You can get the proper building code from your town administrator.Think about what you want,electrical outlets,tv,computer. Think about your plumbing, bathroom, kitchen, laundry room outside water. Go over the plumbing and electrical work you have designed and then have a liscensed pro check it out. 90 % of it is grunt work and 10% proper planning.
LAY YOUR FIRST ROCK
If your building is going to be two stories high your beginning walls should be at least two feet thick. A circular structure is a little bit more difficult than a square or rectangular structure. A tip if you are building a circular structure. Draw a circle on the ground.
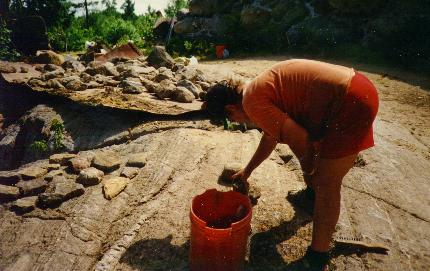
An easy way to do this is to find the middle and take 2 1 inch by 4 inch boards nail them together then drill a 2 inch hole in one end. Sledge hammer a 0ne inch diameter pipe in the middle of the circle and slide the board over the hole and you have a guide for what ever size circular structure you want.Now back to that first rock which you will never forget. I assume that rocks are easy to come by as they are here in New Hampshire. If they are not forget it unless you are very well healed. Have at least 200 rocks on hand. Sort them put all over the ground by shape. Flat, round etc.On your first level use your largest rocks. Over 3 feet high they get heavy.Now I think you have handeled your rocks three times now is the fourth. Take your five gallon bucket of water and your wire brush and scrub all the old residue off your rock. It will be beautiful. Think about where you are going to place it.Now that your footing is solid throw down some more cement and place your rock with the best face on the outside. From experience I have learned that a 2-3 foot wall will be three rocks thick. Congradulations you have laid you first rock.
YOUR SECOND ROCK
You are on your way. Your second rock will be an interior rock. Pick a rock, wash it lay it so that the inside surface is one foot from the surface of the out side rock.
Now remember thoes small rocks, fill the middle space with those odd shaped small rocks the mix some cement loosly and fill in. Now you got the idea. Go all around your paramenter doing the same thing only dont forget where your sewer line is going to be.
Dont bother cleaning up around your newly laid rocks till the next day. on the second day wet down your work and take that metal cleaning brush and clean off any excess cement to bring out the luster of your 2 rocks. Admire your work. Remember it will be there a long time.
WET DOWN YOUR WORK AND WASH YOUR HANDS
It is very important to keep all your work wet for at least a week. Continued watering will make your wall almost as strong as steel. Be careful. If you do not wash your hands the lime in the cement will blister any exposed area of skin. Where gloves if you can. I prefer not to.Continue the same process all the way around leaving a one foot opening for your outgoibg septic pipe. Don't get discouraged by the slow work. The best I can do is laying 17 surface showing rocks with filler in between. Get more rocks as you will soon be ready for the second tier which is a little different.
THE VERY IMPORTANT SECOND TIER
Once you master this second tier you can do almost anything with stone. A rock if balanced properly will be making contact in three places. This is where chinking will come in. Use your small rocks to prop up and support any of your larger rocks. Now the second tier you mix the cement a little differently. Instead of three sand and one cement you use four sand one cement and one motar. Doing this will make the cement adhere better to the rocks. Remember keep your previous days work wet and covered with wet burlap. In no time at all you will find that your new wall is three feet high. I hope you left an opening for a door or two. {commom sense} Now your getting the hang of it.
THREE FEET HIGH. NOW WHAT
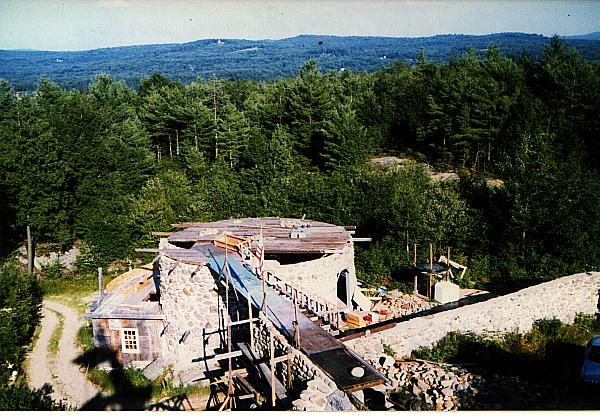
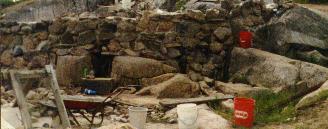
Now you are doing good the work will get a little more difficult the higher you go. There will be more lifting but by now you sre getting stronger.I found that an old butter knife and spoon were really good tools for smoothing out the motar the day after and then brushing off rhe residue with your stiff brush.The picture below will show you what my work looked like at the end of the first summer. Notice that the foundation is about four feet high. In this picture you will see the wheelbarrow, my sand sifter as I had my own sand and my five gallon pails for water and cement.I was over 40 years old when I started and I hope you are a lot younger. I found that if I started early {5 A.M.} and took a 2 hr nap I could get a lot more done.I live in a cold climate and could only work into early November but you can still gather more rocks for next years work. The winter is a good time to do more planning. Now that your work is three or four feet high you have to think about staging. I had a lot of left over lumber from other projects and was able to make my own. Make sure your staging is strong enough to hold 500 lbs. Your weight plus the weight of the rocks you are lifting. I found that the higher I went the smaller the rocks got.
CHECK YOUR WORK
Make sure your work is level up and down {vertical} on both the inside and outside.Since your work is not very high yet the best way is to place a level on the 2 inch side of a 2 by four. Don't forget to use your radius measure to check that you are making a true circle. Another thing that is important is to have on hand some large old blankets to cover your work in case of a sudden down pour. If not covered you could loose a day's work in minutes. Also wash off all the cement from your tools at the end of the day. By now if you are working alone and mixing your cement by hand you are probably laying 10 surface rocks a day and filling in with hundreds of smaller rocks. Don't get discouraged look at each rock as a piece of art and in the end you will have a piece of art.
ROCK GATHERING
When I started my rock tower I had no idea of how many rocks it would take but from previous experience I new it would take a lot. However on the other hand I was surprised how far a couple of bags of cement would go if you used thousands of smaller rocks as fillers. In New Hampshire we are fortunate to have long stone walls that the farmers made to keep the cattle in. I have miles of these stone walls on my property and have used a lot of them.
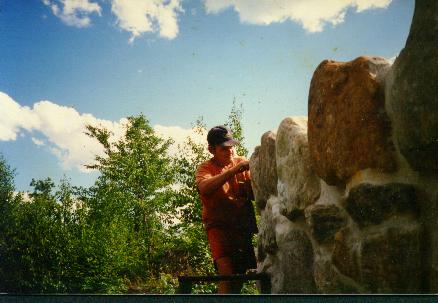
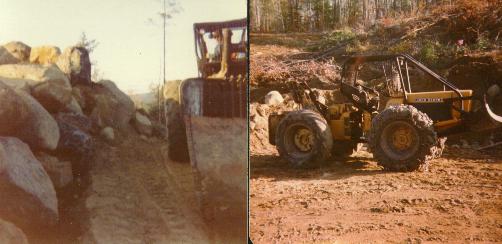
I have used up two old trucks hauling them. I discovered that the natives when clearing the land they would throw all their rocks in a pile and over the years the falling leaves would cover them and what looked like a small pile of rocks actually was a thousand or more sinking deep into the ground. I also discovered that the top three feet of soil had many rocks in it.I was very fortunate to have a machine called a skidder with a winch on it which could pull 25,000 pounds of rocks on the back of a metal plate 8 foot wide and 16 feet long. Rocks are expensive if you have to buy them. Up to $2.00 a lb so when you are laying a 50lb rock think about all the money you are saving. Beware of rusty rocks. From experience these rocks will bleed and make rust streaks on your work. Save out the real pretty rocks for special places.
OM WASHING ROCKS
SKIDDER WITH 8 by 16 STEEL DRAG

NEXT=MORE ON HOW TO BUILD A FIELDSTONE CASTLE CHEAPCLICK HERE TO RETURN TO THE MAIN PAGE
CLICK HERE TO RETURN TO THE TABLE OF CONTENTS
