Fishing and camping has always been something that my family has done at least a few times a year. In previous years, we have gone in 2-man (they say 3, but they lie) blow-up boats. After any bit of use at all, they start to leak both air and water (so you end up sitting in a puddle). At a cost of $40+ (I don't remember exactly how much they were), it's not something that I would want to replace every time we go camping.
This year, my Dad and I decided that we would like to be a little more comfortable, with more space to sit/move, and drier clothes. After looking around at prices for used boats, where a cheap one runs about $300, we decided that we could make our own. How hard could that be?
As we are both internet junkies, we set out in search of references and plans for building boats. After a bit of research into stich-and-glue building, I decided to look at some older plans (1890-1950). I thought that they may be a little easier, and a whole lot less expensive, as there should be no need to coat the entire boat in epoxy or tape up and fill in the gaps/joints with fiberglass and more epoxy.
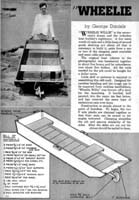
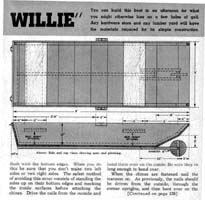
My searching led me to an odd little beauty of a boat which the author named "Wheelie Willie." Basically, it was a floating box with a wheel added so that it could be carted around like a wheelbarrow. It was very simple, and fairly small (8'x3'x12"). As such, it could be made for very little cost, and fit into the back of a truck. After showing this one to my Dad, we decided that this could make a good beginner boat.
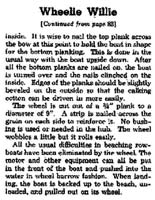
Here's the original pages that I found, and I even created some thumbnail images for your viewing
pleasure. I have not modified the full-sized images in any way. They are the same quality as I found
them (the text on page 3 is a little ugly, but still readable). I have no clue what the original
publication was that these came from, but if anyone has an idea, I'd like to know (for interest, and
proper credit), so you can email me (see bottom of this page).


Primary design decisions came from a few factors:
Supplies:
Real design work
The width of the boat was pretty much fixed by the 1/2" plywood we used as a base (it was cut to about
42 inches). The length, we had a little more flexibility with (we were planning 8 feet, but shortened
it just about 7'6", to trim off some bad portions of wood). The height of the boat was determined by
comfort (sitting at 14-17 inches is fairly easy on the knees), and waterline. As our estimate of
total weight for three passengers, gear, and the boat was about 800 pounds, our waterline was calculated
(by the "Chine Hull Designer" program) to be about 5 inches. As we needed some room above the seats
(so we wouldn't feel like we were falling out), and we assumed that we needed at least 13 inches from
the top of the boat to the waterline, we decided to make the boat 20 inches high.
Construction
Construction of the boat happened over about a 3 day operiod (a total of about 6 to 8 hours of actual
construction time). Most of this time was spent measuring, remeasuring, ripping 2x4s down to about
1.5 inches, and gluing any joints of wood-on-wood with some paint before we screwed them together. I
guess there isn't much more to be said about that, except for the fact that I didn't get any pictures
of this process. There was a bunch more time spent on painting (mostly the outside), but I have no clue
how much time was actually spent. For fun, I weighed the boat, and it measured about 122 pounds
(with seats).
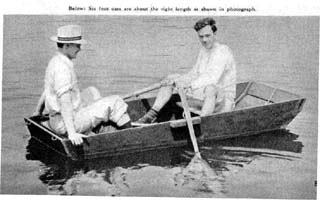
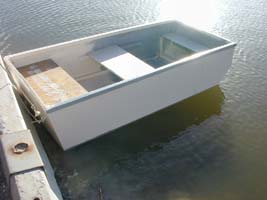
After allowing the boat to dry for about a week (the oil-based paint stayed sticky for quite a while), we decided to test it, even though we hadn't completed painting it (the inside only had 1 coat, and was partially grey, because we ran out of the white). Since we spent quite a while trying to convince people that the boat would actually work, we had a few spectators for our first test (and cameras).
Placing the boat in the water, we found that it -- TADA -- really floated. Hehe. It seems I wasn't over confident at all. We did, however, notice a slow leak in the front of the boat (which we later pointed out to be a crack caused by either our dropping it to put it in the water, or cramming it into the truck).
All that's left, is to show some pictures to document the test:
If for some reason you need to contact me, you can reach me at kpReMOvEthISharris@users.sourceforge.net, remembering to remove the 'removethis' portion.
Go back to Kevin's Project Page.
Revision History:
07May2002 Created this page, wrote some verbage, added the pictures of the test, and the original 'willie' pictures.