
While searching for a tabletop jewelry buffer, I discovered this unusual buffer by accident at an automotive supply site. Since I enjoy saving money and making my own tools, I decided to try my hand at making this one. It has turned out to be the best buffer I have used to date.
The item was called a "mushroom buffer," but it reminds me of a carnation as it begins to take shape. Its purpose is to get into tight spots. Below are instructions for making two versions. One is made with muslin, the other with faux chamois.
I encourage you to try this marvelous buffer. I find that it not only eliminates the need to buff in different directions, but it produces the best shine, in the shortest time with the least amount of manual effort. I achieved a brillant shine on a #1 setting on my Ryobi.
![]()
Homemade Mushroom Buffers
One of the following--Pliers or Vice Grips, small screwdriver
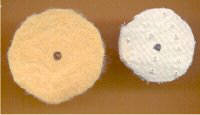
NOTE 1: To create the Faux Chamois wheel you will need all the materials listed above (except the muslin wheel). Purchase a package of Sammy Shammy or similar type polishing cloth (you can pick this up at a local dollar store. It comes in a long package (20" x13.5" on average). If you can not find Sammy Shammy, try a few others they only cost a dollar. Experiment! It should be yellow to goldenrod, soft and non-abrasive.
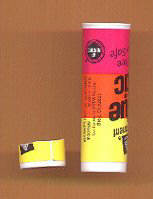
NOTE 2: If you happen to have an empty glue stick such as the one shown below, you can fashion a cap by cutting it down to about 1/2" to 3/4". Place a hole in the center and you are ready to go. I have tried this with the muslin version. I would add more plys if you are going to use this with the faux chamois.
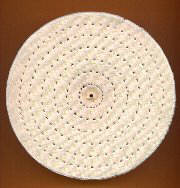
Create a circle template from spent cardboard or an index card that measures 1-3/4"-to 2" in diameter. If your muslin wheel is stitched, remove stitches (figure 1). Cut 25 circles of muslin (6 faux chamois). Place a dot with a marker in the center of circle. Using a needle tool, push a hole through a few thicknesses, until you have done all 25 plys. You will need to widen the hole a bit, using an exacto knife or a drill bit. But be careful.
![]()
![]()
Cutting and Filing Down Screw Mandrel
If you cannot find a 2" screw, you will need to cut it down to 2". Using a cut off wheel on a Dremel or Ryobi rotary tool, measure and cut down to a 2" length. You will need to smooth the threads by using a metal file. Don't worry this won't take very long to do and will aid in putting it into the 1/4" collet. I also use this adapted version to accomodate two regular buffing wheels. Be sure to wear eye protection. Consult your owner's manual for the correct rate of speed.
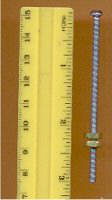
Stack 25 plys of muslin together. Place a washer on the screw, followed by your stack of plys. Move the plys up to the underside of the screw. Drill a hole in the center of the cap large enough to accomodate the screw.
With the open end of the cap facing you, insert your screw with plys. Attach a screw nut to your screw, until it is almost flush with the top of the cap. You will need to pull up at least 6 plys, gathering the ends and pulling them to the center . This will act as a cover for your screw head. Insert needle and thread through all 6 thicknesses several times around. This is necessary because once you turn on your tool, it will open.
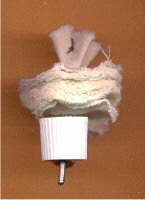
On the underside of the cap, screw on one nut until it is flush with the top of the cap. You will begin to see a flower like pattern form. Follow that with a second nut. This acts as a locking nut. Make sure they are tight. Your buffer should look like the one below when complete.
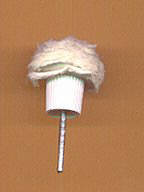
The same instructions are applicable in this case. You will need (depending on the size of your cap at least 6 plys.)
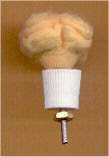
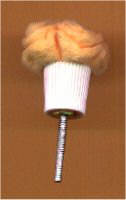
The secret to my sucessful shine is to buff with the faux chamois first, then follow up with the muslin buffer. This method of circular buffing seems to really "pop" the shine. Try this, you will love it.
![]()
![]()


