Trellis Stitches

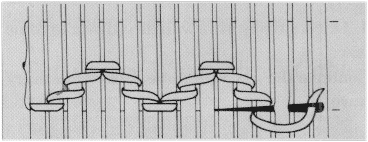
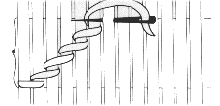
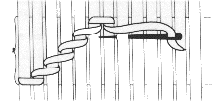
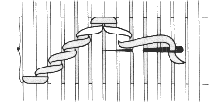
The different types of trellis stitches derive their names from the number of climbing stitches (steps) taken between the bottom level cable stitch and the top level cable stitch that anchor them. So.... a four step trellis indicates that there are four climbing stitches between top and bottom level cables; a three step trellis indicates that there are three climbing stitches and a two step trellis indicates that there are two. Got it? Good! (Imagine me grinning.)
As always, the basic rules remain the same:
  1. Keep the needle horizontal to the gathering rows.
  2. Pick up only the top third of each pleat.
  3. Watch position (i.e. over or under) of the thread.
  4. Pick up only one pleat with each stitch.
  5. Maintain consistent spacing.


Stitches covered on this page

Two Step Trellis
2 step trellis
Four Step Trellis
4 step trellis
Three Step Trellis
3 step trellis

bar


Two Step Trellis (or Half Space Trellis)

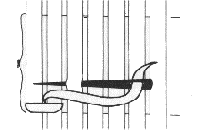
baby trellis 1   1. Make a bottom level cable stitch with the thread under the needle picking up the second pleat.
  2. With the thread under the needle, make a stitch up into the next pleat (pleat 3), one quarter of the way between the gathering rows.
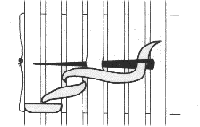
baby trellis 2   3. Make a stitch in the 4th pleat at the half way point, thread still under needle.
baby trellis 3   4. Changing to thread over needle and keeping needle at this same level, make a top level cable in the next (5th) pleat.
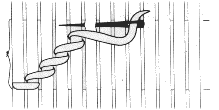
baby trellis 4   5. Now, going one quarter space down again, with thread over needle, make a stitch into the next pleat (6th).
baby trellis 5   6. Go down to the bottom gathering row with your next stitch (pleat7), still with thread over needle.
  7. Change to thread under needle and make a bottom level cable into the next pleat and continue trellis across the row. baby trellis 6


Four Step Trellis (Full Space Trellis)


trellis 1   1. Make a bottom level cable stitch with the thread under the needle picking up the second pleat.
  2. Still with the thread under the needle, take a stitch up into the next pleat (pleat 3)one quarter of the way between the gathering rows.
trellis 2   3. Take a stitch in the 4th pleat at the half way point, thread under needle.
  4. Stitch pleat 5 at the three quarter way mark between gathering threads, thread under needle.
trellis 4   5. Stitch pleat 6 at the top gathering thread row, thread still under needle.
trellis 5   6. Change to thread over needle stitch a top level cable into pleat no.7 at the same level.
  7. Keeping your needle horizontal to the gathering rows and with your thread over needle, one pleat per stitch, work the other side of the trellis going down at three quarter space, half space and one quarter space intervals .
trellis 6trellis 7trellis 8
  8. Thread over needle, stitch the next pleat(no.11) at the bottom gathering row. trellis 9
  9. Change back to thread under needle and take a bottom level cable in the next pleat, level with the last stitch and continue the trellis across the row.


Three Step Trellis

  Following the above principals of anchoring bottom and top level cable stitches this time with three steps in between, use one third spacings between row so that there are three steps. (If you can't "eyeball" it, you could try lightly marking your fabric with a soft lead pencil.)


Next         back to main smocking page


1