Home Contents Someplace Green Permaculture Sheetmulching Worm Farming WWOOF
The Ark Garden

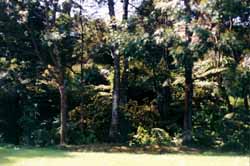
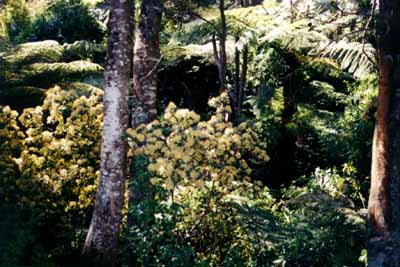
The view of native bush and wattle trees as seen from my lounge window. The wattles have gone, but tall Manuka (teatree) still shade the Pungas (treeferns) and other natives. This little patch of bush soothes my soul like nothing else. There's always something moving, singing or flying. There's a tiny stream at the bottom of the narrow, sloping strip of scenic reserve, creating a musical backdrop for the steady flow of life surrounding it. Local ducks visit, bringing ducklings in spring, and in return for edible scraps from the compost heap, they give me free fertiliser and much entertainment!

Now that I have you believing I live in paradise, (and perhaps I do, because everything's relative, isn't it, to what you already have) let me tell you about the reality. The bush backdrop to my property is on one boundary. Both sides of my tiny, box-like home have neighbouring houses you can almost touch. The front boundary opens to our shared driveway.
When I purchased the property, there were two plants existing. A Jasmine and Fuchsia. After I moved in, I learned that the block of land had previously belonged to the local pottery, Crown Lynn. There's no topsoil, just solid, soggy (or rock hard) clay!
Because I didn't plan to stay longer than 2 years, I tried hard not to plant, but because it was there, I had to, just a little. We've been here nearly 6 years now.
The Plot Thickens

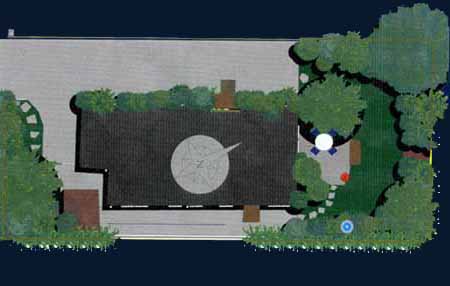
My place doesn't really look like this. At least not yet. This is a projected landscape I designed, using Pro Landscaper 3-D. A great little tool, but limited by it's plant graphics. Because of my small budget, plants get purchased as and when I can buy them.
Same goes for the non-existent ranchsliders (or french doors) in the lounge leading to the non-existent paved patio directly outside. There is also a shed and paving stones in my plan. A garage or carport was perhaps going a little too far, as because this is a half-site, seeking and paying for approval of the addition would cost as much as the garage itself!
Below is a list of existing plants in my garden. They are all thriving, in spite of a long dry summer. I've hardly watered in recent months. I like my plants to dig their roots in deep to find moisture, rather than rely on a costly tap supply.
My Plants

| North
Boundary Manuka Rock Rose Gleditsia Sprouting Broccoli Perpetual Spinach Box (2) Europys Daisy Californian-Lilac Meyer Lemon Strawberry-Guava Purple Akeake |
North
Boundary Corn Variegated Flax, Native Grass Native Moss Pomagranite Californian Lilac Beetroot, Carrots Peas,Beans Alyssum |
North
Boundary Yukon Kowhai, Potatoes Asparagus Italian Tomatoes Moneymaker Tomatoes Zucchini-Blackjack Globe Artichoke |
East
Boundary Boston Lace Tree Water Fuchsia Native Clematis Banana Pepinos Lemon Grass Telegraph- Cucumber Potato Vine Rhubarb |
| West
Boundary Daisy Blue thing Pittosporum (Sunburst) Pittosporum (Tenfolium) Pittosporum (Variegated) Daisies Ground Covers West Facing Hibiscus Daisies Cosmos Fuchsia Impatiens Star Jasmine Bluebells Pelagoniums African Daisy Lavender Fuchsia Daffodils West Boundary |
North
Corner Cherry Tree Ground cover Pittosporum North Facing Front Fence Climbing-Geranium, Lavender, Wisteria Five-Finger Perennials Passionfruit South Facing House Hostas, Boston Lace South Facing Front Fence Climbing Geranium Ivy Impatiens South Boundary |
East
Corner Hydrangea, Rosemary, Perpetual Spinach Peppers Capsicums Strawberries Alyssum Lobelia East Facing Potager Garden Rhubarb Mixed Lettuce Rocket Chives Spring Onion Radish Spearmint Common mint Parsley |
East
Boundary Herb Garden Climbing Peas Dill Thornless Blackberry Lemon Balm Chamomile Marjoram Oregano Rosemary Strawberries Grapes Tomatoes Passionfruit Chives Parsley North-West Fence Cabbage Tree Fuchsia Glossy Shrub Jasmine Feijoa (2) South Boundary |
Beginner gardeners are often confused by the overwhelming variety of plants. The climate, growing preferences and size of the mature plants are very important, and not to be taken lightly, but some plants, just like humans, refuse to conform to what is expected of them.
My advice is, take a stroll around your plot of land. Open your senses and notice the changes in heat, moisture levels and the health of existing plants on your land. You'll notice the land's microclimate, the warm moist areas, the dry heat and the cooler areas.
Winter means increasingly less light for your plants as the sun drops lower in the sky. The south side of your house or shed will get little, if any winter sun, but one side of your southern boundary fence is north facing and the fence itself gives protection (smaller plants) from those southerly winds, so bear that in mind when planting. But check that it gets enough winter sun.
Take a good look at the soil. in various areas of your ground. Some areas will have more topsoil than others. Other areas may have more organic matter and some spots may be rock hard, compounded dirt.
Don't fret about what you find. You can change it by using the sheet-mulching method described on the 'No-Dig Garden' page. Professional gardeners have to get rid of their prunings and clippings. These items are usually shredded and sold cheaply to anyone who asks. Sometimes they advertise, and you may have to go on a waiting list, but it's worth it. The amount of material you buy may look like a mountain at first, but within a year you'll be wanting more, so buy or beg as much as you can.
I bought 5 cubic metres of mulch for the price of 3. There was a condition. The extra 2 metres were hedge clippings and I had to take the lot or none at all. The clippings (prunings) were longish (30-70 odd cm's) and I wondered what I'd let myself in for, but I shouldn't have worried.
I laid the mulch material on top of flattened cardboard cartons, taken with permission from recycle bins outside businesses such as "The Warehouse". The cardboard was overlapped well, wetted down, then clippings added, about 30-40 cm's deep. I used the finer, shredded mulch on areas I knew would be planted first. The coarser material was used for pathways and future garden areas.
On top of my mulch, I added lime, then I laid some old hay, bought with luck (Johnny on the spot!) from a local garden centre for $2 per bale. I bought the lot. 12 bales! Lugging it all home in my little hatch-back car, 3 bales at a time. Everyone thought I was mad. It took a while for the smell of rotting hay to leave the car, and it took ages to clean the car, even though I'd used a plastic sheet to line the car. But I was grinning ear to ear with self-satisfaction.
The sheet-mulching was done around May-June (early winter, over a kikuyu lawn. The area covered was the entire back width of my land by about 4 metres. It was quite a marathon effort for a lone first-time sheet-mulcher. I was lucky enough to find cheap materials to do the job, but a word of warning. If you, like myself, are a city-dweller on a microscopic budget, set your sights on smaller plots. It's April (Autumn) now, and my mulch needs topping up. Actually, to be perfectly honest, I can't see much of it left at all. It's been absorbed. Transformed. Bare earth isn't healthy and I'll have to go hunting for more. On the cheap. Help!!!
By spring, the area was ready. I admit I got out there and did a bit of mulch turning, to speed things up a little and I checked to see if the kikuyu was dying. I should have trusted the method more. However, dealing with Kikuyu is war. Whatever you do, don't use carpet as your first layer if you have Kikuyu grass. It will creep under the edges and come through the holes you made for your shrubs. Then you'll have to move all the mulch and remove the carpet so you can pull up the roots or remove your plants and start again. The problem is that the carpet acts like weed netting. The wool rots just fine, but the nylon webbing on the back remains.
On the same subject, don't leave your edges untended for too long if kikuyu is a problem. Cut around them with a spade and take any stray shoots away. The object of sheet mulching is to disturb the soil or composting matter as little as possible. The reason being, plant roots and worms are creating air pockets. Aerating the soil. Worms lay eggs, and tiny delicate worms come into existence. Plant tops dye off, seeds drop to the surface, the plant's roots die and are absorbed, leaving air space within the soil and adding to it's organic matter. Healthy soil has lots of worms, organic matter and air.
Then someone comes along, digs and walks over the soil, crushing new worms, eggs and air spaces. The reason for digging soil is to aerate it. Loosen it up for the young plant roots. But loose soil, uncovered, loses moisture very quickly and weed seeds take hold at an amazing speed. You still have to feed the soil and mulch it if you want to keep the moisture in. So why not do it the easy way to start with? Throw everything on top the way nature does! The mulch rots down into soft rich compost, perfect for seed to root in.

All graphics
and writings on this homepage are copyright of Anne Keller, 1998.
Exceptions to this are works and/or images which have been included with an
acknowledgement and the owner's permission.
Enquiries and feedback on this homepage to: Anne Keller