|
|
|
|
|
|
|
|
|
|

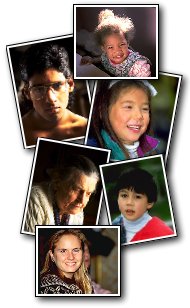
1. Move in close. Fill the frame with your subjects smiling image. If using a wide angle lens or a point and shoot lens set at the lower wide setting, don't get too close or else the subject's nose will be exaggeratingly large. Some cameras do not focus closer than 4ft. 2. Watch the background.Move your subject away from distracting background clutter. By using a telephoto lens on an SLR with the aperture set at its largest setting, the background will go out out focus due to limited depth-of-field creating a soft backdrop for the subject to stand out from. 3. Don't over cue the subject. It's okay to give suggestions which flatter their image but let them pose themselves after awhile. Portrait photography involves more psychology than anything else. Pre visualize the expression you want and then manufacture it through subtle suggestions by way of subject interaction. For example, if you want to bring out the thoughtful nature of your grandmother, rather than saying "say cheese" ask her a question in an area of interest to her and watch as her face transforms in deep thought awaiting your shutter to capture the moment. 4. Avoid direct midday sun.Turn them away from the sun and shoot into the direction of the sunlight. Use a white reflective surface to bounce some light back into the shadowed side. This is a time tested technique used by pros when shooting models outdoors. This creates a brilliant rim light effect separating them from the background. Bear in mind that a clean lens with no filters attached avoids lens flare. Keep the sun out of the image and shield the lens from the sun by using a lens hood or your hand, just make sure NOT to include your hand in the photo. :-) Another option is to shoot in the shade of a tree or building. You'll get more natural looking expressions. 5.
Use flash outdoors. This
will fill in the shadows and add catch lights in their eyes. Using
flash outdoors requires a shorter camera to subject distance due to the
existing ambient light and lack of reflective surfaces to spread the light.
Therefore make sure the subject is no further than ten feet from the camera.
5 ft for 35mm compact cameras due to their smaller built-in flash units. Use your camera's built-in balanced fill-flash if it has one. Camera
position in relation to the subject can greatly alter the final image.
Correct camera angles can prevent distorted features or enhance or de-sentuate
certain features. For a head and shoulder shot try to keep the camera at
the subject's eye and nose level. Raise the camera slightly above the center
of the face to elongate the nose, narrow the chin, reduce broad jaw line
and broaden forehead. Lower the camera angle below the center of the face
to shorten the nose, narrow the forehead or to accentuate the chin. For a
3/4 shot where the subject's head and torso are visible, shoot at chest
level. And for a full head to toe shot, position the camera at waist level. My favorite
technique for portraits is to use a 35mm SLR camera outdoors on a sunny
day. I turn the subject away from the sun so their back is to the
harsh light. I then use a 85mm 1.8 lens without any filters on my
35mm SLR camera. I use a white or gold reflector to bounce extra
light into the shadowed area. All this is exposed on Fujicolor NPS
160 print film. I sometimes use a Nikon SB -28 flash bounced out
of a Lumiquest reflector to add more sparkle on dull overcast days.
In my opinion, anyone can be made to look good on film provided special care is taken for camera angle and lighting set up. Of course make-up, hair and wardrobe contribute to the final product.
Prominate forehead-
Long Nose-
Narrow Chin-
Baldness-
Angular Nose-
Broad face-
Narrow Face-
Wrinkled Face-
Double Chin-
Facial Deffects-
Prominate Ears-
Glasses-
Deep Set Eyes-
Protuding eyes-
Heavyset Figure- | ||||||
|
|
|
|
|
|
|
|
|
|