Personal

My MySpace
E-mail unii
Home
Sign Guestbook
View Guestbook
Archived Guestbook
Web Rings & Awards
Unii's Resumé
Unii's Personal
Unii's Links
Our pictures
Unii's recipes

Crafts

Plastic Canvas Links
Plastic Canvas Patterns
Plastic Canvas Tips
Unii's Crafts
Unii's Sewing & Quilting
Pics of sewing & crafts
Unii's Scrapbooking Page

MS & Health

Creutzfeldt-Jakob Disease
Unii's MS Links
MS Videos
Unii's Battles with MS
Fairview Park, OH
 NMSS Support Group

Cervical Cancer

Pets

Bunny Links
Our Bunny, Schnuggles
Eddie's Memorial
Our Cats
Tabbitha's Memorial
Misfit's Memorial
Venus' Memorial

Counter
Visitors


Copyright© 1997-2007
Web Design By Unii
Last Updated: 8-5-07

Unii's Toothpaste & Toothbrush Holder Pattern
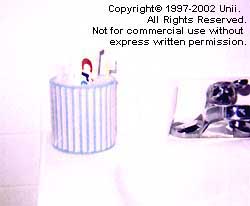

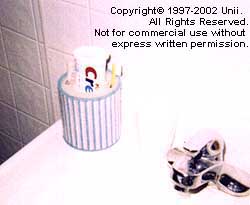
Toothpaste and Toothbrush Holder Toothpaste and Toothbrush Holder
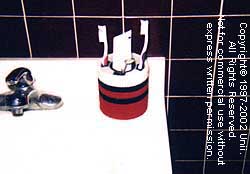
Another version of my Toothpaste and Toothbrush Holder

     I made this Toothpaste and Toothbrush Holder to match my bathroom when we lived in the trailer. It added life to the somewhat dreary surroundings of it all.

     Of course you may change the colors to whatever you wish. I need to make a new one for the bathroom in the new house. *smiles*


Materials:

Plastic Canvas:

1 sheet of 7 count Plastic Canvas
* 3 or 4 Plastic Canvas Circles (4-inch)

* See note in instructions!

Yarn:

Ecru
Aqua
Pink


Stitches Used:

Reversed Tent Stitch
Overcast


Instructions:

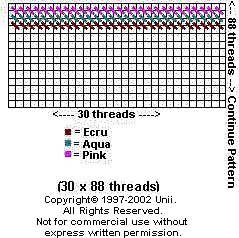
     Cut 1 piece of PC 30 x 88 threads (Piece A - Body).
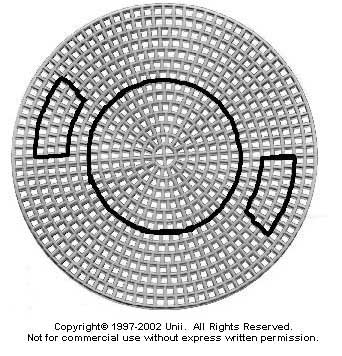
     Cut 2 pieces of PC circles as shown in pattern (Pieces B and C - Top).
     Keep 1 or 2 PC 4" circles complete (Pieces D and E - Bottom).

     * NOTE: If you wish for more stiffness, use two circles for the Top (B and C) and two for the Bottom (D and E). I recommend using at least two layers of the PC circles for the Top (B and C)! At least!

     * NOTE: You may also add more toothbrush holes if you wish on the outer sides of the Top (B and C).

     First, cut out the pieces as stated above. It is best to use an Exacto knife for doing the 4 inch circles. Basically, it's rather difficult to cut out the circle with scissors unless you have a very small pair.

     Next, stitch the Body (A) as stated in the pattern below (Pink, Aqua, and Ecru rows), using the reversed tent stitch. The pattern just continues in a repeat. Leave the first and last thread undone! When finished stitching the Body (A) overcast stitch the first and last threads together with Ecru, making the Body (A) a complete circle.

     Continue by overcast stitching the Bottom (D and E) to the Body (A) with Aqua yarn. This will take some maneuvering, but you will be pleased with the results!

     Then, match up the Top (B and C) pieces, making sure the holes that you cut out align. When aligned, overcast stitch the holes (center toothpaste hole in Ecru) (outer toothbrush holes in Pink) so that it holds the two pieces together.

     Finally, overcast the Top (B and C) to the Body (A) using Aqua yarn. Again, the difficulty in maneuvering is more intense here.


The Patterns:

Piece A
Body

Toothpaste and Toothbrush Holder Body Pattern


Pieces B and C
Top

Toothpaste and Toothbrush Holder Top Pattern

1