|
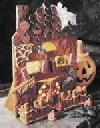
Gingerbread
|

|
|
|
|
Pumpkin Carving
Carving can be a fun family project. You can save time by using our patterns, or come up with your own.
Carve an entire family of jack-o-laterns, or make each one drastically different.
Download the free pattern for this project. (Downloading requires Adobe Acrobat software.)
Pumpkin Carving Pattern
Stencils
Prepare pumpkin. Use a marker to draw a 4- to 6-inch circle at the stem end of the pumpkin. Cut along the line with a sharp serrated knife. Remove the top and set aside. (For easiest carving, use a sawing motion.) Scoop out the soft pulp inside the pumpkin with a spoon or jar lid.
Trace patterns. Draw your design on the pumpkin using a marker. Or, tape a paper pattern to the pumpkin and use a ballpoint pen to poke small dots into pumpkin along the lines, then remove the pattern.
Carve pumpkin. Using a sharp, thin-bladed knife, cut out the eyes, mouth, and other features.
Light it up. To illuminate, set a votive candle inside a small ceramic or foil cup, place inside the pumpkin, and light with a long wooden match or long-necked lighter.
Tips: To make white teeth or eyes, cut only through the surface of the skin. Then use a knife to "peel" or cut back the orange layer. Make holes for ears and use pumpkin scraps with funny shapes to stick in those holes. You can use cookie cutters to pattern shapes on your pumpkin.
If a cookie cutter doesn't lie flat enough on the pumpkin, just draw around it.
You can have a bewitching scent if you cut grooves along the underside of your pumpkin's top, then wedge cinnamon sticks into the grooves. Poke cloves around the inside walls. Light your pumpkin and enjoy the scent!
 "Always Kiss The Cook" "Always Kiss The Cook"
|


