| LinkExchange Member | Free Home Pages at GeoCities |
Landscaping With Walls and Steps

Perhaps there is a path in your yard that is too steep or slippery to negotiate without steps, or an unstable slope that needs to be kept in place. You might also decide that a small wall or some steps will add just the desired effect to your garden. Steps and walls can thus become a vital part of your landscaping. It's important to plan wisely and construct them properly, for the results will have a longlasting visual and physical impact.
The Use Of Natural Walls
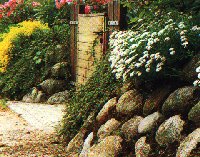
Erosion, though slow-moving, is one of the great forces of nature. It can move tons of earth over the course of time. Walls are useful in combating erosion, as they protect large amounts of earth from the effects of frost, wind, and water. They can also serve as attractive complements to a garden, holding an embankment or slope in beautiful tiers or serving as planters for flowers, vines, and even shade perennials.
There are several ways to build walls. A natural wall can be built out of stacked rocks with no more than clavey soil used as mortar. These walls are easy and inexpensive -- if built to a height lower that 40 inches. Above that height, you will need to pour a concrete foundation at least halt as deep as the height of the wall. A stone wall must be 1/3 as thick at the base as it is tall, though not thinner than a foot. Thus a 6-foot wall would be 2 feet thick at the base, and its concrete foundation 3 feet deep. Remember that such a wall will have to contain tons of earth safely over time.

A natural wall should be pitched into the load it restrains, the minimum angle being 1 inch of declination for every 6 inches of height. Thus a 36-inch-high wall would lean uphill 6 inches from a perfectly vertical line. Many gardeners take advantage of the sloping surface to plant an array of vines and perennials in the cracks during construction (it will prove impossible to do so later) to create a living wall.
The lowest row of rocks is best set into the foundation using cement mortar. Forthe rest of the rocks in the wall, clavey soil will do fine. Set each rock permanently into place be tapping it lightly but smartly with a mason's hammer or a hard rubber mallet.
When constructing the wall, the most important thing is to make sure the rocks are staggered. Rather than placing rock above rock, bridge new rocks across the saddles between the rocks below. Take your time in selecting the rocks for placement. If the seams between rocks are too large, the wall will break at that point. Place the most massive rocks at corners, maintaining the same offset pattern. The entire wall should fit together like a giant jigsaw puzzle.

The best rocks to use are usually shale or slate. Though these types of flat, then rocks interlock nicely, round rocks can be made to fit together just as well, but create a somewhat thicker wall and require more conscientious mortaring. If there are no locally available rocks, you may be able to obtain broken concrete from a demolished building. Once covered with plants, the resulting wall can appear colorful and even natural-looking.
The Use Of Wooden Walls
Wooden walls are a less expensive option than stone. Pressure-impregnated wood is good for building small walls, but lacks the weight and strength to withstand the forces that a stone wall can.
If you prefer a rustic look, railroad ties or bridge timbers are the way to go. Soaked with creosote, they readily withstand the effects of weathering. Good bridge timbers can last a century of more, with time and weather merely enhancing the rugged look of the wood.
Timbers should be stacked in a shallow trench half a foot or more deep. Ties that are buried and meet perpendicularly with the stack are called "deadmen." Wall timbers should be spiked or rebarred to the tips of deadmen, which are placed 1 every 10 feet. To anchor a stack, drill a hole in each of the timbers and thread rebar (as is used in reinforcing concrete) through all the timbers, driving generous lengths of rebar into the ground. Stagger timbers when placing them atop one another as you would bricks.
Another, sturdier method is to place timbers vertically in the ground, securing them in a concrete foundation - much as you would a fencepost - and burying them 1/3 or more of their length, before stacking wall timbers horizontally behind thise timbers. Each horizontal post should touch two vertical posts in such a way as to keep the horizontal posts from pivoting out of place.
Such a wall will possess tremendous strength, although its monumental scale may require softening or even concealment by landscaping, thur forfeiting some of the beauty of the materials that compose it. However, overgrown with ivy or iceplant, it makes a durable and attractive barrier between yard and street.
One important thing to remember when planning your wall is future needs. Walls make excellent places to install protected electrical outlets, suspended lights, and remote faucets. However, make sure to provide for shutoff and drainage or other freeze protection for faucets. Plan for future electric and water lines before beginning construction.
Create Endurance With Brick and Concrete Walls
Where strength is essential, brick or concrete should be your choice. Poured concrete walls can withstand the greatest force, as Hoover Dam, for example, attests. Since a smooth wall is not visually arresting, concrete walls should be poured with rough aggregate, faced with stones, or textured. Failing such treatment, the surface can be disguised or concealed by plantings or landscaping.
Brick walls are perhaps the most attractive. Old bricks from razed buildings can be obtained inexpensively and are easy to work with. Bricks can be laid out in many patterns, complete with recesses and shelves. A brick wall still needs a concrete foundation, however. Unless you are experienced, you might want to consult a professional mason about the finer points of design and construction with brick.
Adding Steps To Your Design

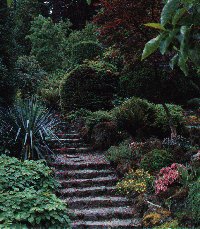
Steps can be as ornate as a crown of jewels, or a simple as flat stones wedged in the ground. A straight line may be the most direct route, but not necessarily the most appealing. Steps can be shallow or deep, but if there are more than 8, break them up with landings, which provide vantage points from which to enjoy your garden, and showcases for special areas. Not least, landings increase the safety of lengthy reaches of steps.
The main thing to keep in mind is that an average stride is about 2 feet. The general rule of thumb is the height of the step times 2 added to the depth of a step should equal 24 inches. Steps over 7 inches high are too steep to be safely climbed, and steps less than 4 1/2 inches tend to be stumbled over and should be replaced by a sloping path. Remember to build a non-slip surface into your steps if they are going to be used wet.
For safety and beauty, all steps should be illuminated by either low-voltage lights or grounded fixtures protected by ground fault interruption. Fixtures at knee height spread light effectively and can be built into adjacent structures, such as walls, or concealed in shrubbery or plantings. Take care to direct light into the risers and away from strollers' eyes. If using colored lights, avoid red and similar shades.

First determine the overall height and length of the steps, then calculate the dimensions (height and depth) of the individual steps - including landings, if any. If you've got 47 inches of height to be graded over a space of 13 feet, 3 inches, you could put in one landing 51 inches deep after 3 steps (each 6 inches high and 13 inches deep), then another 5 steps - or lay in 10 steps, each 4 3/4 by 15 5/8 inches, without a landing.
Natural-looking wooden stairways - made from cross sections of logs or railroad ties - are easy to create. Depending on the calculated height of the steps, lay out 2 or 3 cross sections horizontally, sink 2 stakes into the ground in front of them, and saw the stakes off so that they are even with the top edge of the steps. Fill in behind the logs with coarse rocks, followed by coarse gravel and then finer pebbles and stone chippings.
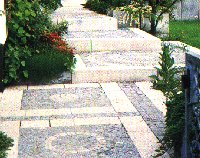
When building steps, secure them in such a way as to prevent them from coming loose. If they are in a wall, build them as part of the wall. If they are on a slope by themselves, anchor them firmly in the ground. Since wood wears quickly under heavy foot traffic, you may want to select stone steps for much-used stretches. Natural stone is an elegant but costly choice; good alternatives are concrete or exposed aggregate. Simple block steps or slabs for stepping surfaces are quite practical.
Below, you will find a site index along with other homesteading links
| View Guestbook | |||
Last Updated July 10, 1998


